Brand: Mitsubishi
Category: Projector
Document Type: Manual
Language: EN
Brand: Mitsubishi
Category: Projector
Document Type: Manual
Language: EN
Uploaded: Nov. 21, 2025, 9:16 p.m.
Consult your dealer for warranty information specific to your projector.
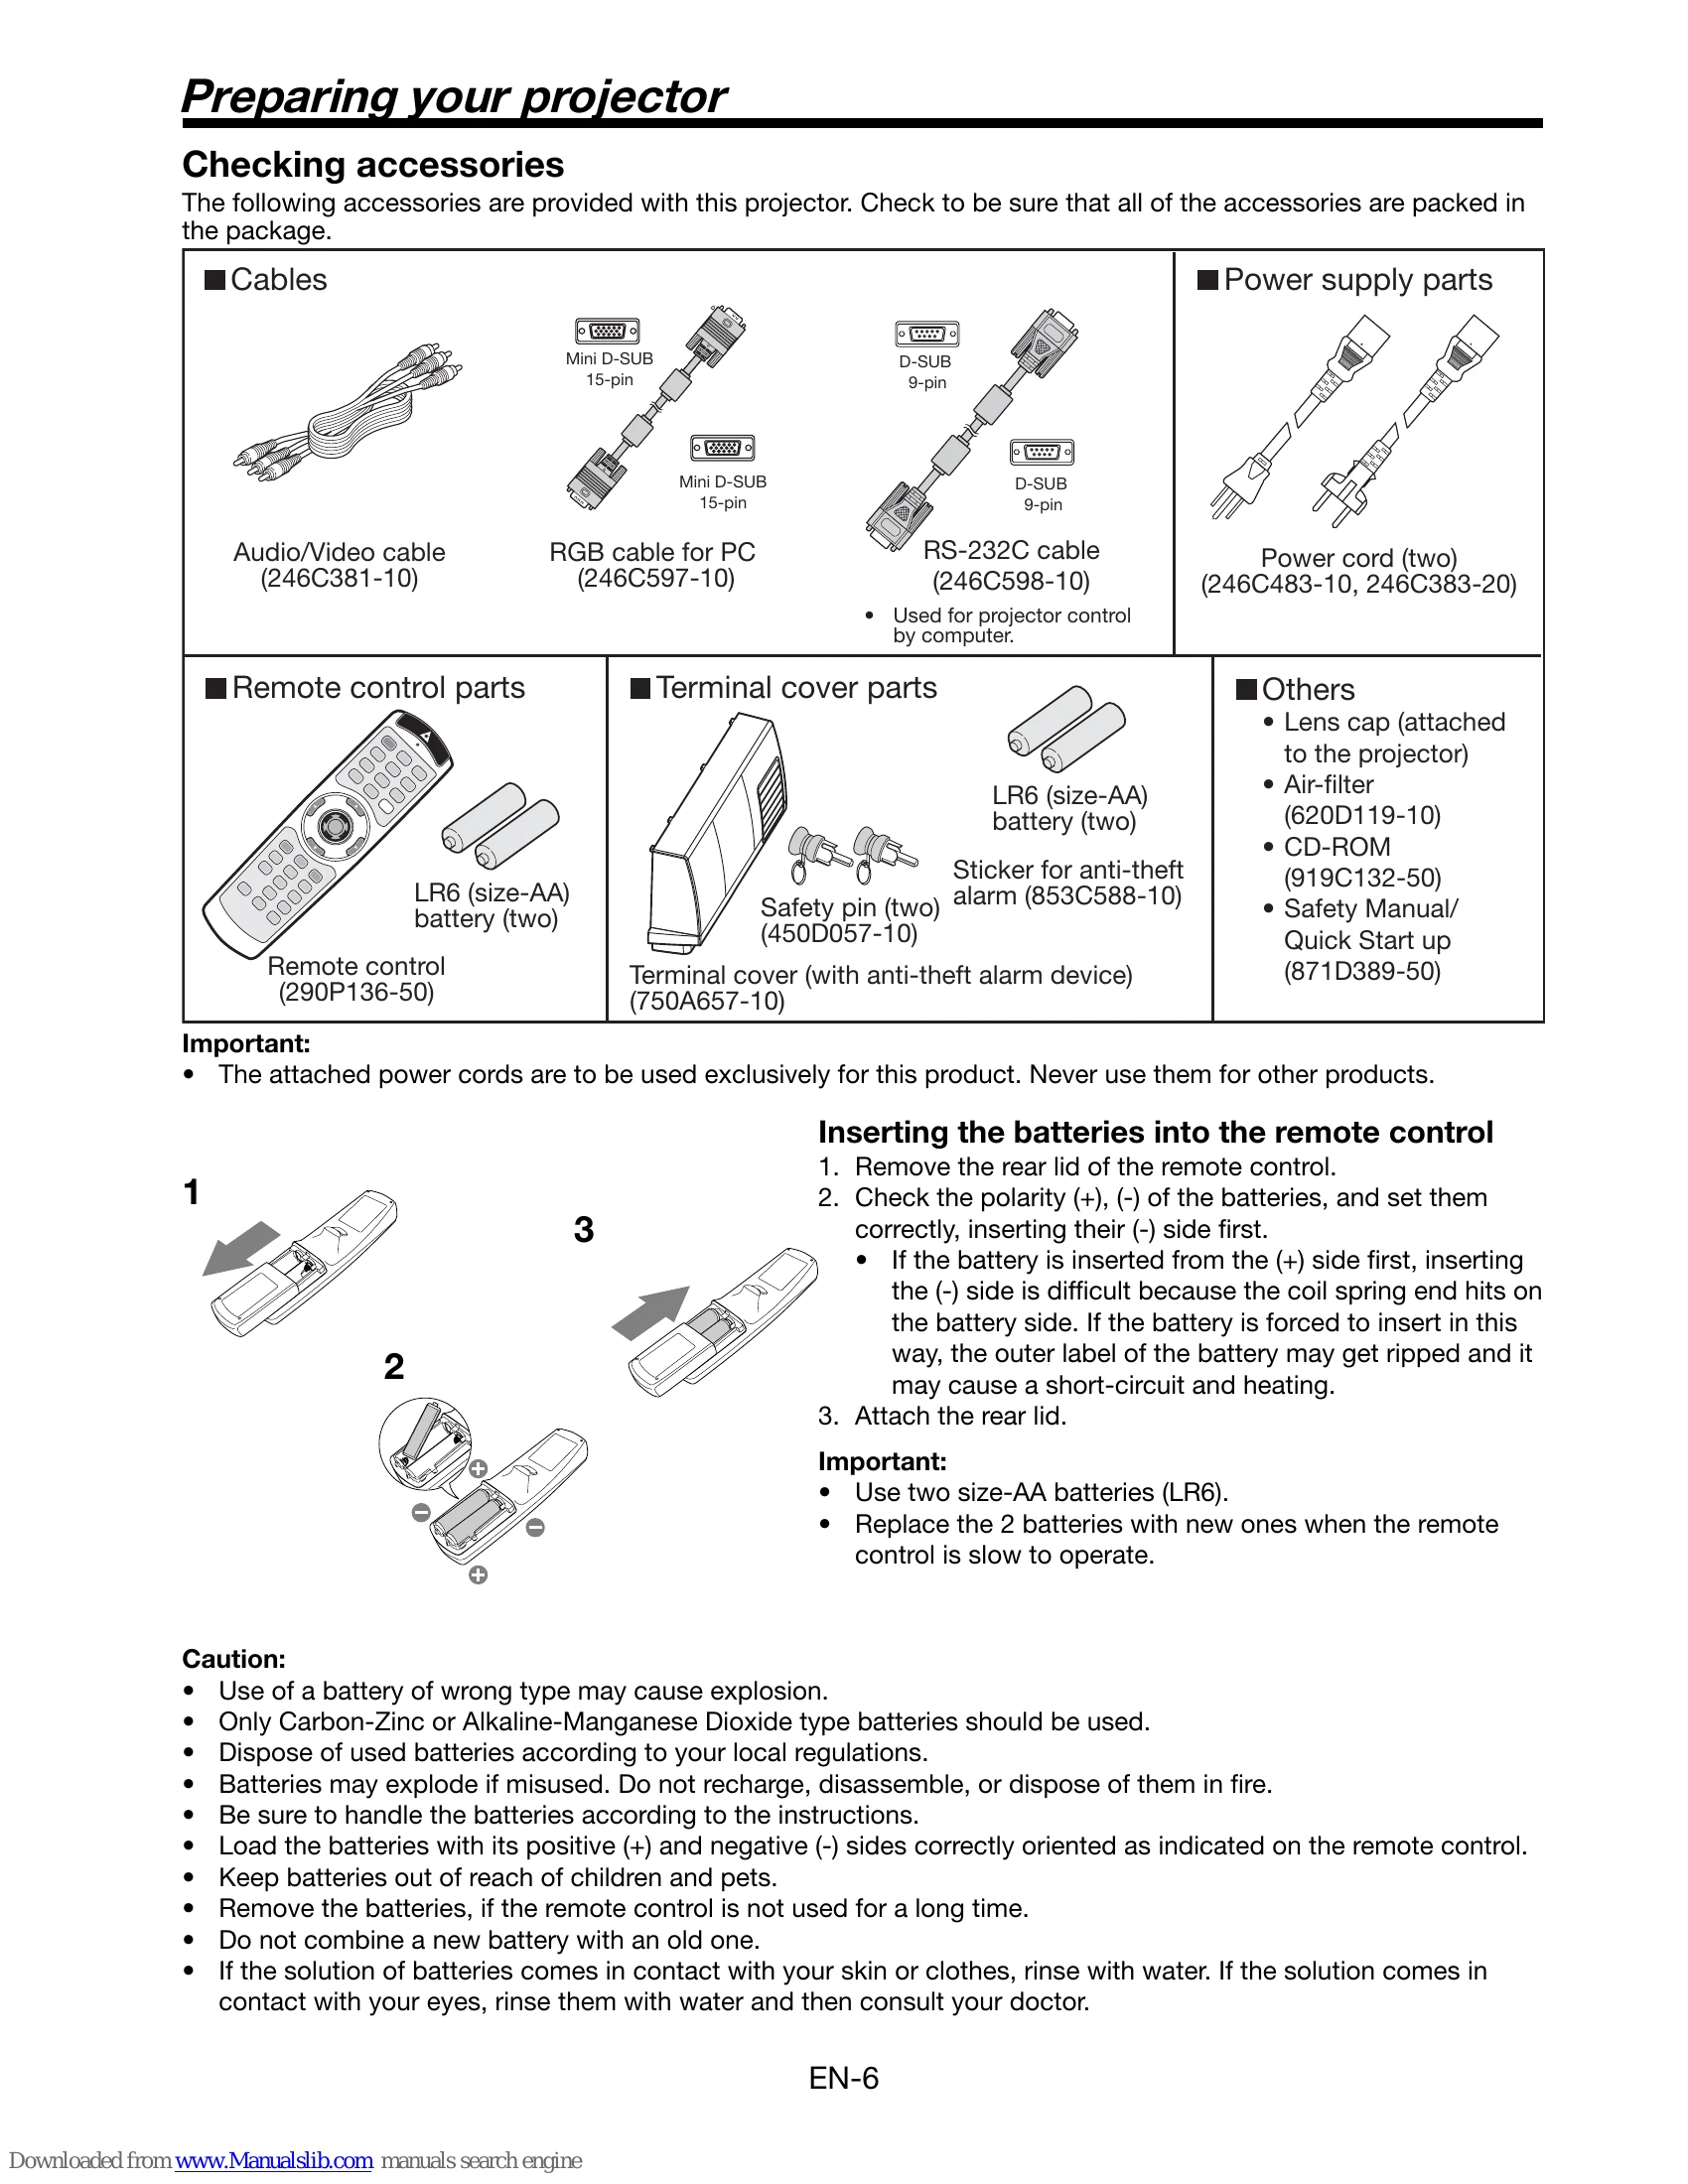
Checking Accessories: Ensure all listed accessories (cables, remote control parts, power supply parts, terminal cover parts, others) are included.
Inserting Batteries: Remove remote's rear lid, insert two AA batteries (LR6) correctly oriented (- side first), reattach lid. Replace when slow.
Projector Overview: Familiarize yourself with components like lens, control area, speaker, and terminals.
Control Area: Buttons include POWER, AUTO POSITION, COMPUTER, VOLUME, MENU, ZOOM/FOCUS, LENS SHIFT.
Terminal Board: Various input/output terminals are available for computer, video, audio, LAN, and serial connections.
Remote Control: Operates wirelessly within 10m. Wired connection is also possible.
Setting Up: Install screen perpendicularly. Adjust projector to match screen center. Avoid direct sunlight.
Projection Distance: Refer to tables for screen size and projection distance.
Lens Shift: Use LENS SHIFT button to adjust image position vertically and horizontally.
Keystone Adjustment: Correct trapezoidal distortion using KEYSTONE button if projector and screen aren't perpendicular.
Connecting to Computer: Connect via RGB, DVI, or BNC cables. Select correct input source.
Plugging Power Cord: Use the provided grounding type plug and connect firmly.
Projecting Images: Turn on main power, then projector, then computer. Adjust focus, zoom, and position. Select input source.
Stopping Projection: Press POWER button twice. Wait for cooling fans to stop before turning off main power switch or unplugging.
AV Mute: Mutes video and audio signals temporarily.
Auto Position: Automatically optimizes image position for input signal.
Viewing Video Images: Connect via composite, S-video, BNC, or component/DVI-HDMI.
Setting Aspect Ratio: Adjust aspect ratio (AUTO, 16:9, REAL, FULL) via ASPECT button or menu.
Menu Operation: Navigate through IMAGE, INSTALLATION, FEATURE, SIGNAL, and INFORMATION menus to adjust settings.
Replacing Lamp: Turn off, unplug, wait for cooling. Replace with specified lamp (VLT-XL6600LP). Reset lamp operation time.
Maintenance: Clean air filter monthly. Clean projector body and lens with appropriate materials.
| Problem | Solution |
|---|---|
| Power can not be turned on. | • Check power cord connection. Turn on main power switch. Remove obstructions from grilles. Press POWER button. |
| No image appears on the screen. | • Cancel AV mute. Check lens cap. Lamp may take time to light up. If projector was recently turned off, wait for fan to stop. Set SCART INPUT to OFF. Check intake vent. Ensure lamp cover and filter cover are closed. Check external cables. Use supplied cable for check. Use RGB signal amplifier if extension cable is used. |
| Power turns off. | • Intake/exhaust vents may be blocked. Remove objects. Wait for fans to stop. Turn off main power. Wait 10 min. Turn on main power. Press POWER. Lamp may need replacement if STATUS indicator is steady red. Check AUTO POWER OFF setting. Lamp may have deteriorated. |
| The screen for entering the password appears. | • Password function is enabled. Enter password or contact administrator. |
| "NO SIGNAL" is displayed. | • Turn on connected device. Check signals from external device. Check cable for defects. Ensure correct terminals are used. Select correct input source. Use supplied cable instead of extension cord. |
| Projected images are shaking. | • Check cable connection. Connect plug firmly. Press AUTO POSITION button. Adjust SIGNAL menu if computer output is out-of-spec. Ensure projector and screen are perpendicular. |
| Projected images are displaced. | • Adjust projector and screen to be perpendicular. |
| Projected images are distorted. | • Adjust projector and screen to be perpendicular. |
| Projected images are dark. | • Adjust BRIGHTNESS and CONTRAST. Replace lamp. |
| Projected images are blurred. | • Adjust focus. |
| Afterimages persist on the screen. | • Keep projecting a bright image. Avoid displaying static images for long periods. |
| Red, blue, and green dots appear in projected images. Black dots appear in projected images. | • These are normal LCD characteristics. |
| Fine streaks are seen on projected images. | • Screen surface interference. Replace screen or adjust focus. Enable LPF if necessary. |
| Projected images become wavy. | • Connect plugs securely. Keep projector away from devices emitting radio waves. Adjust keystone to be minimal. |
| Hue is not appropriate. Tint in projected images is incorrect. Different color tint. | • Check external cables. Set COMPUTER INPUT correctly. Compare with other projectors or displays; variations may occur due to optical components or color reproducibility. |
| Only the motion areas in the images supplied from the computer aren't displayed. | • Caused by the computer. Contact computer manufacturer. |
| Projected images are obscured. | • Match computer output resolution to projector resolution. Avoid keystone adjustment if it causes obscuring. Connect to COMPUTER/COMPONENT VIDEO IN 2 terminal and reboot. Set refresh rate to 60Hz. Decrease resolution if signal is unsupported. |
| Image cannot be displayed correctly even when the computer's resolution is set to 1920 x 1080. | • Connect to COMPUTER/COMPONENT VIDEO IN 2 terminal and reboot. Set refresh rate to 60Hz. Decrease resolution if signal is unsupported. |
| Noise appears around the image. | • Decrease OVER SCAN setting. |
| The exhaust vents emit warm air. | • Normal after cooling. |
| No audio is output. | • Check volume. Turn off and on the projector to resolve microcomputer issues. |
| "TEMPERATURE!!" is displayed. | • Ambient temperature is high. Remove causes of heat. Ensure grilles are not blocked. |
| The ☐ mark appears. | • Ineffective operation. |
| The remote control doesn't function easily or at all. | • Check batteries. Ensure remote sensor is not exposed to direct sunlight or fluorescent light. Use within operation range. Keep 10cm away from projector. |
| The buttons on the control panel (except for the POWER button) don't function. | • Menu access password lock enabled. Cancel or contact administrator. |
| Alarm sounds. | • Temporarily halt anti-theft alarm device by inserting safety pin. |
| The projector does not turn on. The STATUS indicator blinks. | • Fit lamp cover securely. Reset lamp operating time. |