Brand: OLYMPUS
Category: Digital Camera
Document Type:
Language: EN
Brand: OLYMPUS
Category: Digital Camera
Document Type:
Language: EN
Uploaded: Aug. 9, 2025, 11:45 p.m.
No warranty period is specified in the provided manual excerpt.
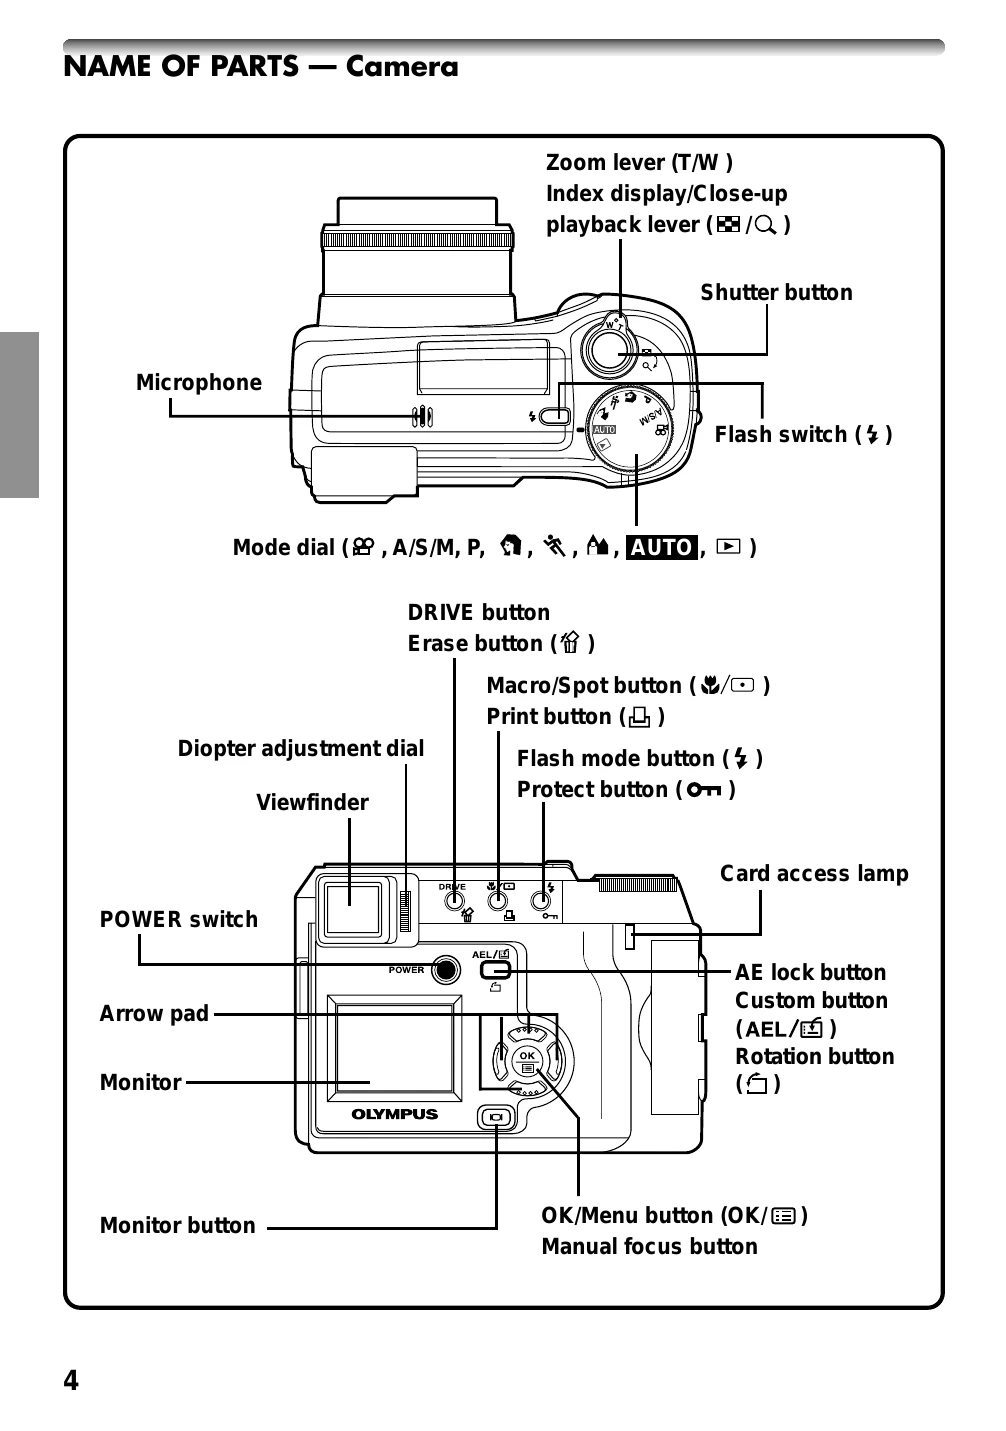
The instructions in this manual use a series of numbers for each operating procedure and button/dial illustration. Operate the camera in the order of these numbers.
Means "Press this button".
If a button turns black, this means you should press it as part of the step.
Load the batteries as shown below. Make sure the camera is off.
Be sure to use a 3V (3.3 V) card. Non-Olympus 3 V (3.3 V) cards must be formatted with the camera. Do not use a 5 V card or a 2 MB card.
Press the tabs on the lens cap to remove it.
Press the Power switch to turn on the camera.
Turn the diopter adjustment dial to see the AF target mark clearly.
Follow the numbered steps to set the date and time, including the date format.
Set the Mode dial, press the POWER switch, point the camera, press the Shutter button halfway, then press it fully.
Press the flash switch, press the Shutter button halfway, then press it all the way.
Press the monitor button twice quickly to switch to playback mode. Use the Arrow pad to display desired pictures.
Set the Mode dial, point the camera, press the Shutter button halfway, then press it fully to start recording.
Switch to playback mode, select a picture, press to display Menu, select MOVIE PLAY, then press to select MOVIE PLAYBACK.
Set the Mode dial, select the picture to erase, press YES, then press to erase.
Set the Mode dial, display Menu, select ALL ERASE, select YES, then press.
Set the Mode dial, select the picture to protect, then press the protect button.
| Messages | Error Content | Remedy |
|---|---|---|
| The card is not inserted or cannot be recognized. | Insert a card. Or insert a different card. | |
| The card is full. You cannot take more pictures with this card. | Replace the card or delete unneeded pictures. | |
| Write-protection. | If you are taking pictures, remove the write-protection adhesive seal. | |
| Card error. You cannot record, reproduce, or delete pictures stored on this card. | If the card is dirty, clean it with a cleaning paper and reinsert it. If it does not work, you can opt to format the card again (all information stored on it will be lost). If the card continues to be unresponsive, you should use a new one. | |
| Image error. The recorded image cannot be reproduced with this camera. | Use the image processing software on your computer to download the image. If the image still does not open, it may be partially damaged. | |
| The card is not formatted. | Format the card. | |
| No image recorded on the card, so the image cannot be reproduced. | Insert a card containing images. | |
| No free space on the card, so no new information, such as print or sound data, can be recorded. | Replace the card or delete unwanted images. | |
| The battery is depleted. The camera interrupts its operation. | Install new or freshly charged batteries. |