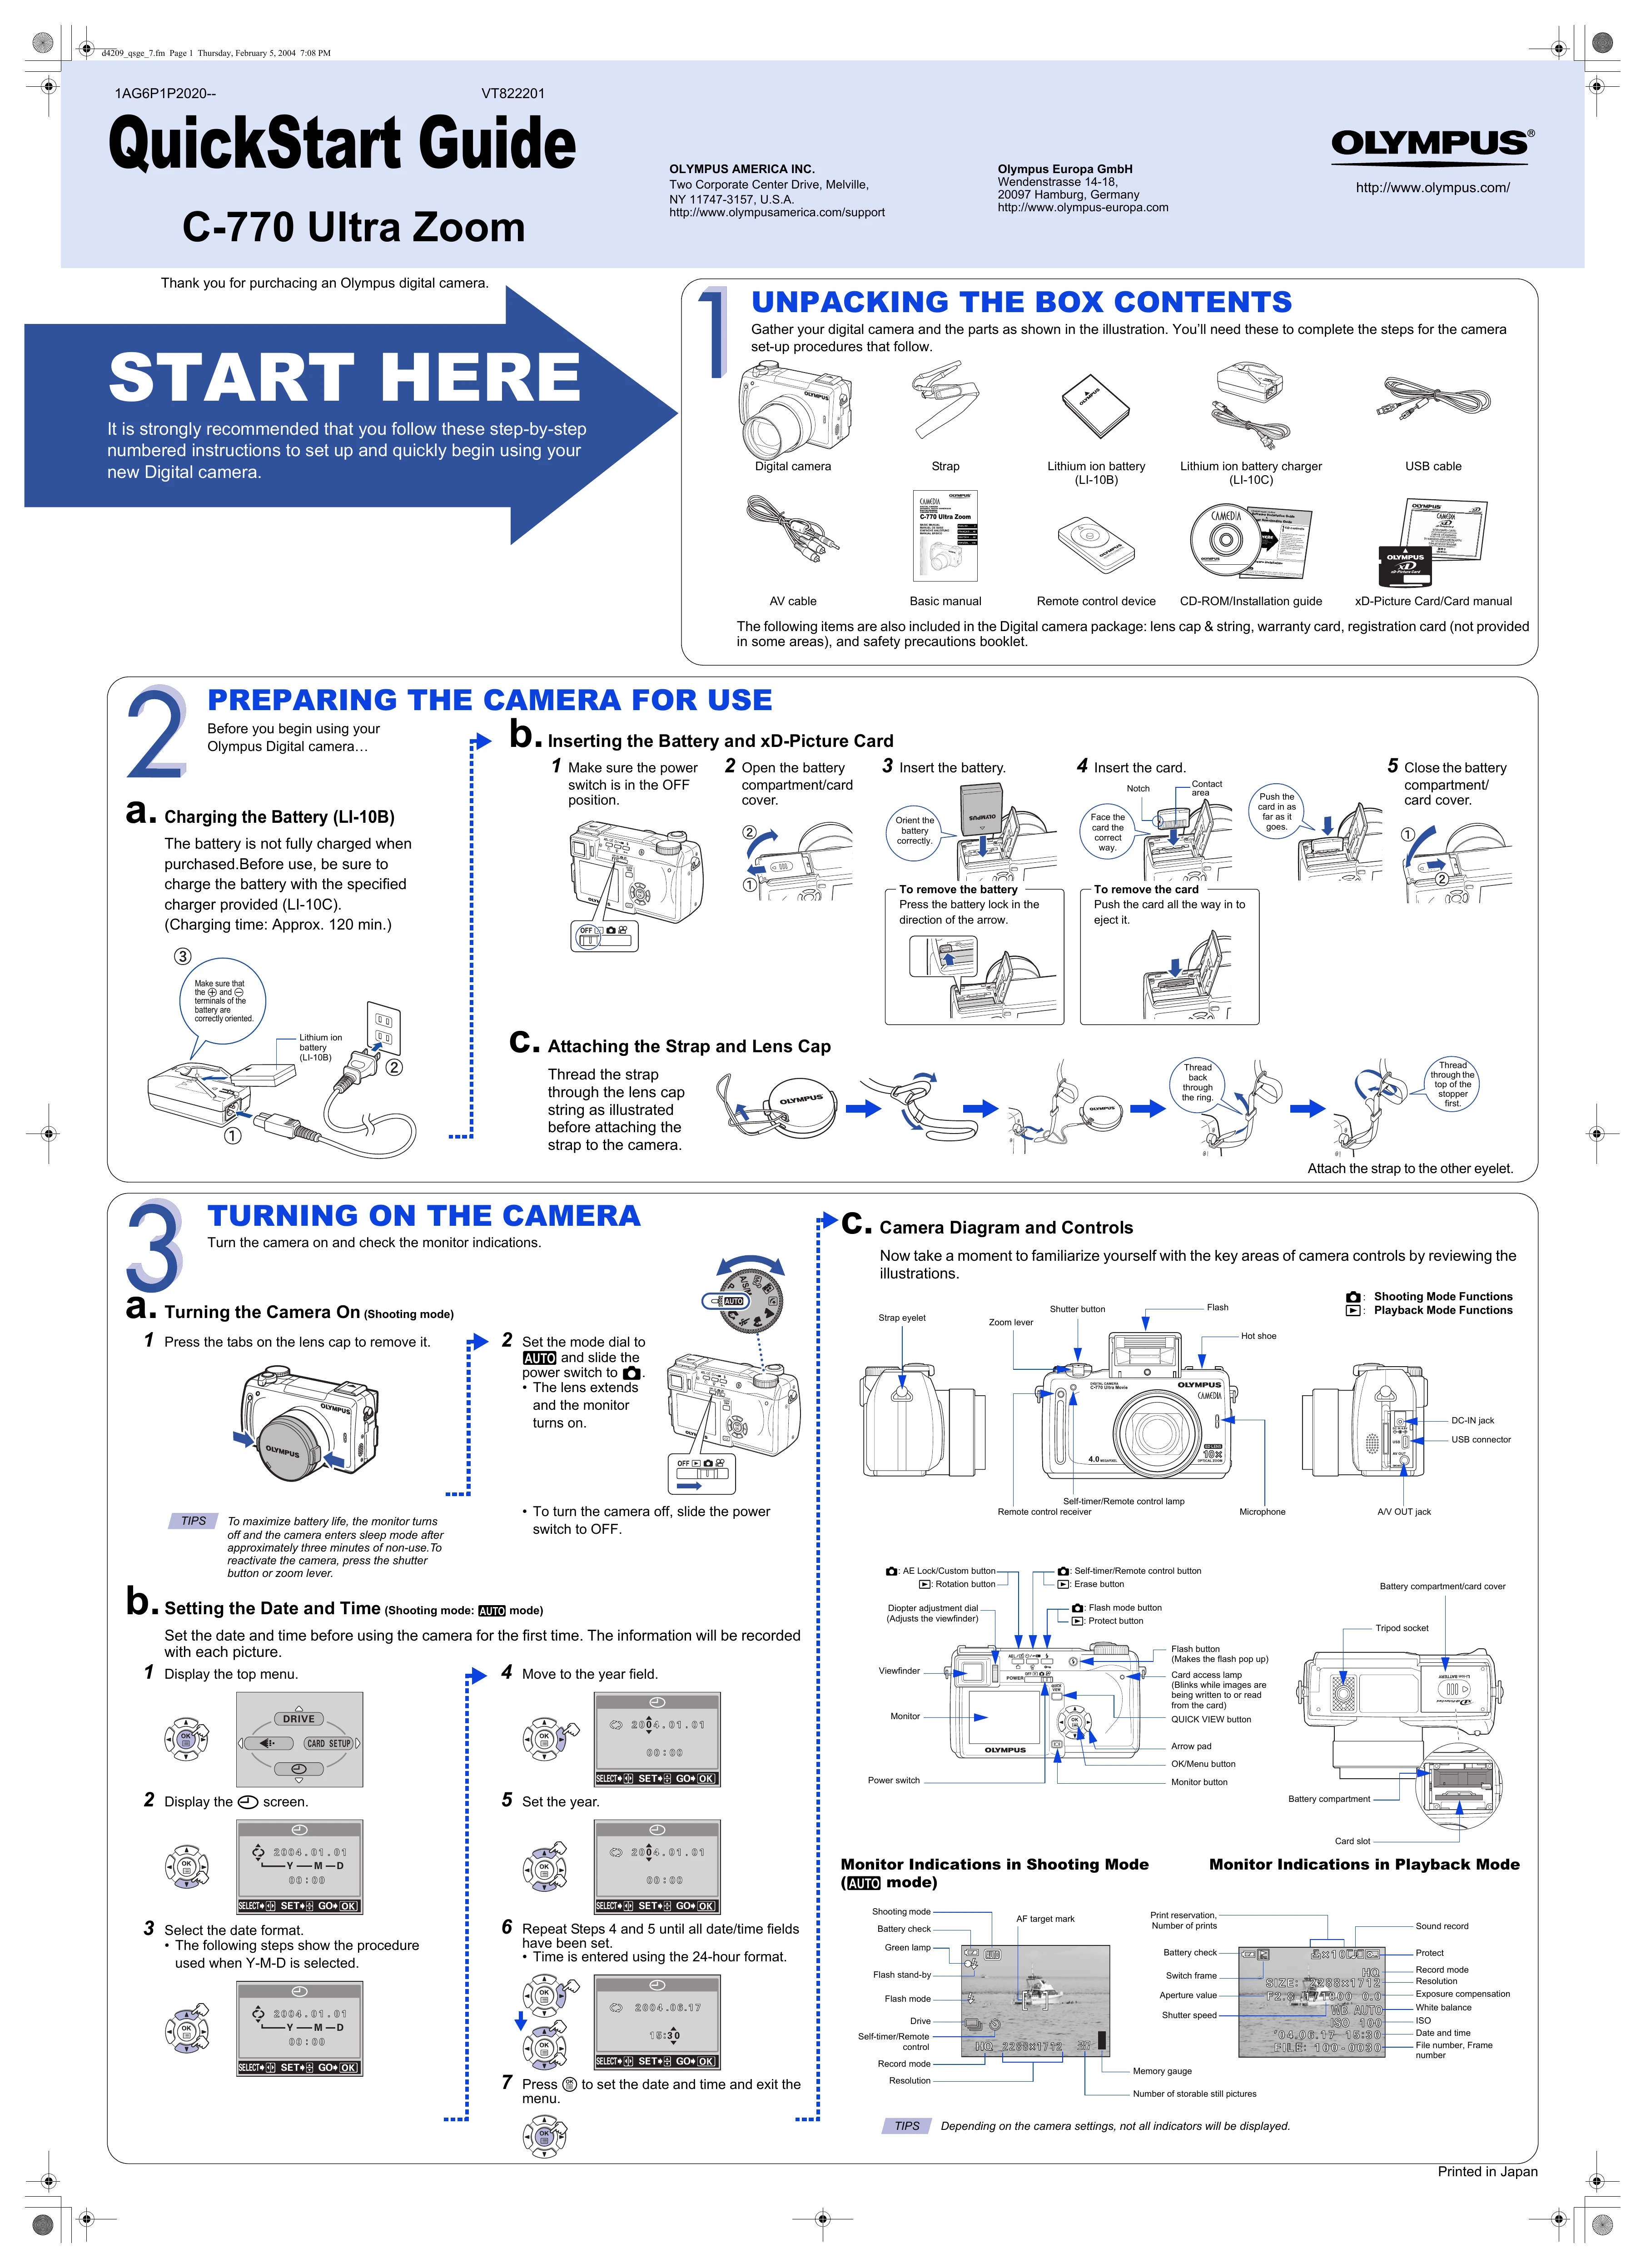
UNPACKING THE BOX CONTENTS
Gather your digital camera and the parts as shown in the illustration. You'll need these to complete the steps for the camera set-up procedures that follow.
START HERE
It is strongly recommended that you follow these step-by-step numbered instructions to set up and quickly begin using your new Digital camera.
PREPARING THE CAMERA FOR USE
a. Charging the Battery (LI-108): Charge the battery with the specified charger (LI-10C) before use. Charging time is approx. 120 min.
b. Inserting the Battery and xD-Picture Card: Ensure the power switch is OFF. Open the battery compartment/card cover. Insert the battery and xD-Picture Card correctly oriented. Close the cover.
c. Attaching the Strap and Lens Cap: Thread the strap through the lens cap string, then attach to the camera.
TURNING ON THE CAMERA
a. Turning the Camera On (Shooting mode): Remove lens cap. Set mode dial to AUTO and slide power switch to .
b. Setting the Date and Time: Display the top menu, select date format, set year, month, day, hour, and minute using the arrow pad and OK button. Press to set.
TAKING PICTURES
a. Taking a Picture: Compose using viewfinder or monitor. Press shutter button halfway to focus, then fully to take the picture.
b. Zooming: Use the zoom lever to zoom in (T) or out (W).
c. Flash Modes: Press flash button to pop up. Select flash mode (Auto, Red-eye Reduction, Fill-in, Slow Synch, Flash Off) by pressing repeatedly.
VIEWING AND ERASING PICTURES
a. Viewing Pictures: Press QUICK VIEW button to view the last picture. Use arrows to scroll. Press QUICK VIEW again to return to shooting mode.
b. Erasing Pictures: Single-frame erase (select picture, press , select YES) or All-Frame Erase (select CARD SETUP, ALL ERASE, select YES).
CONNECTING THE CAMERA TO A COMPUTER
Turn camera OFF. Plug USB cable into camera and computer. Turn camera ON, select PC. When recognized, a new icon appears on the desktop.
INSTALLING THE CAMERA SOFTWARE
Install software from the CAMEDIA Master CD-ROM for photo editing, printing, and more.
Additional Camera Features
Explore advanced features like Aperture Priority, Shutter Priority, Manual modes, Scene Program modes, Macro Mode, Sequential Shooting, Movie Recording, etc.