Brand: OLYMPUS
Category: Digital Camera
Document Type:
Language: EN
Brand: OLYMPUS
Category: Digital Camera
Document Type:
Language: EN
Uploaded: Aug. 9, 2025, 11:45 p.m.
Refer to the included warranty card for detailed warranty information specific to your region.
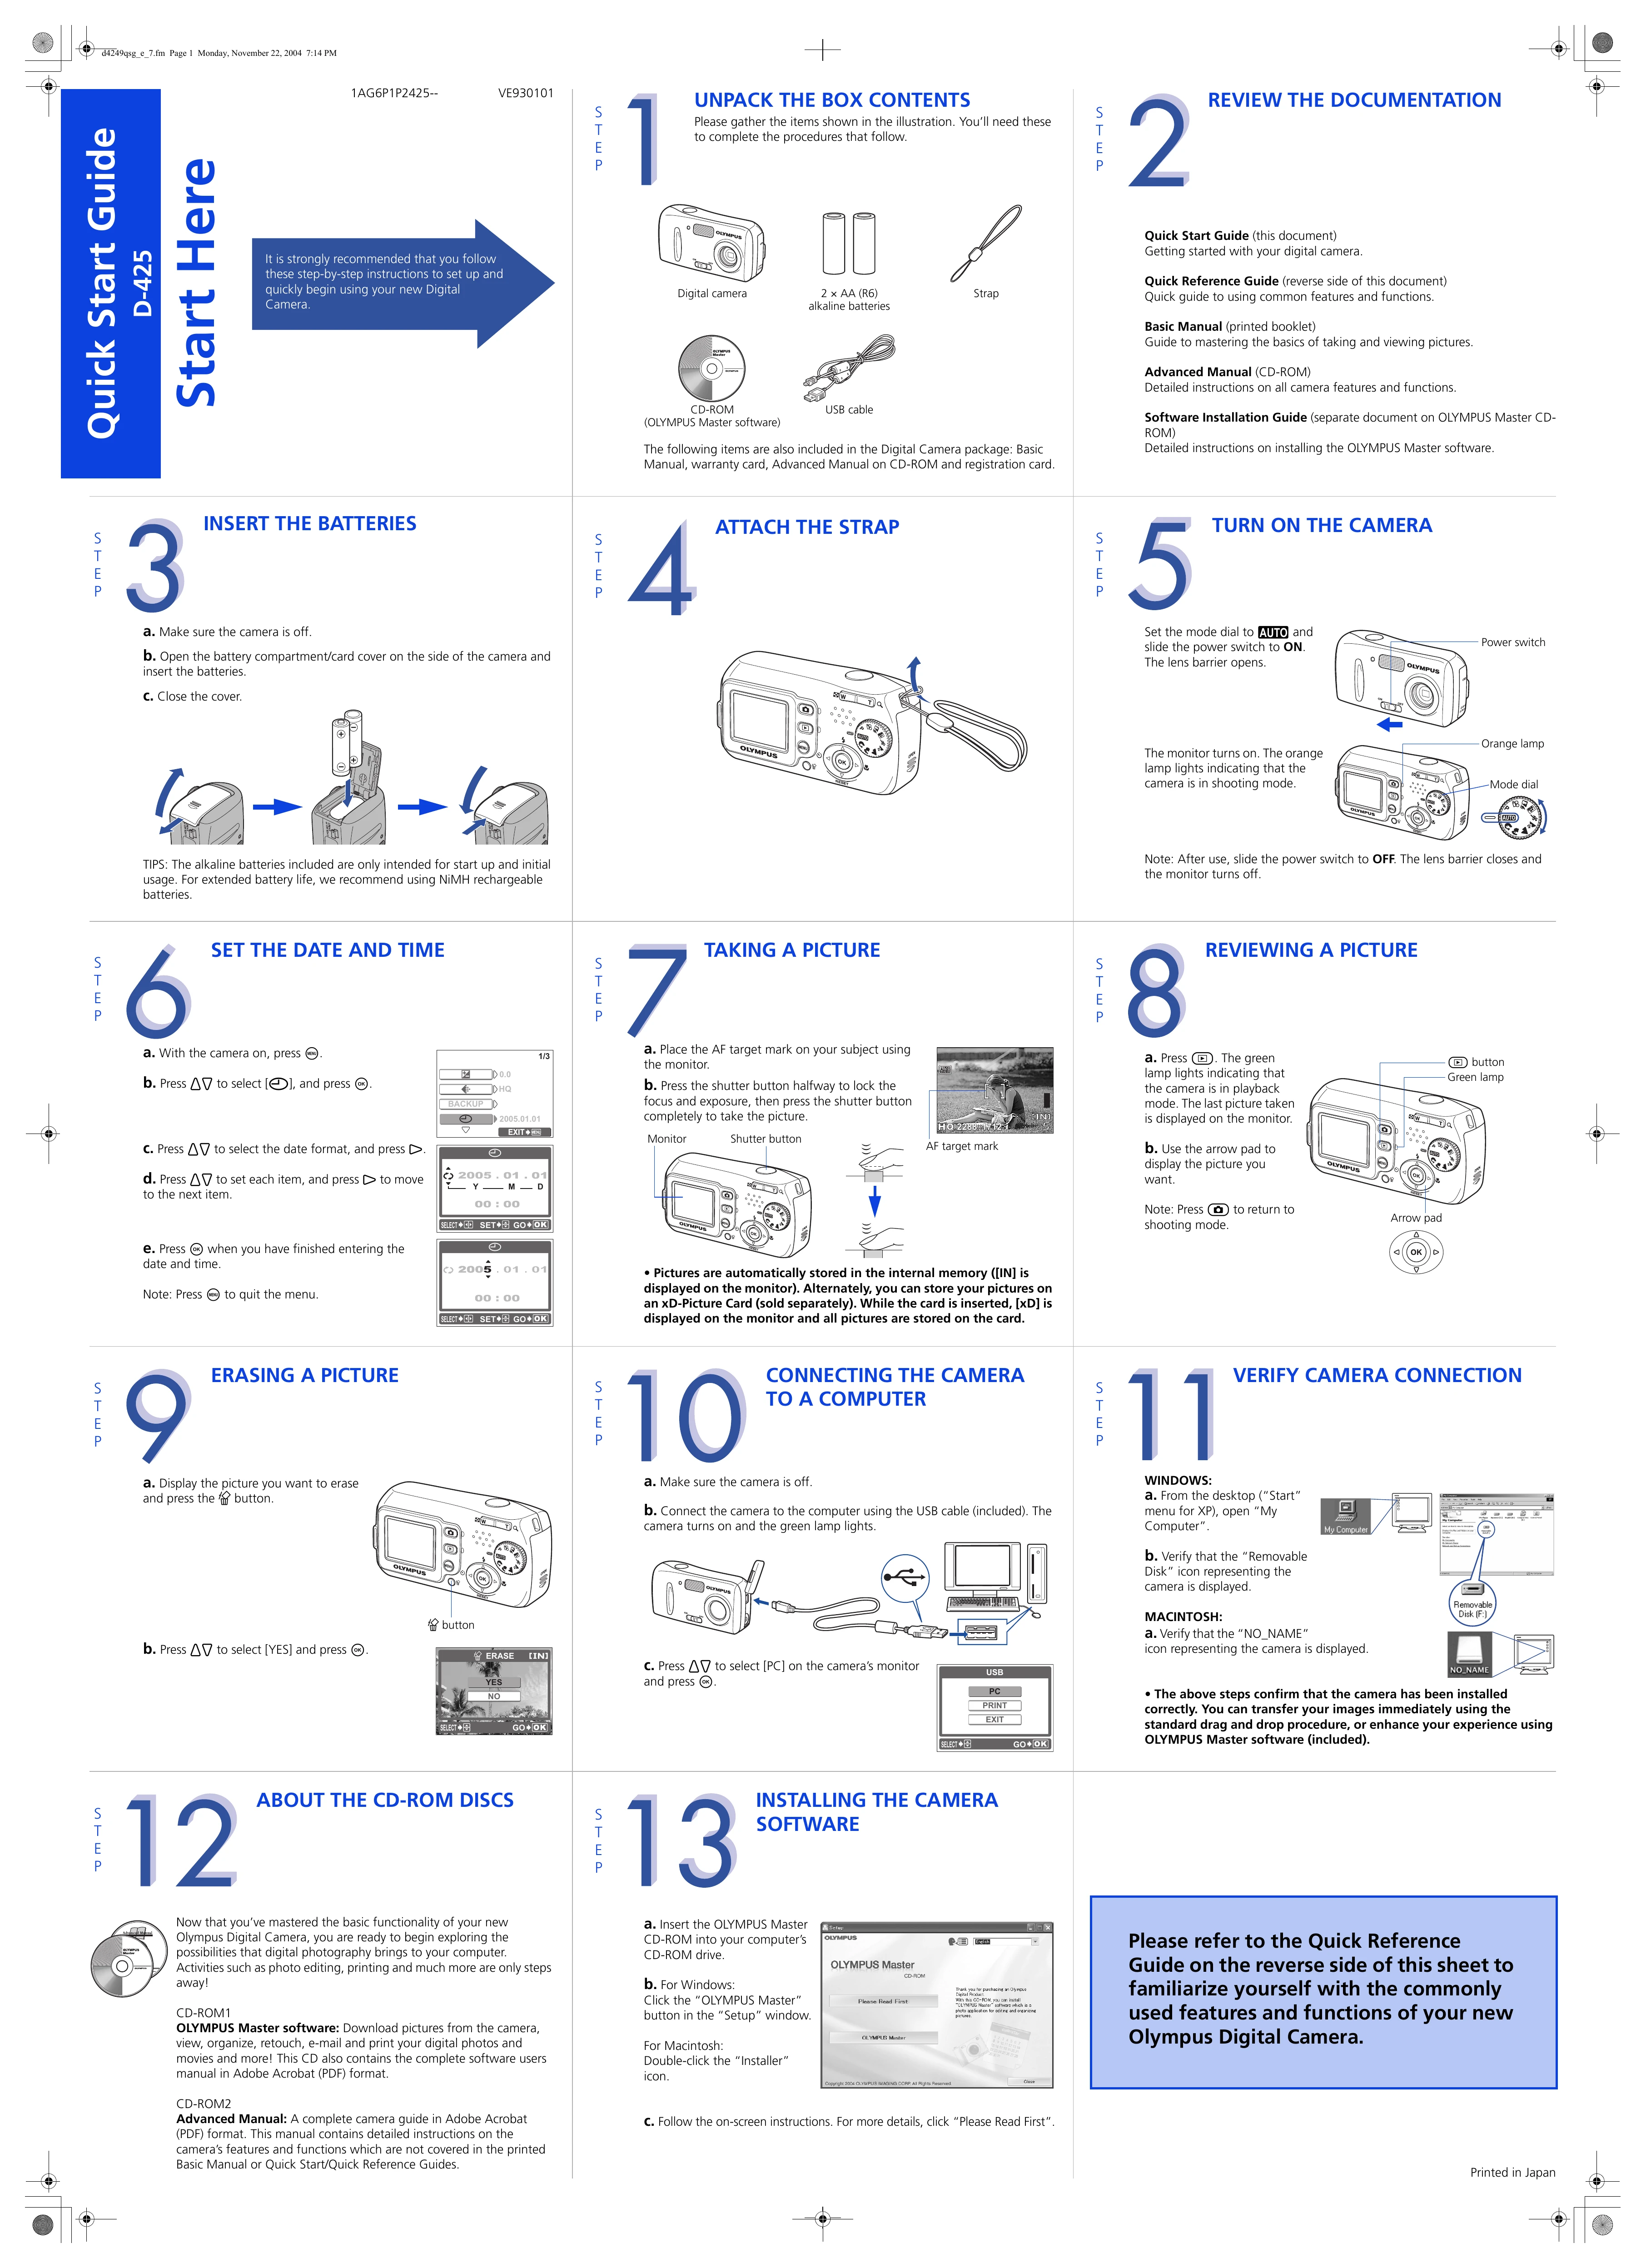
1. Unpack and Prepare: Gather all contents from the box, including the camera, batteries, strap, USB cable, and software CD-ROM. Insert AA batteries (NiMH recommended for extended use).
2. Insert Batteries & Strap: Ensure the camera is off. Open the battery compartment, insert batteries, and close the cover. Attach the strap.
3. Turn On Camera: Set the mode dial to AUTO and slide the power switch to ON. The lens barrier will open, and the monitor will display shooting mode.
4. Set Date and Time: With the camera on, access the menu to set the date, time, and preferred format.
5. Take a Picture: Position the AF target mark on your subject. Half-press the shutter button to lock focus and exposure, then fully press to capture the image.
6. Review Pictures: Press the playback button. Use the arrow pad to navigate through your stored images.
7. Erase a Picture: Display the picture you wish to delete and press the erase button.
8. Connect to Computer: Turn off the camera. Connect it to your computer using the USB cable. Turn the camera on and select PC mode. Follow on-screen instructions for software installation and image transfer.
9. Install Software: Insert the OLYMPUS Master CD-ROM into your computer and follow the installation prompts.
10. Print & Email: Use OLYMPUS Master software to print or email your photos.
| Column 1 Header | Column 2 Header | Column 3 Header | Column 4 Header |
|---|---|---|---|
| Row 1, Cell 1 | Row 1, Cell 2 | Row 1, Cell 3 | Row 1, Cell 4 |
| Row 2, Cell 1 | Row 2, Cell 2 | Row 2, Cell 3 | Row 2, Cell 4 |
| Row 3, Cell 1 | Row 3, Cell 2 | Row 3, Cell 3 | Row 3, Cell 4 |