Brand: Panasonic
Category: Video Camera
Document Type: Manual
Language: EN
Brand: Panasonic
Category: Video Camera
Document Type: Manual
Language: EN
Uploaded: Aug. 10, 2025, 12:41 a.m.
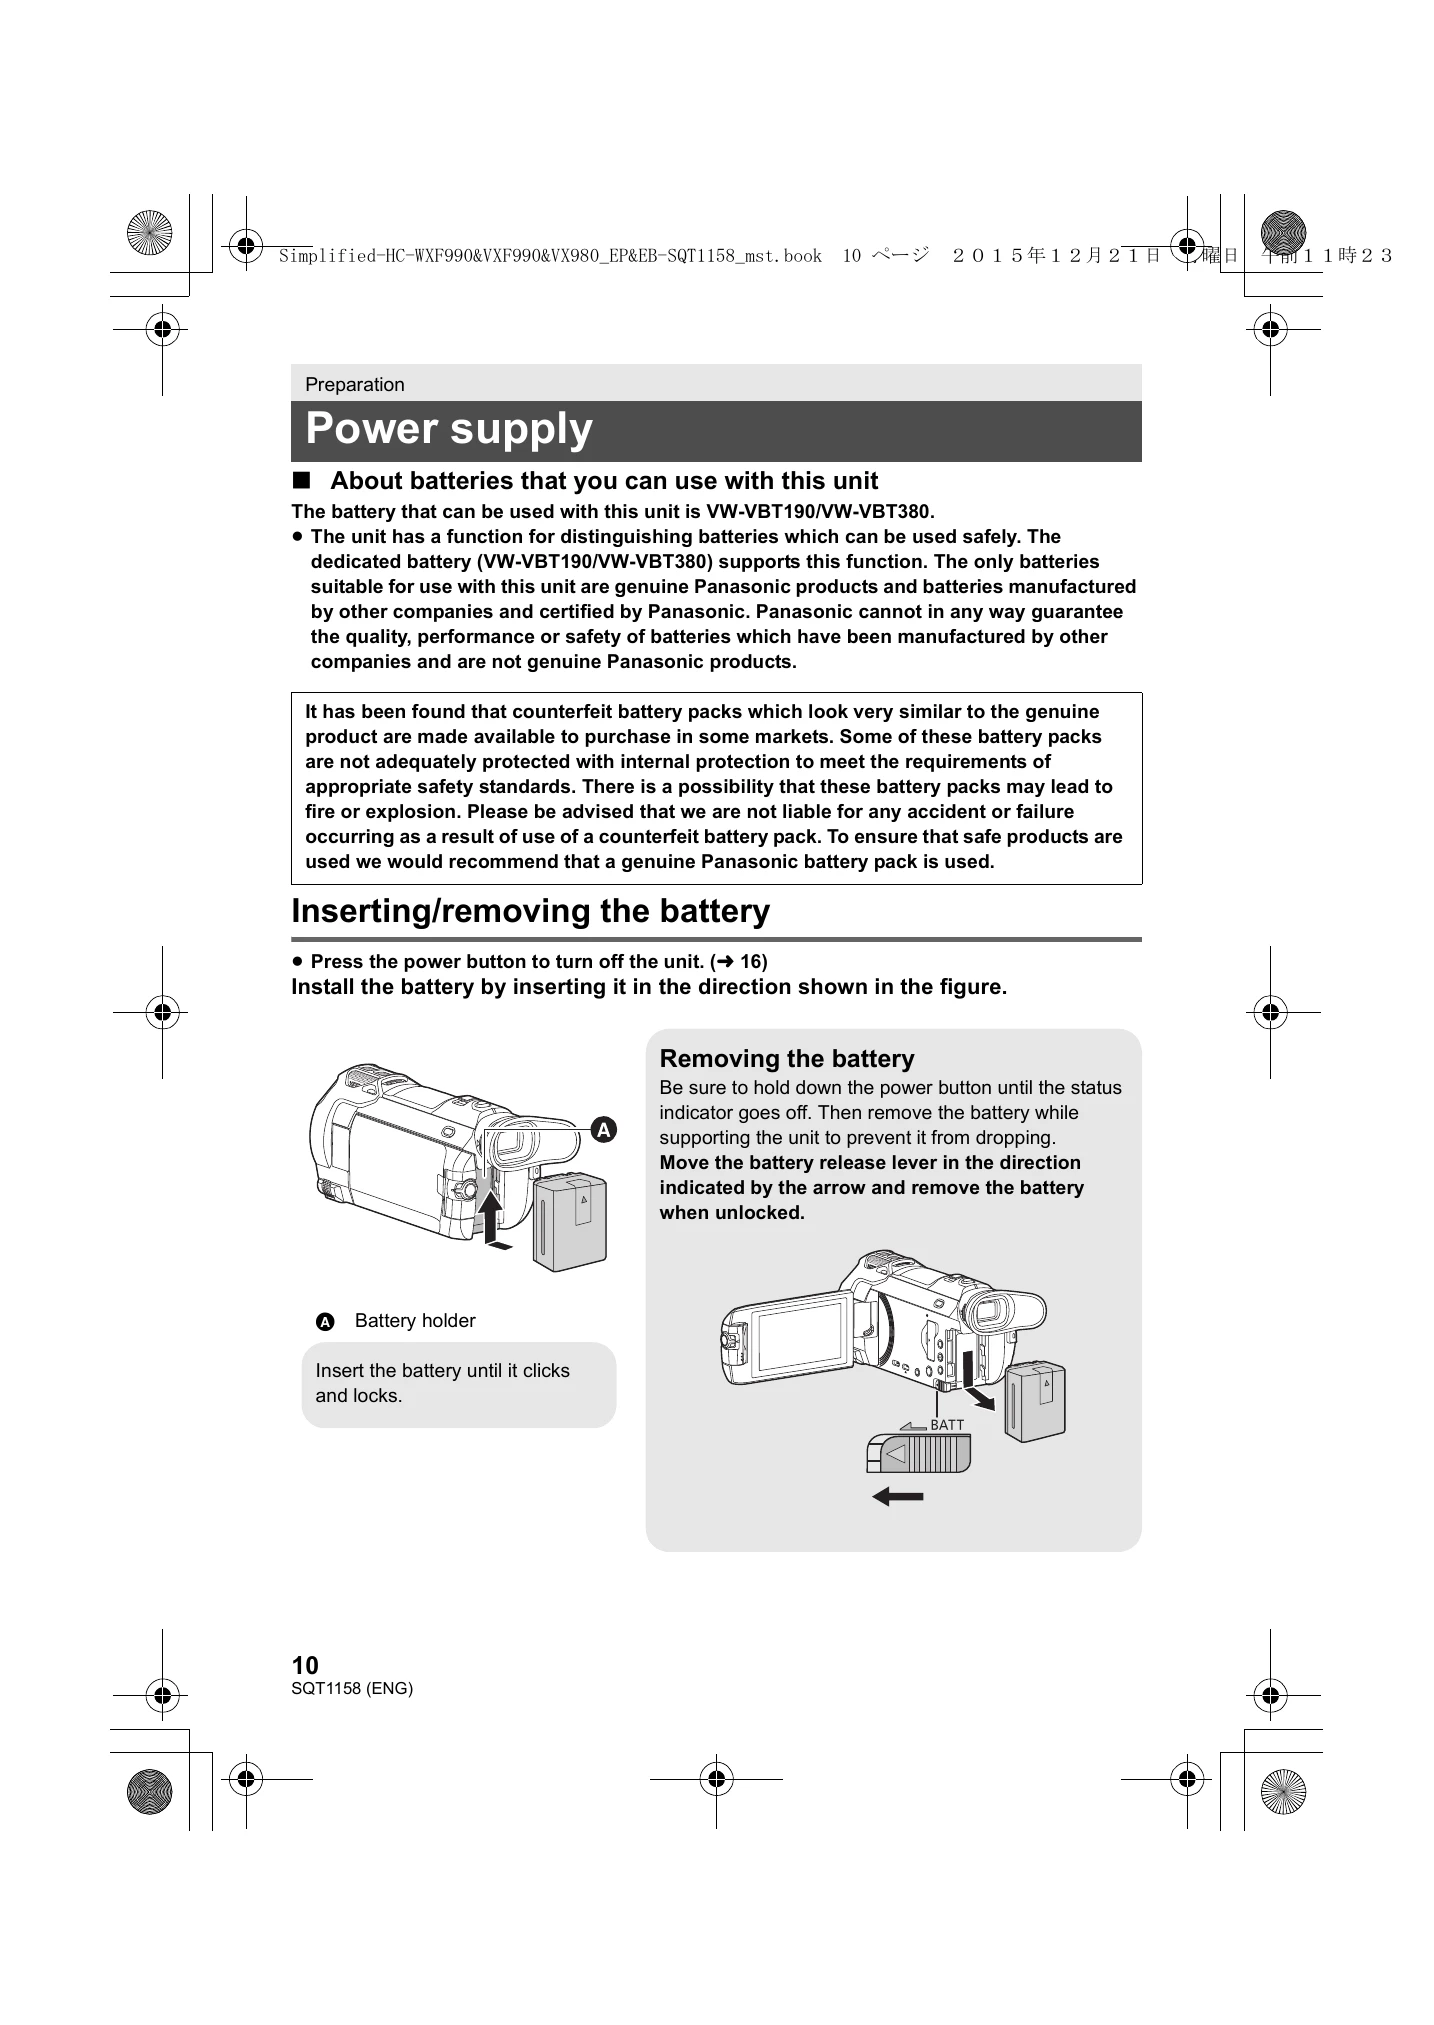
Charge the battery fully before first use. Insert battery until it clicks. Remove battery by pressing the power button and releasing the battery release lever.
Connect DC cable to AC adapter and unit, then plug AC adapter into an outlet. Status indicator flashes red during charging and turns off when complete. Battery can also be charged via USB.
Use SD, SDHC, or SDXC memory cards. Ensure card meets Speed Class ratings for recording motion pictures. Insert/remove SD card by opening the SD card cover and pressing/pulling the card.
Turn on by opening LCD monitor and pressing power button. Turn off by holding power button until status indicator goes off. Unit can also be turned on/off using viewfinder.
Switch between Recording and Playback modes using the recording/playback button. Within Recording Mode, switch between Motion Picture, 4K Photo, and Still Picture modes using the recording mode selector button or by touching the recording mode switching icon on the LCD.
Operate by touching the screen. Adjust viewfinder clarity with the diopter adjustment dial.
Access via MENU > SETUP > CLOCK SET. Touch date/time to set values using arrow keys, then press ENTER.
Access via MENU > SETUP > SET WORLD TIME. Touch, then use arrow keys to select region and press ENTER.
Set to Recording Mode, select MENU > MEDIA SELECT. Choose between SD CARD and Built-in Memory for VIDEO and PICTURE, then press ENTER.
Touch the Recording Mode button icon, then touch the desired mode (Intelligent Auto, Intelligent Auto Plus, Creative Control, HDR Movie, Scene Mode, Manual, Cinema Like Effect, FULL HD Slow Motion Video, 4K Photo, Stop Motion Animation Assist).
| It is not a malfunction in following cases | |
| A clicking sound is heard when the unit is shaken. | This is the sound of the lens moving and is not a defect. This sound will no longer be heard when the unit is turned on and set this unit to the Motion Picture Recording Mode or Still Picture Recording Mode. |
| Object seems to be warped. | Object seems to be warped slightly when the object moves across the image very fast, but this is because the unit is using MOS for the image sensor. This is not a malfunction. |
| The lens, the viewfinder or LCD monitor fog up. | This is due to condensation. It is not a malfunction. Please refer to page 5. |
| Power | |
| This unit cannot be turned on. |
|
| This unit does not stay on long enough. Battery runs down quickly. |
|
| This unit cannot be operated though it is turned on. |
|
| This unit does not operate normally. | The unit has automatically detected an error. Restart the unit by turning the unit off and on.
|