1. INTRODUCTION
This camera is designed for use with REO Observation Systems only. It combines a high sensitivity sensor with advanced digital signal processing, resulting in a high quality camera with excellent performance even under difficult circumstances.
2. STANDARD PACKAGE INCLUDED
- Screws x 3pcs
- Observation Camera x 1pc
- Dual twisted pair cable - 15 metres x 1pc
- Camera wall bracket x 1pc
- Manual x 1pc
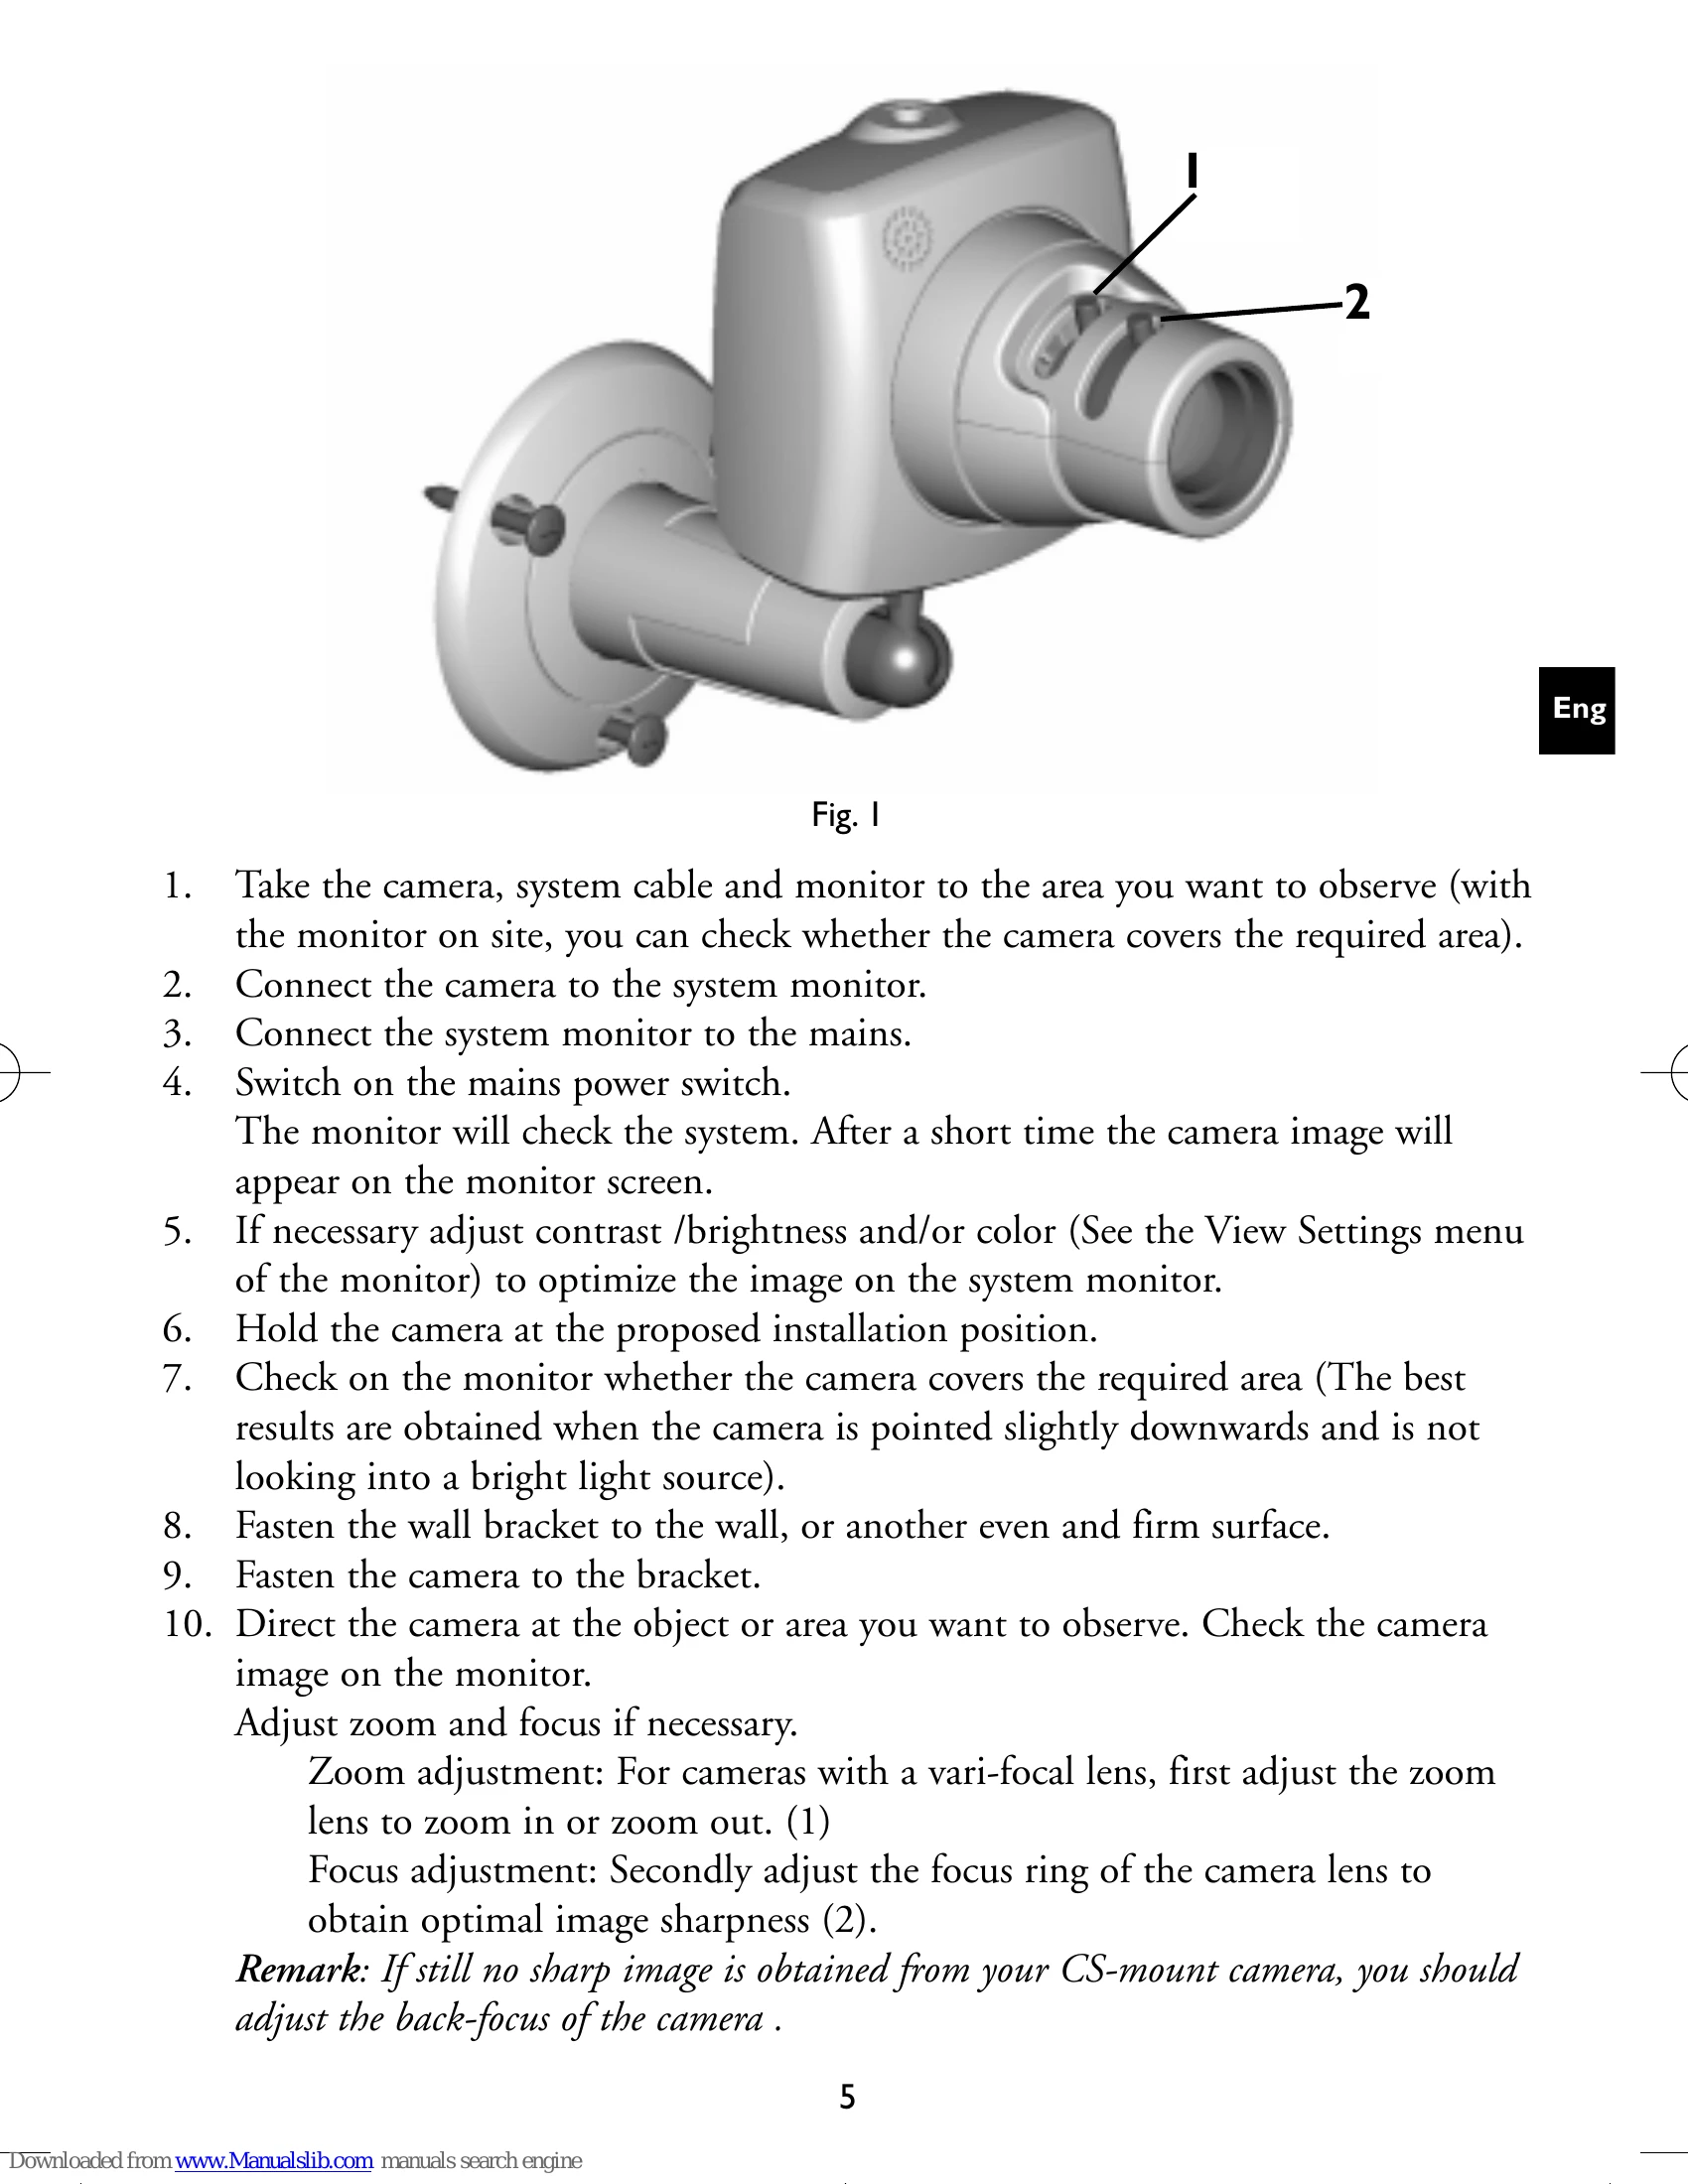
3. INSTALLATION (refer to Fig. 1)
1. Take the camera, system cable and monitor to the area you want to observe.
2. Connect the camera to the system monitor.
3. Connect the system monitor to the mains.
4. Switch on the mains power switch. The monitor will check the system. After a short time the camera image will appear on the monitor screen.
5. If necessary, adjust contrast/brightness and/or color.
6. Hold the camera at the proposed installation position.
7. Check on the monitor whether the camera covers the required area.
8. Fasten the wall bracket to the wall.
9. Fasten the camera to the bracket.
10. Direct the camera at the object or area you want to observe. Check the camera image on the monitor.
Adjust zoom and focus if necessary.
- Zoom adjustment: For cameras with a vari-focal lens, first adjust the zoom lens to zoom in or zoom out.
- Focus adjustment: Secondly adjust the focus ring of the camera lens to obtain optimal image sharpness.
Remark: If still no sharp image is obtained from your CS-mount camera, you should adjust the back-focus of the camera .
Camera sound on/off
Use the monitor On Screen Display Menu to enable or disable the built-in camera microphone.
Lenses
The camera is provided with either an integrated lens, integrated auto-iris vari-focal lens or CS-mount vari-focal lens.
Field of view
The figure below shows the field of view (= covered area) of the different lenses.
Outdoor use:
The camera switches to specific settings optimised for outdoor use when connecting an auto-iris lens.
Remark: For outdoors, use a protective camera housing has to be used to protect the camera from rain and snow.
System Cable:
For the interconnections between the system monitor and camera, a 15m/45ft system cable is supplied.
For an optimum picture and sound quality you should always use 4-wire dual twisted-pair cable when extending the connection. The maximum allowed cable length is 200m/600ft. Pay attention that the connectors are fixed to the cable corresponding to the figure.
Caution: The plugs used for the observation system have the same dimensions as standard telephone plugs. Never connect the camera or system monitor to a phone line.
4. TIPS FOR MAINTENANCE
Cleaning
You can clean the outside of the camera with a moist fluff-free cloth or shammy leather cloth.
When cleaning the camera lens a special cleaning cloth should be used. Do NOT use cleaning fluids based on alcohol, methylated spirit, ammonia, etc.. Avoid direct contact with water.