Brand: Pioneer
Category: Home Entertainment System
Document Type: Manual
Language: EN
Brand: Pioneer
Category: Home Entertainment System
Document Type: Manual
Language: EN
Uploaded: Nov. 21, 2025, 9:22 p.m.
Manual Publish Date: 1990-01-01
No specific warranty period is mentioned in this manual.
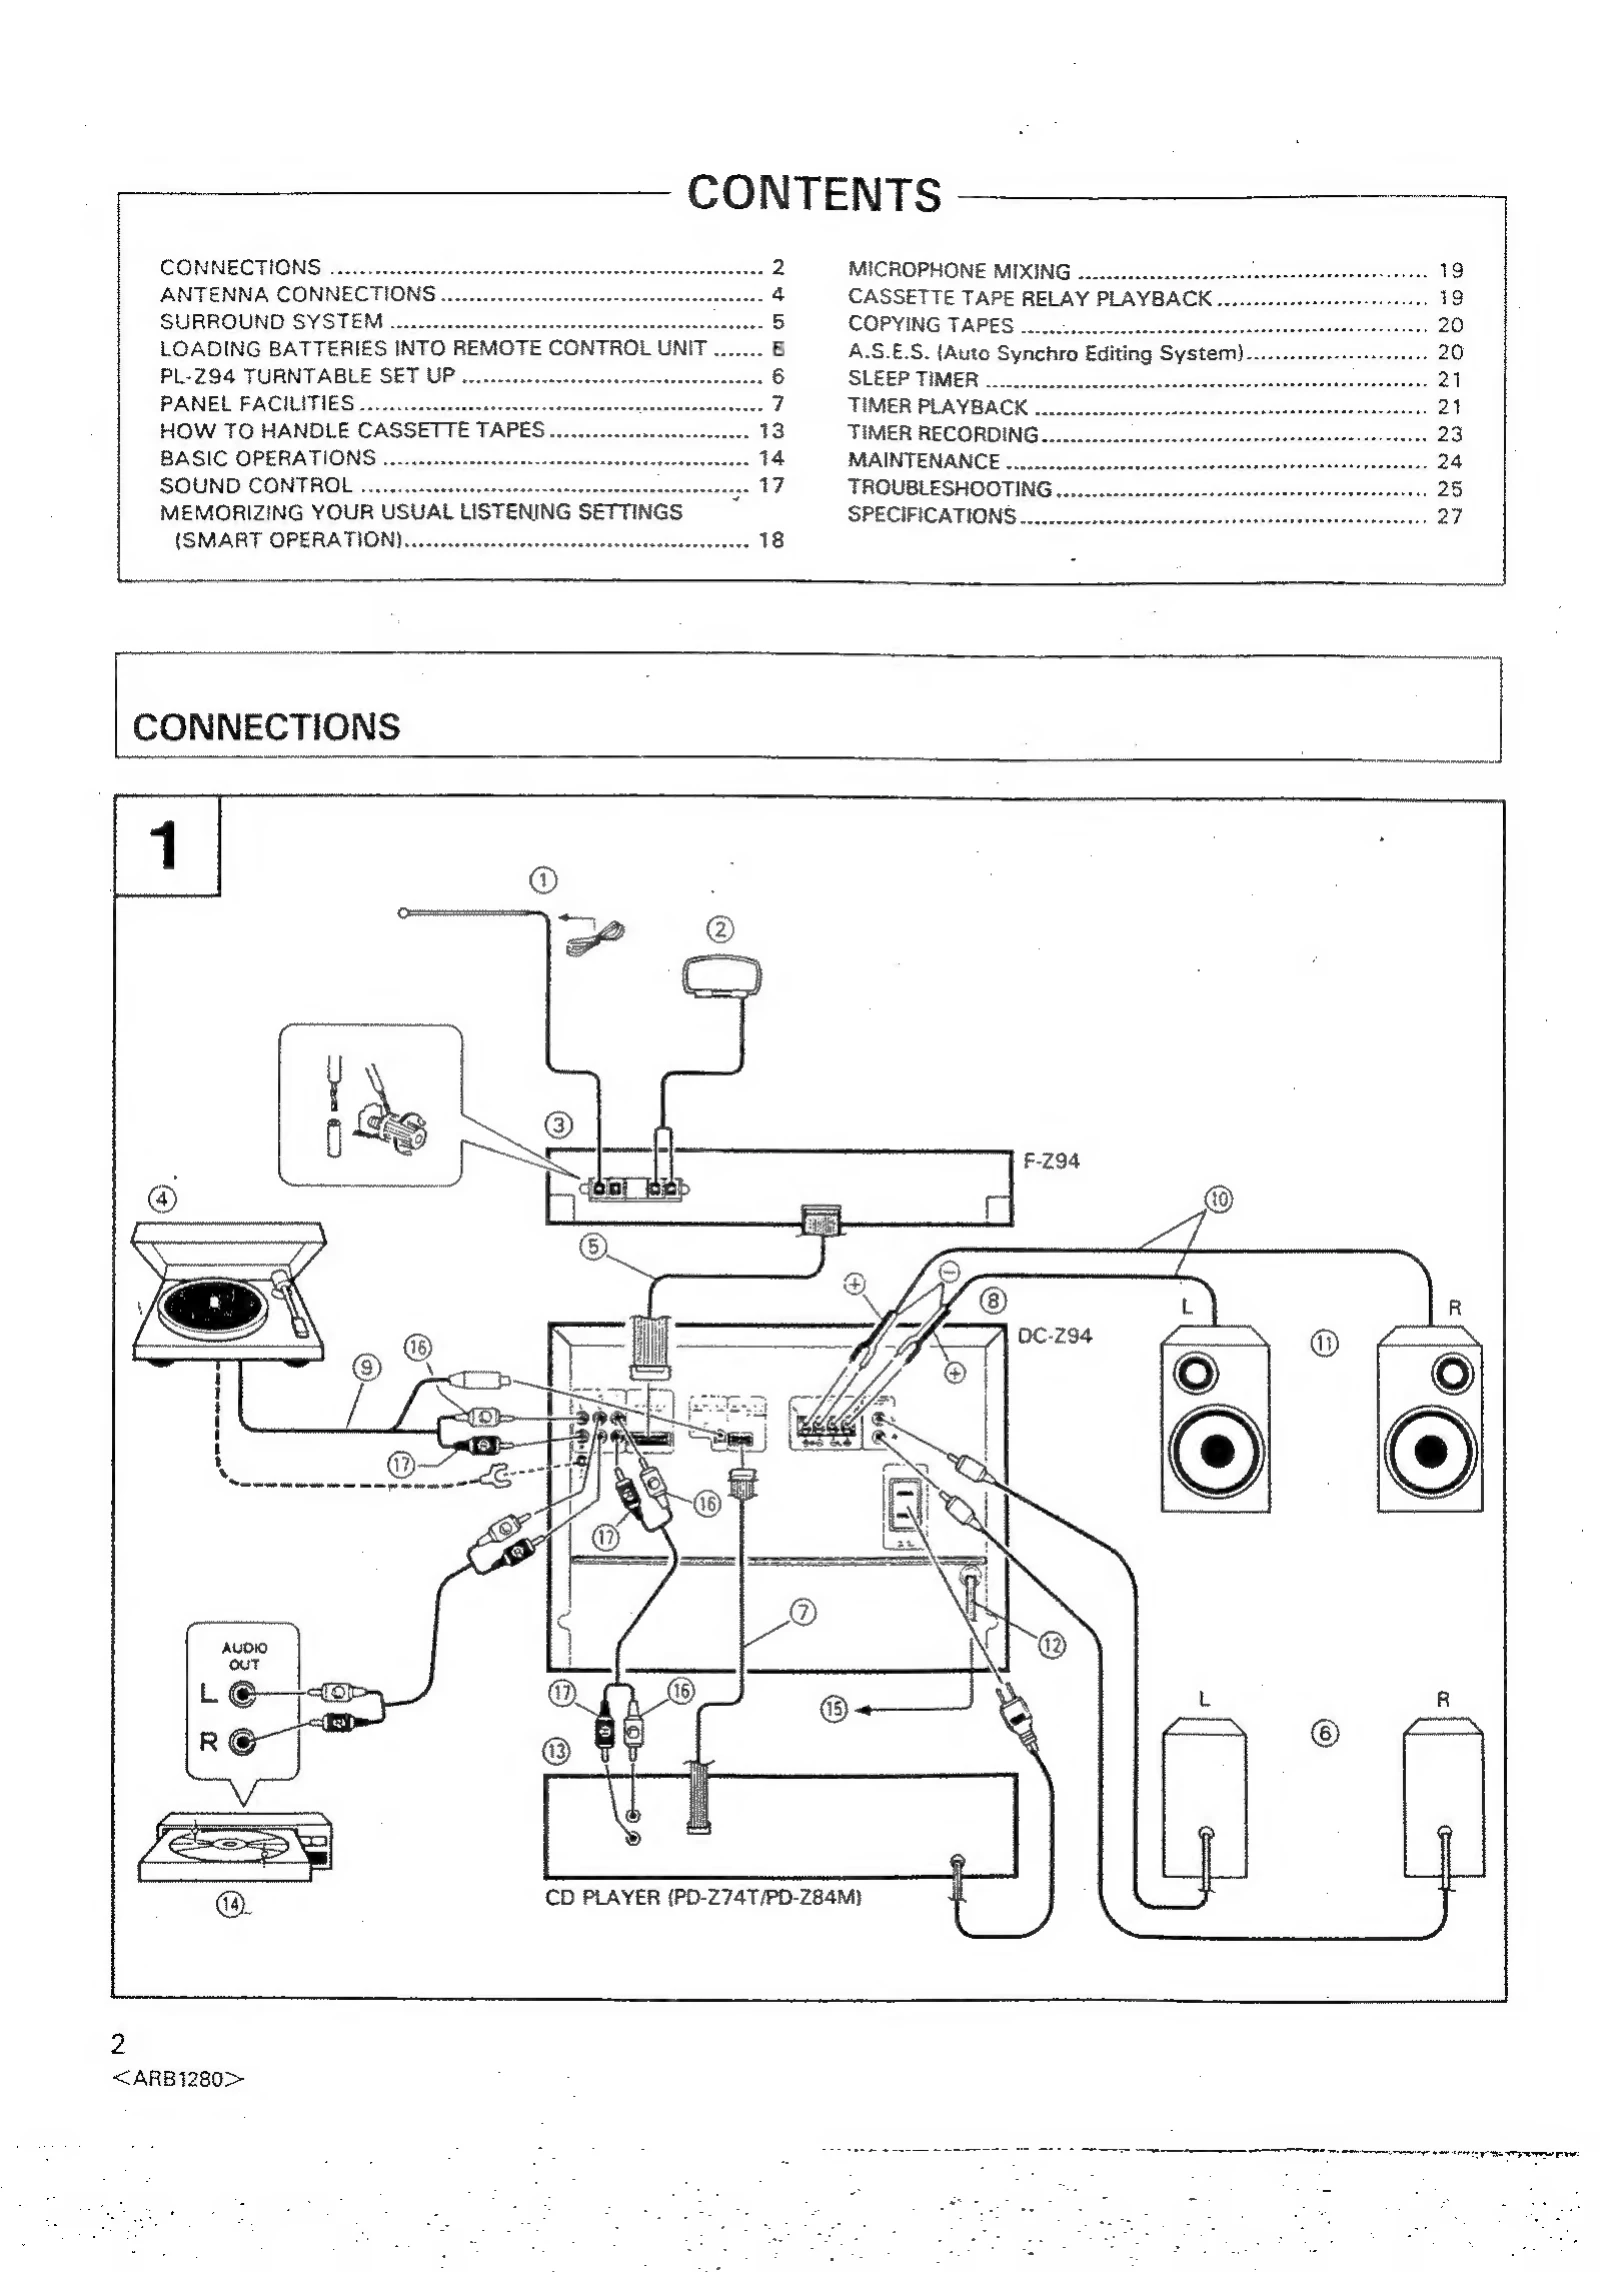
Basic Operations:
Refer to specific sections for detailed instructions on each operation.
| Symptom | Cause | Remedy |
| Power switch is on but power does not turn on. | AC cord is unplugged. | Plug power cord into wall socket. |
| No sound from speakers. | Volume is turned all the way down. Speaker cords are disconnected. Speaker cords are connected with vinyl insulation still on. Input selector is not set to your desired listening source. Connection cords are not connected or are damaged. |
Raise volume knob setting. Connect speaker cords correctly. Strip vinyl insulation from speaker wire tips before connecting. Select correct input selector. Connect correctly or replace with good quality cords. |
| Sound from only one speaker. | One of the speaker cords is disconnected or damaged. Incorrect Balance setting. |
Connect correctly or replace with good quality cord. Set Balance to center position. |
| Screeching or howling sound heard during mic mixing. | Microphone angle is bad. Microphone is too close to speaker. Volume is too loud. |
Change microphone angle. Move microphone further away from speakers. Reduce volume. |
| Tape does not move. | Deck is in pause mode. Cassette inserted incorrectly. |
Press PAUSE or PLAY button. Put cassette properly in holder. |
| No sound heard from tape. | Input selector not set to TAPE. Playing unrecorded tape. Dirty head. |
Set to TAPE. Play a recorded tape. Clean head. |
| Tape sounds unclear, not loud enough. | Dirty head. | Clean head. |
| Can not record. | Erasure prevention tabs are broken off. Dirty head. |
Apply adhesive tape over tab holes. Clean head. |
| Can not copy tape. | One deck has no tape loaded. Tape in deck II has erasure prevention tabs broken off. |
Load tapes in both decks. Use cassette that can be recorded on. |
| Treble tones unclear. | Dirty head. | Clean head. |
| Treble tones too strong. | DOLBY NR system is ON when listening to a tape recorded without DOLBY NR. Tape recorded with DOLBY NR but played without. |
Use same noise reduction system for playback as for recording. (Do not play tapes recorded with different NR systems.) Play in same condition as recording. (Turn on DOLBY NR switch for recorded tapes with DOLBY NR.) |
| Strange sounds heard (or recorded from) tape, CD, or radio. | TV is on. This unit is too close to TV. |
Turn off TV. Move TV away until interference stops. |
| Music Search does not work. | No 4-second space. CD DIRECT button is on. |
Copy using NORMAL instead of HIGH speed. Use tape with 4-second space between songs. |
| Sound image control has no effect. | CD DIRECT button is on. | Sound image controller can not be used when CD DIRECT is on. |
| CD Auto Function does not work. | Flat cable not connected. | Securely connect flat cable and audio cord. |