1. Packing List: Familiarize yourself with the included items: Prestigio car DVR, suction mount, car charger, and power cable.
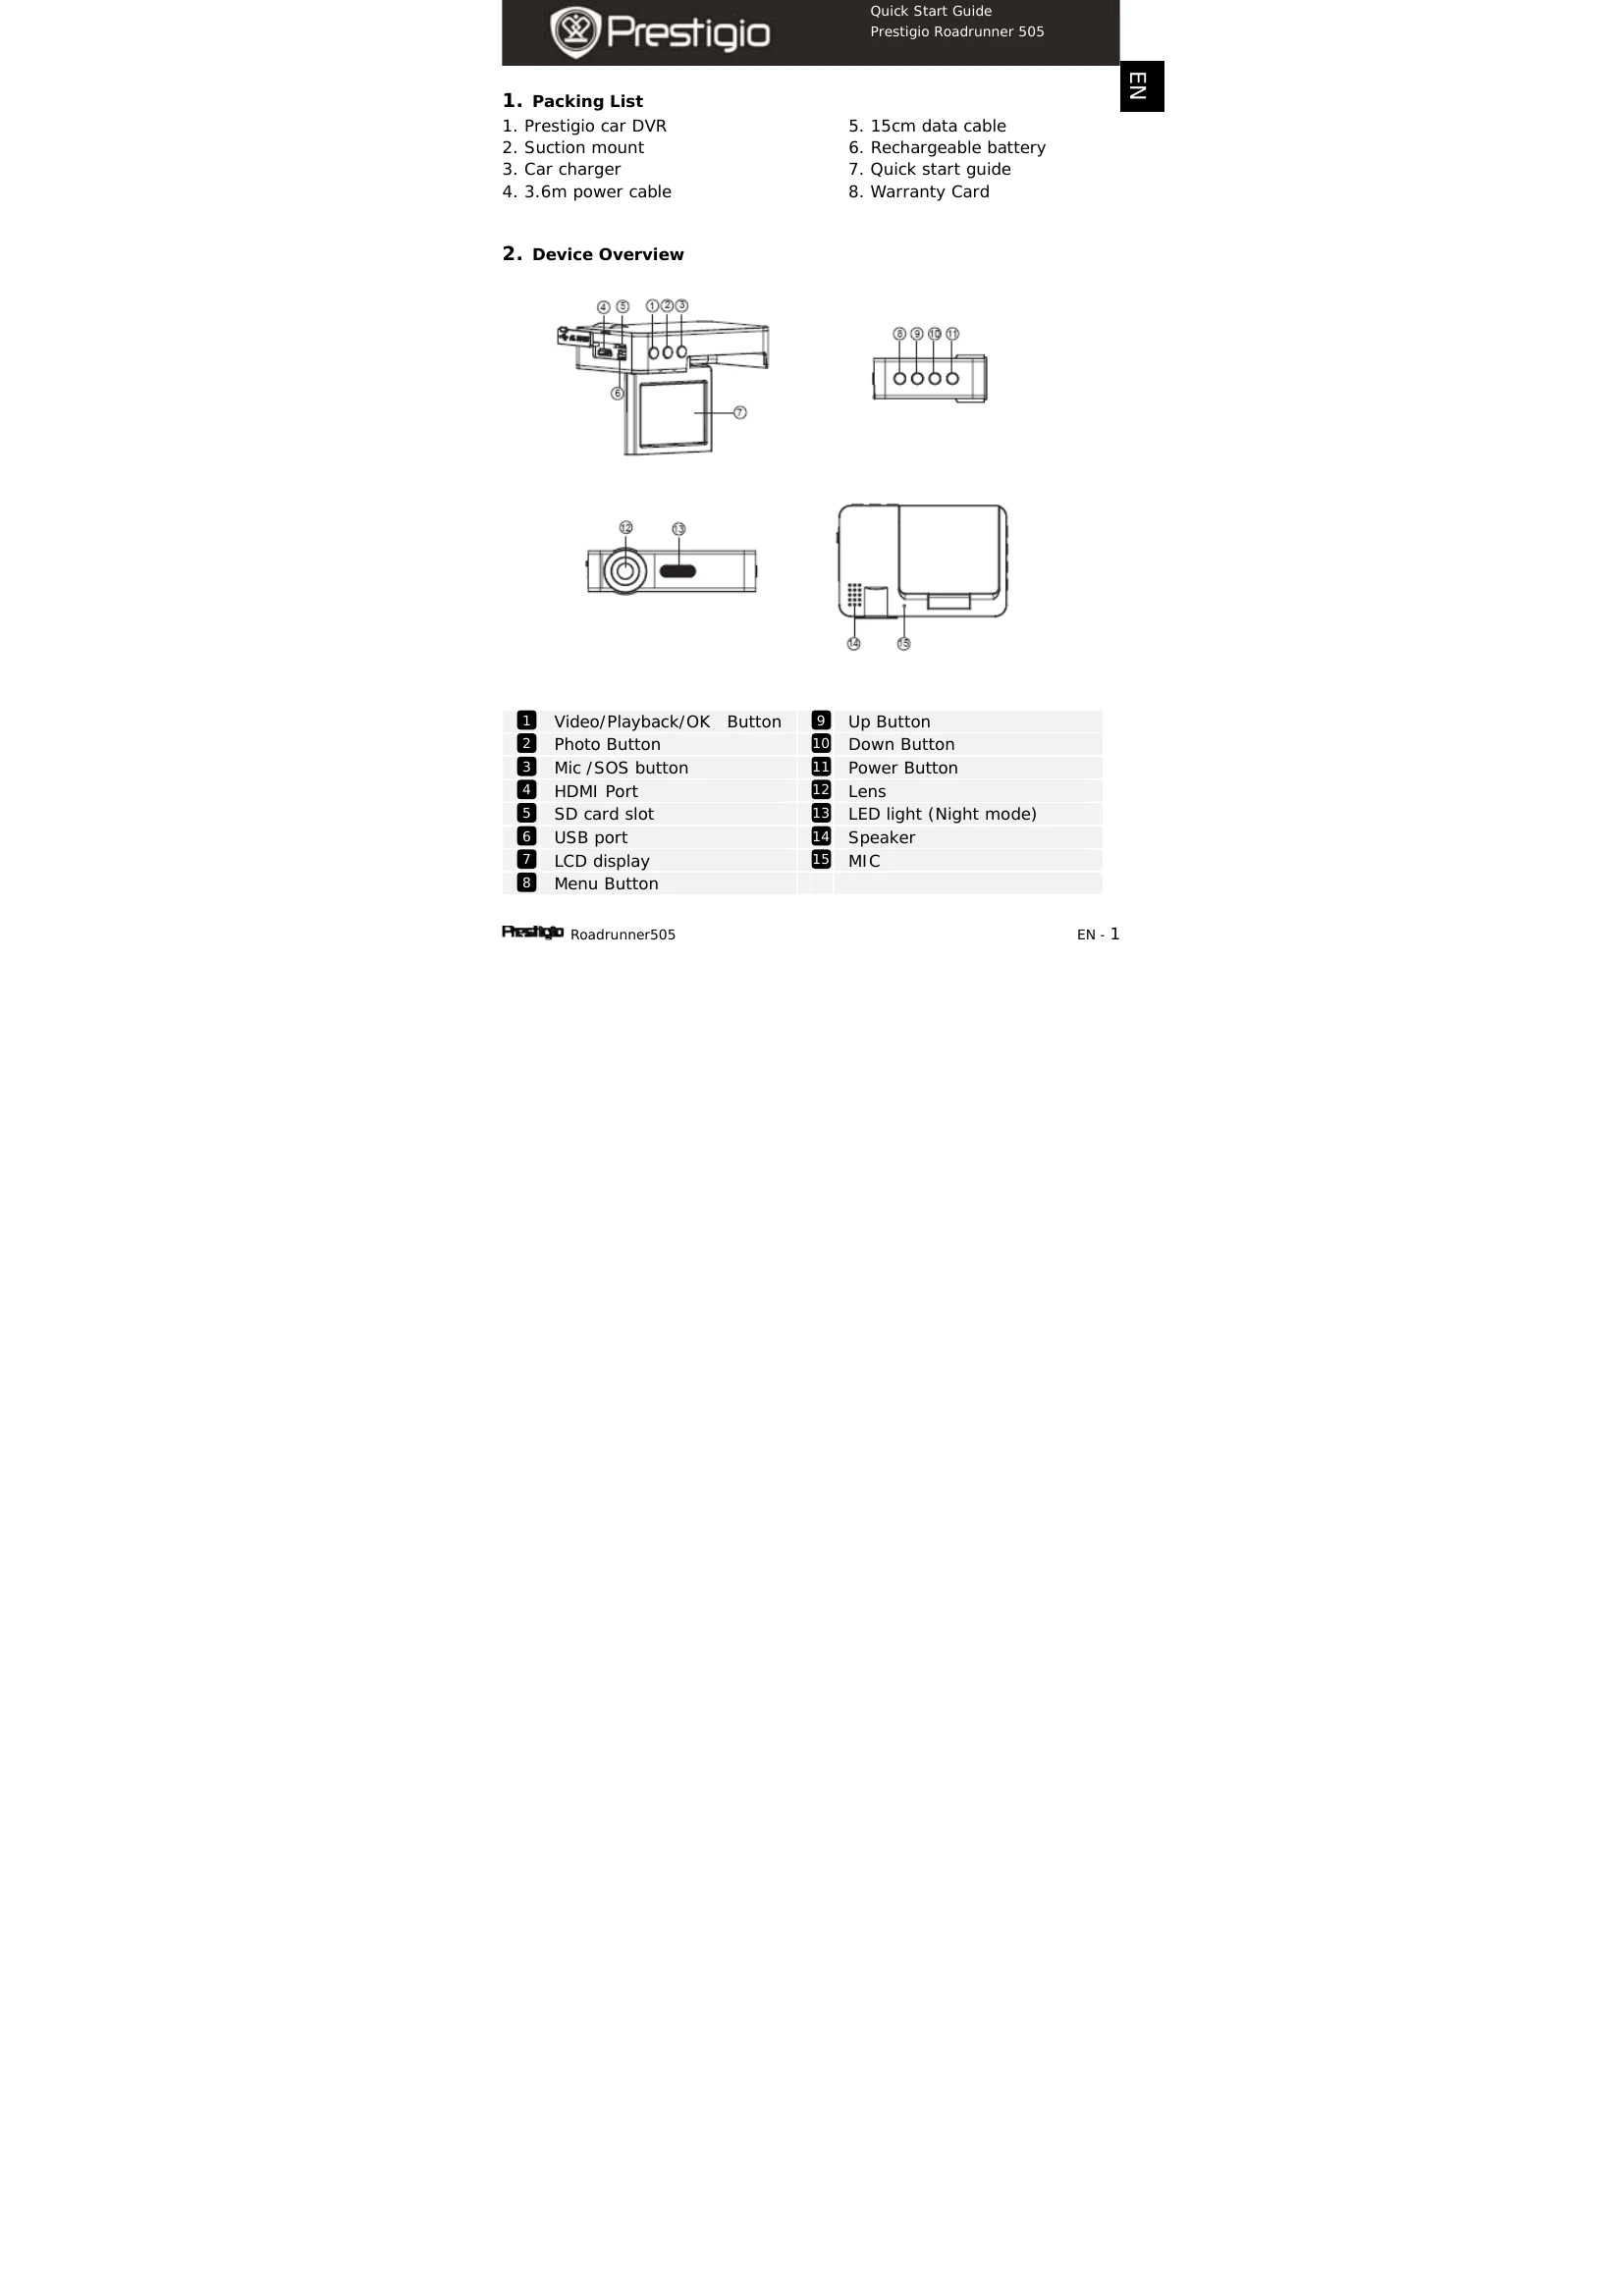
2. Device Overview: Identify the various buttons and ports on the device.
3. Power On/Off: Use the power button or connect to the car charger to turn the device on/off.
4. Charging: Charge the device via USB or car charger. Full charge takes 2-3 hours.
5. Micro SD Card: Insert a Micro SD card (not included) for recording.
6. Recording: Connect to car charger and engine start to begin loop video recording.
7. Taking Pictures: Use the Photo button to capture images.
8. Main Menu: Navigate through Video Recording, Picture Mode, Storage Card, and Sound Recording.
9. Video Menu Settings: Adjust Resolution, Loop Recording, Exposure, Motion Detection, Record Audio, and Date Stamp.
10. Picture Menu Settings: Configure Capture Mode, Resolution, Sequence, Quality, Sharpness, White Balance, Color, ISO, Exposure, and Date Stamp.
11. General Settings: Adjust Date/Time, Auto Power off, Beep Sound, Language, TV Mode, Frequency, LCD Off, Format, Default Setting, and Version.
12. Playback Mode: View, play, pause, forward/backward recorded files. Options include Delete, Protect, Slide Show, Thumbnail, and Volume.
13. USB Connection: Connect to PC/notebook to download files.
14. PC Camera Mode: Use the device as a PC camera.
15. Playback on TV: Connect to TV via HDMI cable for playback.