Manual for VM-PS12

Manual for VM-PS12

Brand: SANYO

Category: Camcorder

Document Type: Manual

Language: EN

Uploaded: Nov. 21, 2025, 7:07 p.m.
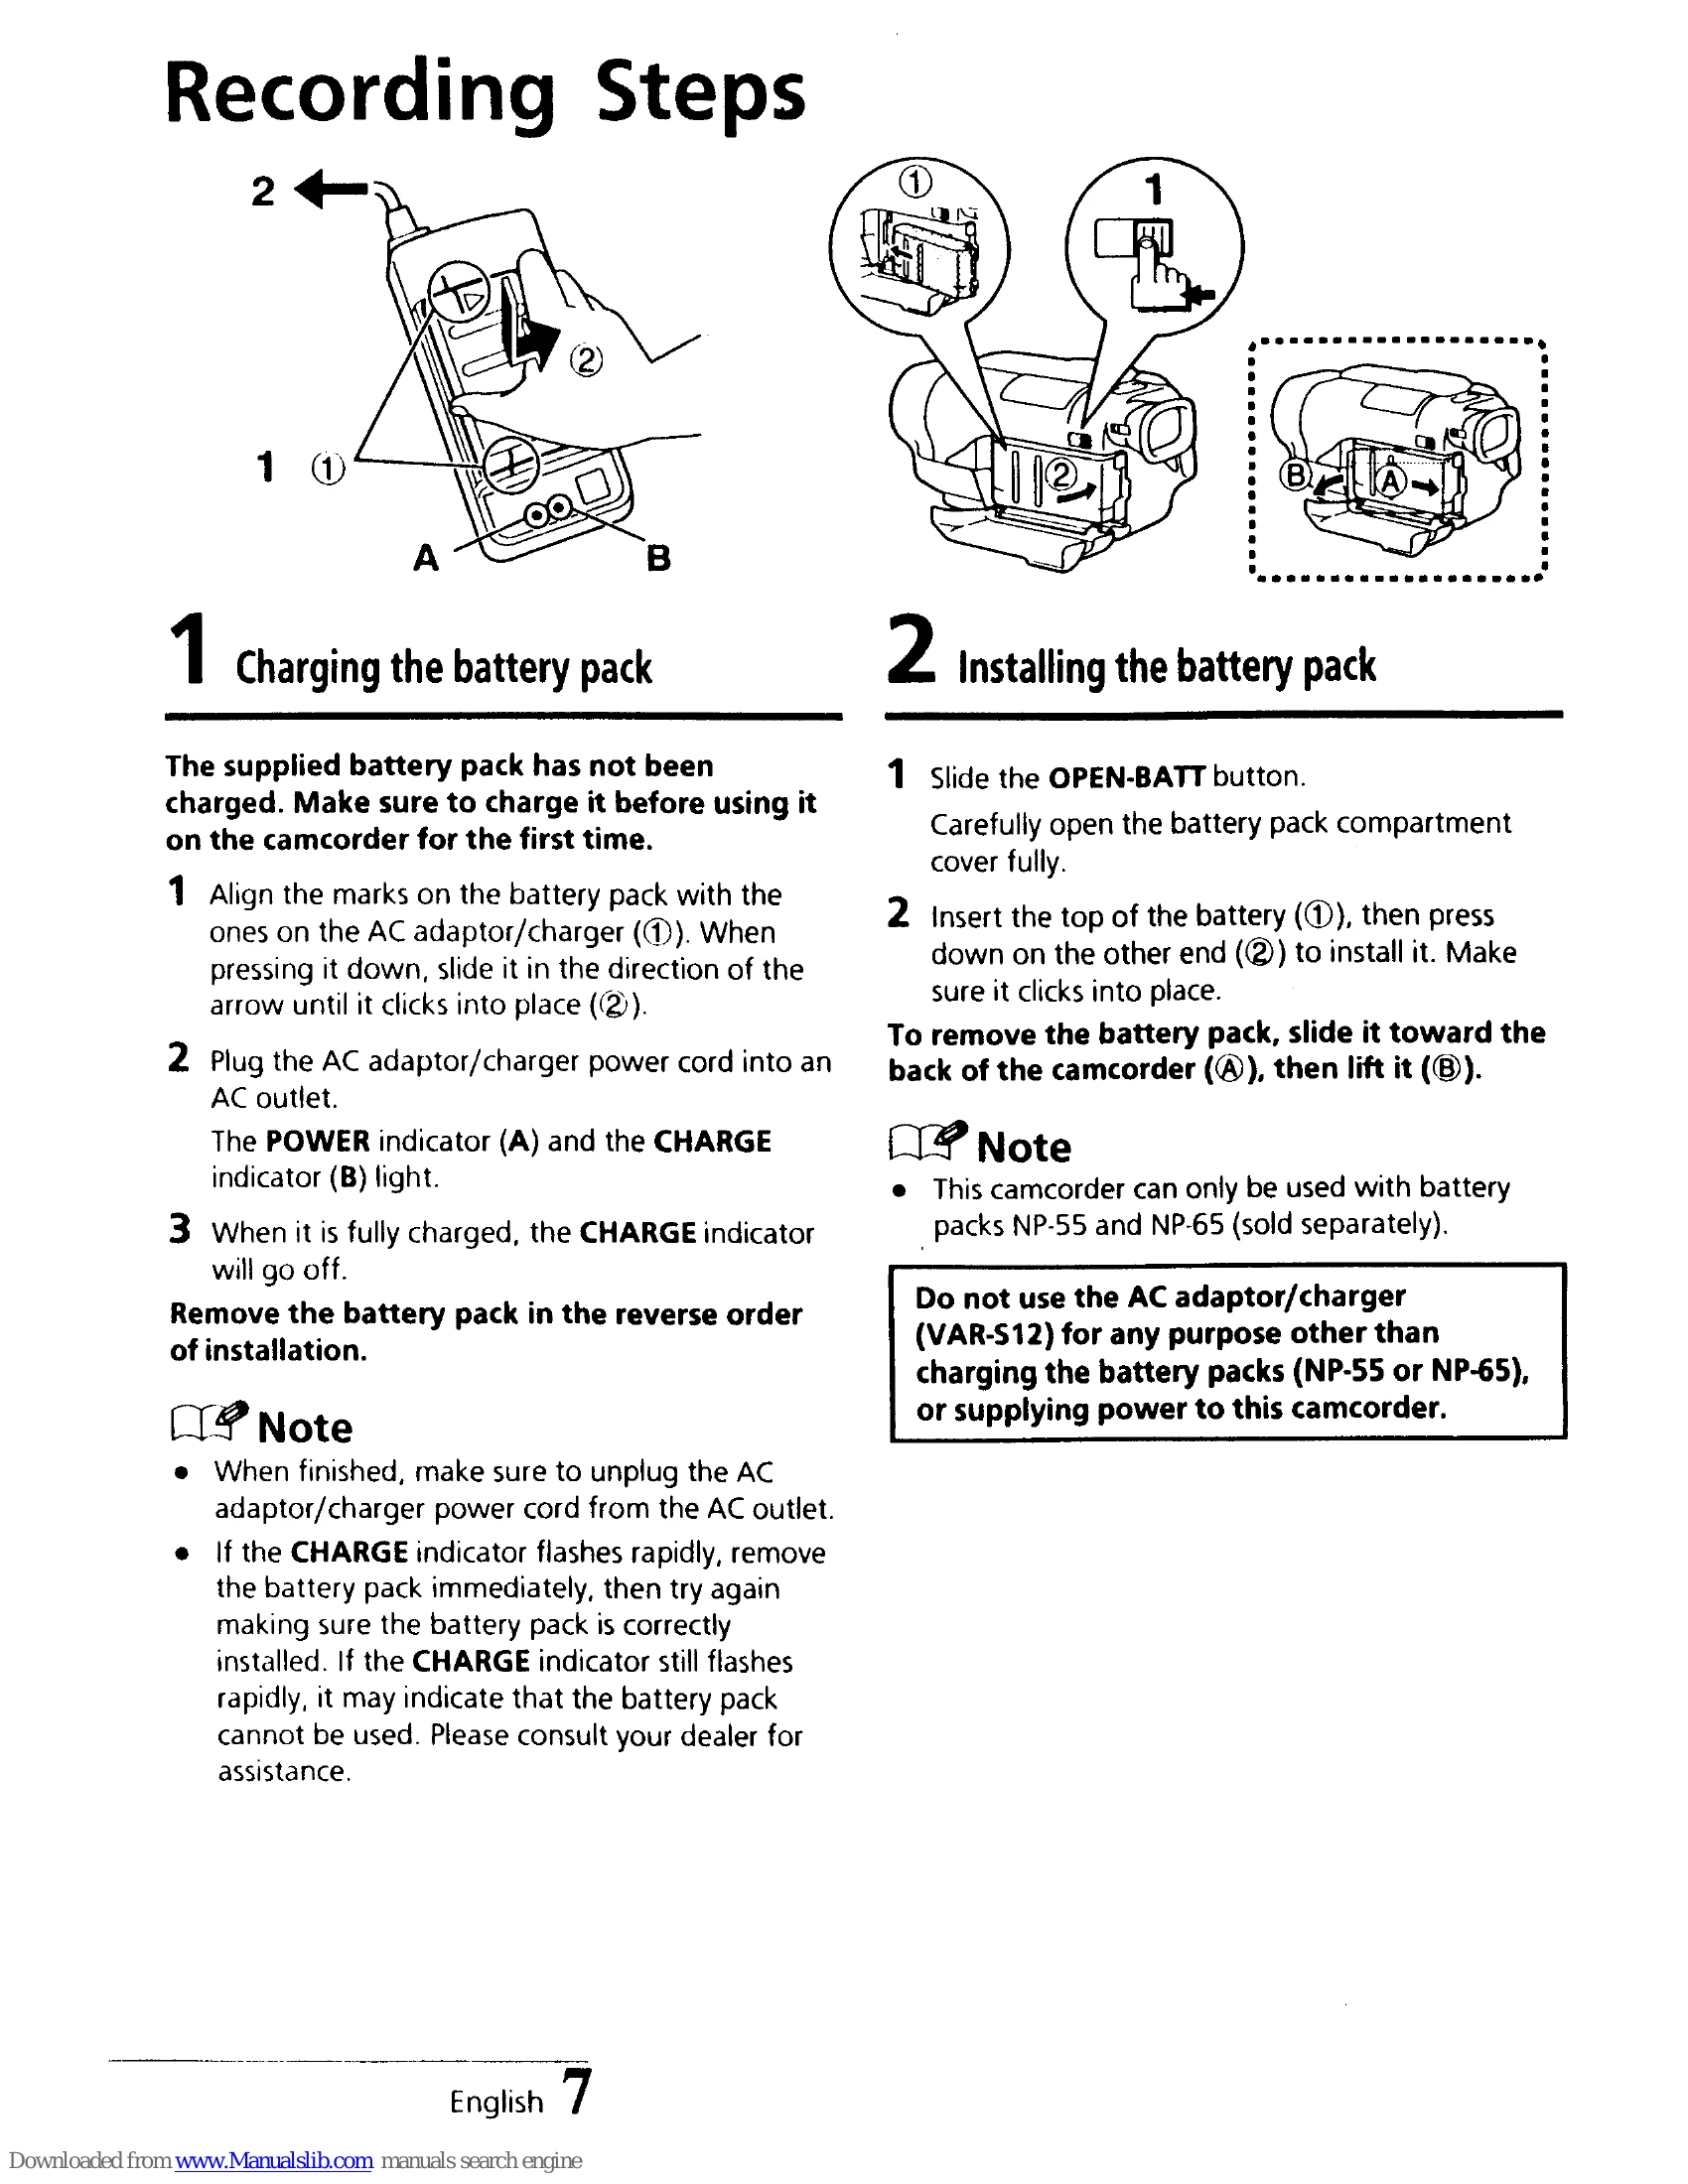
Warranty Information

None

About the Camcorder
A. Viewfinder: For viewing tape playback, see pages 11 and 12 for TV connection.
B. Power mode button: Cycles through PLAYER, CAMERA, and recording pause modes.
C. Zoom Lever: Use T for telephoto (1.6m minimum distance) and W for wide-angle (0.7m minimum distance).
D. LCD display: Shows battery charge, tape remaining, and warning indicators.
Recording Steps
1. Charging the battery pack: Align, connect AC adaptor, and wait for CHARGE indicator to go off.
2. Installing the battery pack: Slide the OPEN-BATT button, open cover, insert battery.
3. Loading a cassette: Turn left reel to eliminate slack, press EJECT, insert cassette, press PUSH.
4. Recording: Push POWER, press REC to start, press REC again to stop.
Power Source
Using the DC connecting cord: Open compartment, connect cord, plug into AC outlet.
Refreshing the battery pack: Install pack, press REFRESH. The CHARGE indicator will flash.
Playback
Connections to a TV: Connect to SCART or AUDIO/VIDEO terminals, set TV/VCR switch to "VCR", turn power on, set to PLAYER, rewind and play. Use STOP to finish.

Troubleshooting and error codes

Problem No Picture/Sound Connections Ensure all cables are securely connected. Verify TV/VCR switch is set correctly.
Poor Picture/Sound Quality Dirty Heads Clean video heads with a dry-type cleaner. (See page 14)
Condensation Allow the camcorder to acclimatize to room temperature before use. (See page 5)
Battery Not Charging Incorrect Installation Ensure battery pack is correctly installed in the AC adaptor/charger.
Battery Faulty Consult dealer if CHARGE indicator flashes rapidly.
Warning Indicator Flashing Various Issues Refer to page 5 for explanations of warning indicators (e.g., low battery, tape end, condensation, dirty heads).
Privacy Policy