Installation Guide for GSS2323.V2 & GSS2323G.V2

Installation Guide for GSS2323.V2 & GSS2323G.V2

Brand: SEALEY

Category: Workshop Furniture

Document Type: Installation Guide

Language: EN

Uploaded: Nov. 21, 2025, 6:15 p.m.

Manual Publish Date: 2019-09-23

Warranty Information

Guarantee is 12 months from purchase date, proof of which is required for any claim.
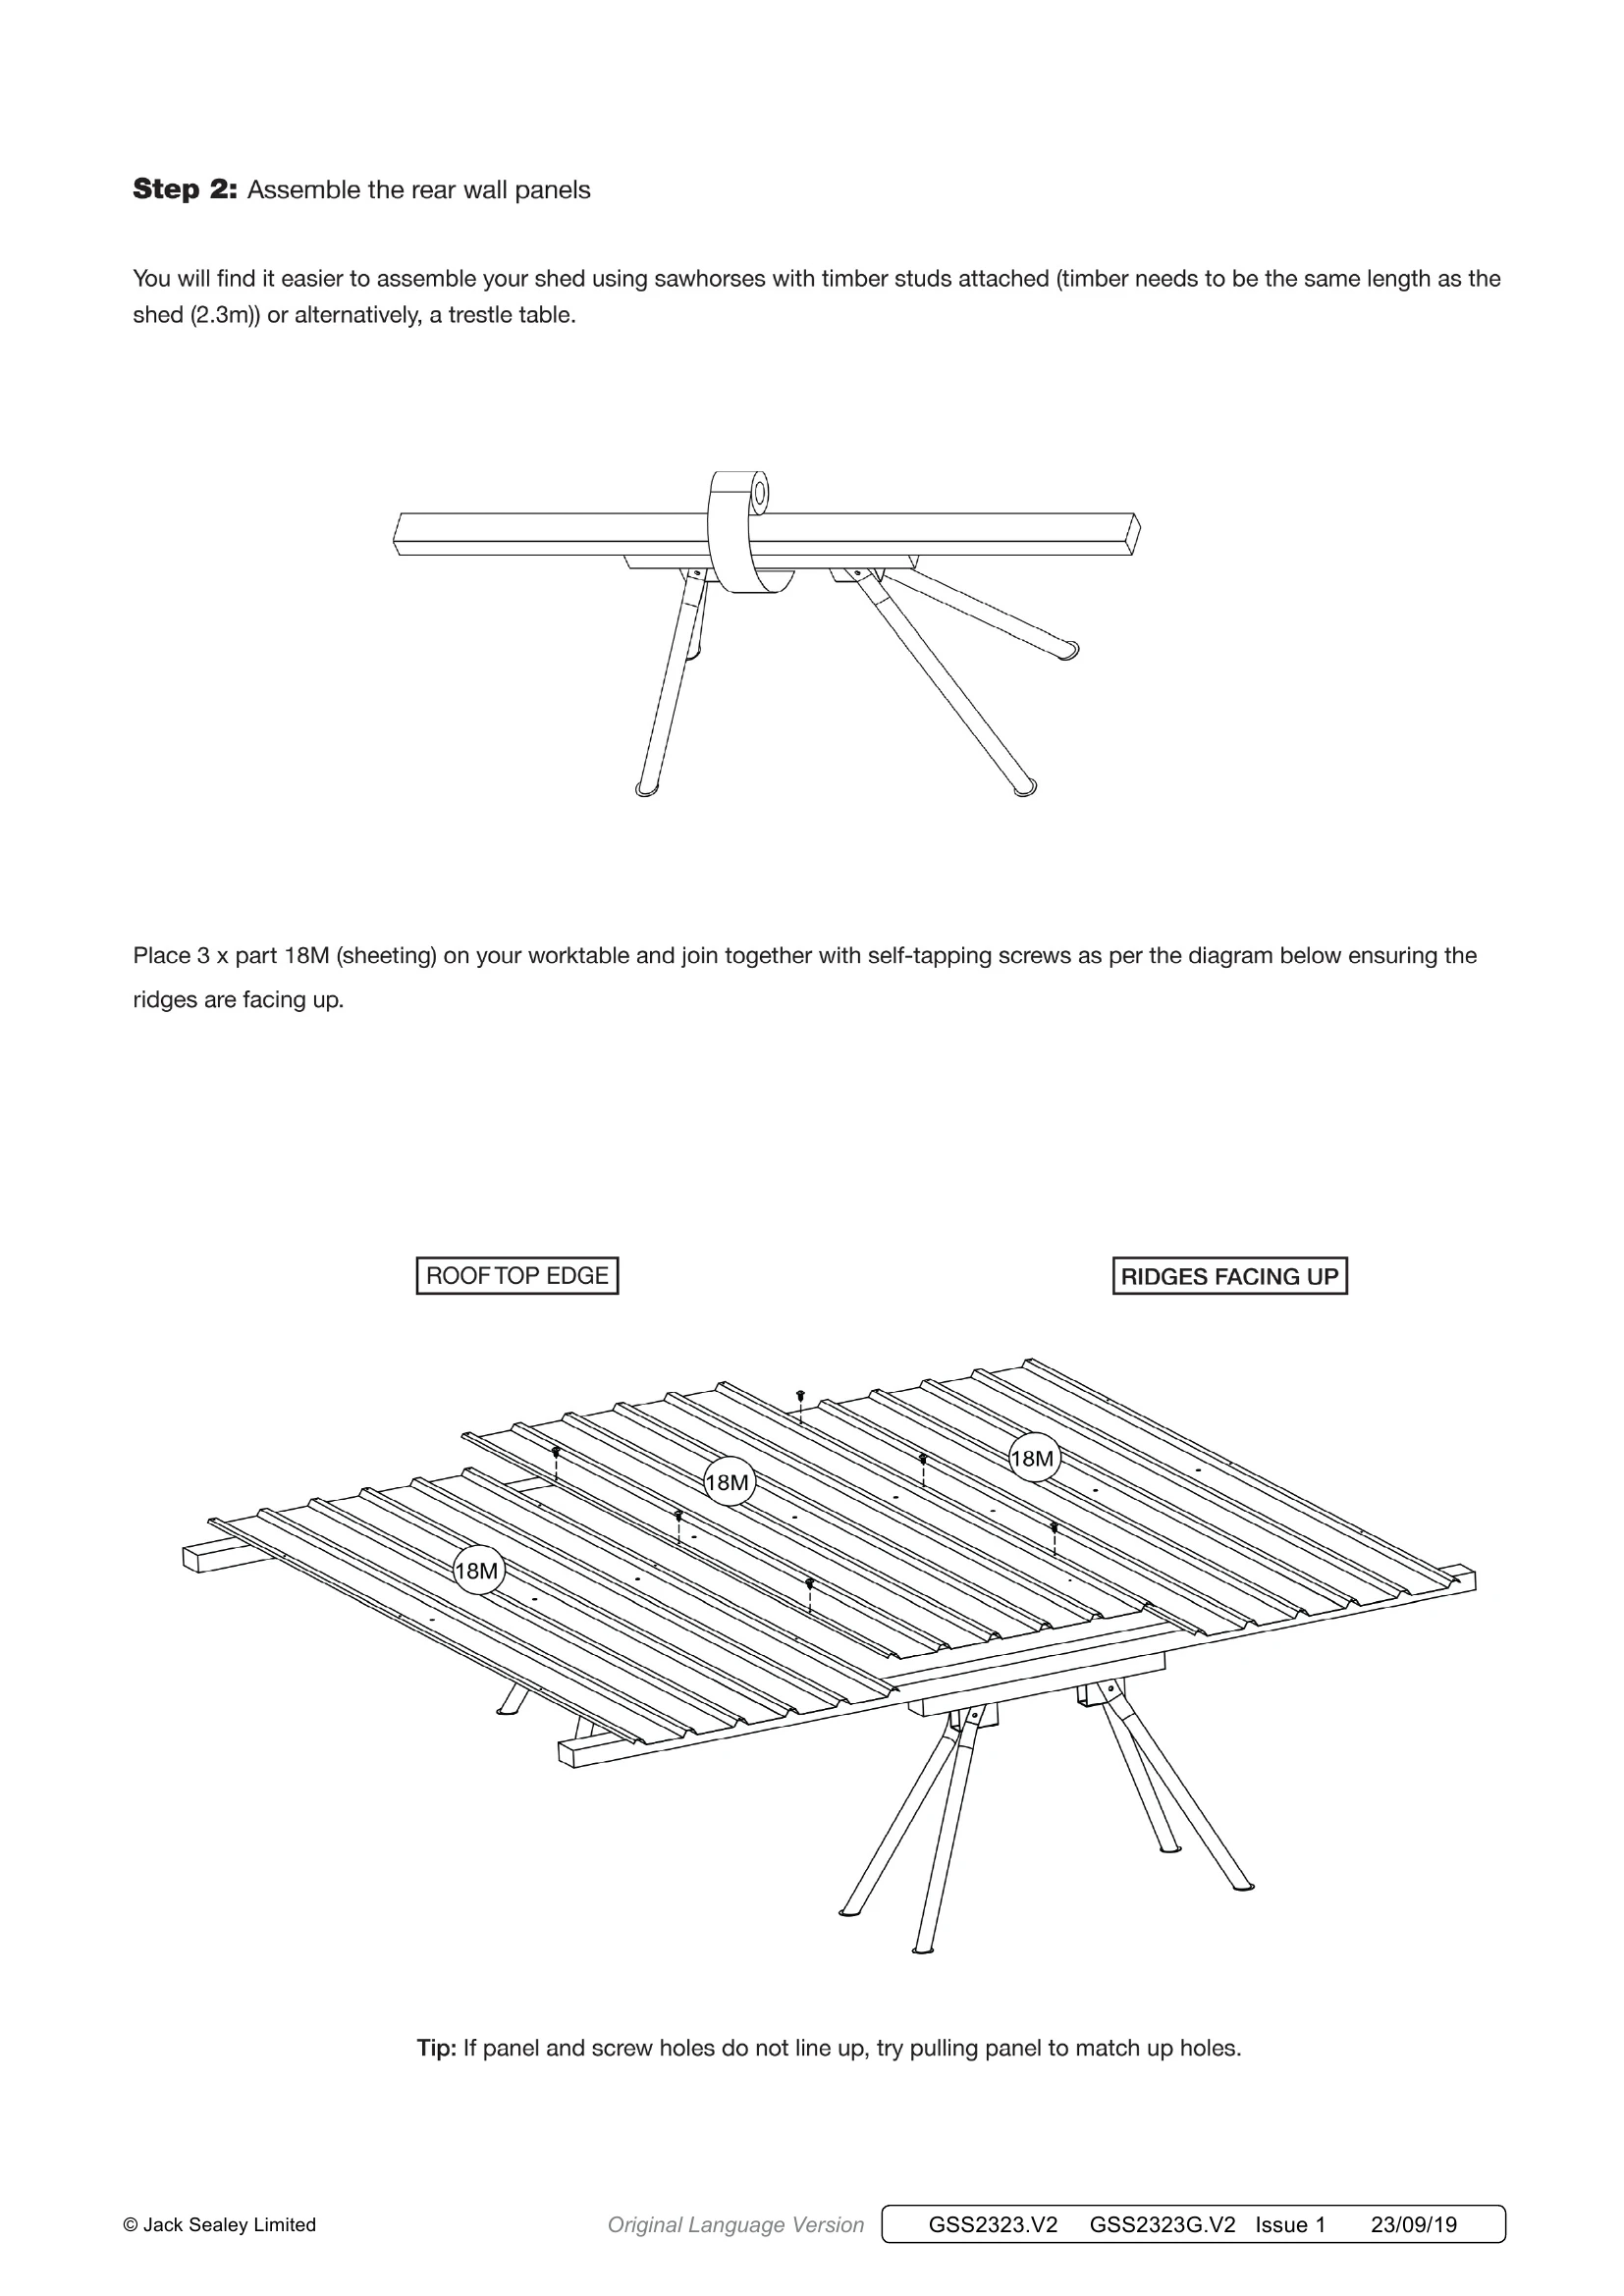
Safety First: Always adhere to Health & Safety regulations, wear appropriate protective gear (eye protection, gloves, footwear), and ensure the work area is clear and well-lit. Keep children and unauthorized persons away. This product is designed for its intended purpose only. Assembly requires assistance.Assembly Steps:
1. Check all parts against the component list.
2. Assemble the rear wall panels by joining sheeting and adding channels.
3. Assemble the side wall panels similarly.
4. Assemble the roof panels, attaching channels and bracing.
5. Assemble the front wall panels, including jambs and channels.
6. Assemble the front door by attaching channels and bracing.
7. Fit all panels together, securing gables, corner braces, and roof components. Finally, fit the bolt-down kit and safety covers.Important Note: Ensure all panels and channels have their small lip facing outwards to prevent rainwater ingress. Follow specific screw fixing instructions, noting any screws not to be fixed at early stages.

Troubleshooting and error codes

Panel and screw holes do not line up. Try pulling panel to match up holes.
Concerns about visibility of pre-drilled holes. Fill with rivets.
Screws marked with a cross. Do not fix at this stage.
Rainwater build-up. Ensure small lip on channels is always facing out.
Privacy Policy