Manual for Kit II

Manual for Kit II

Brand: Smart Touch

Category: Interactive Whiteboard

Document Type: Manual

Language: EN

Uploaded: April 20, 2026, 7:46 p.m.

Warranty Information

Please refer to your local Acer website for warranty information.

Smart Touch Kit II Operation Summary

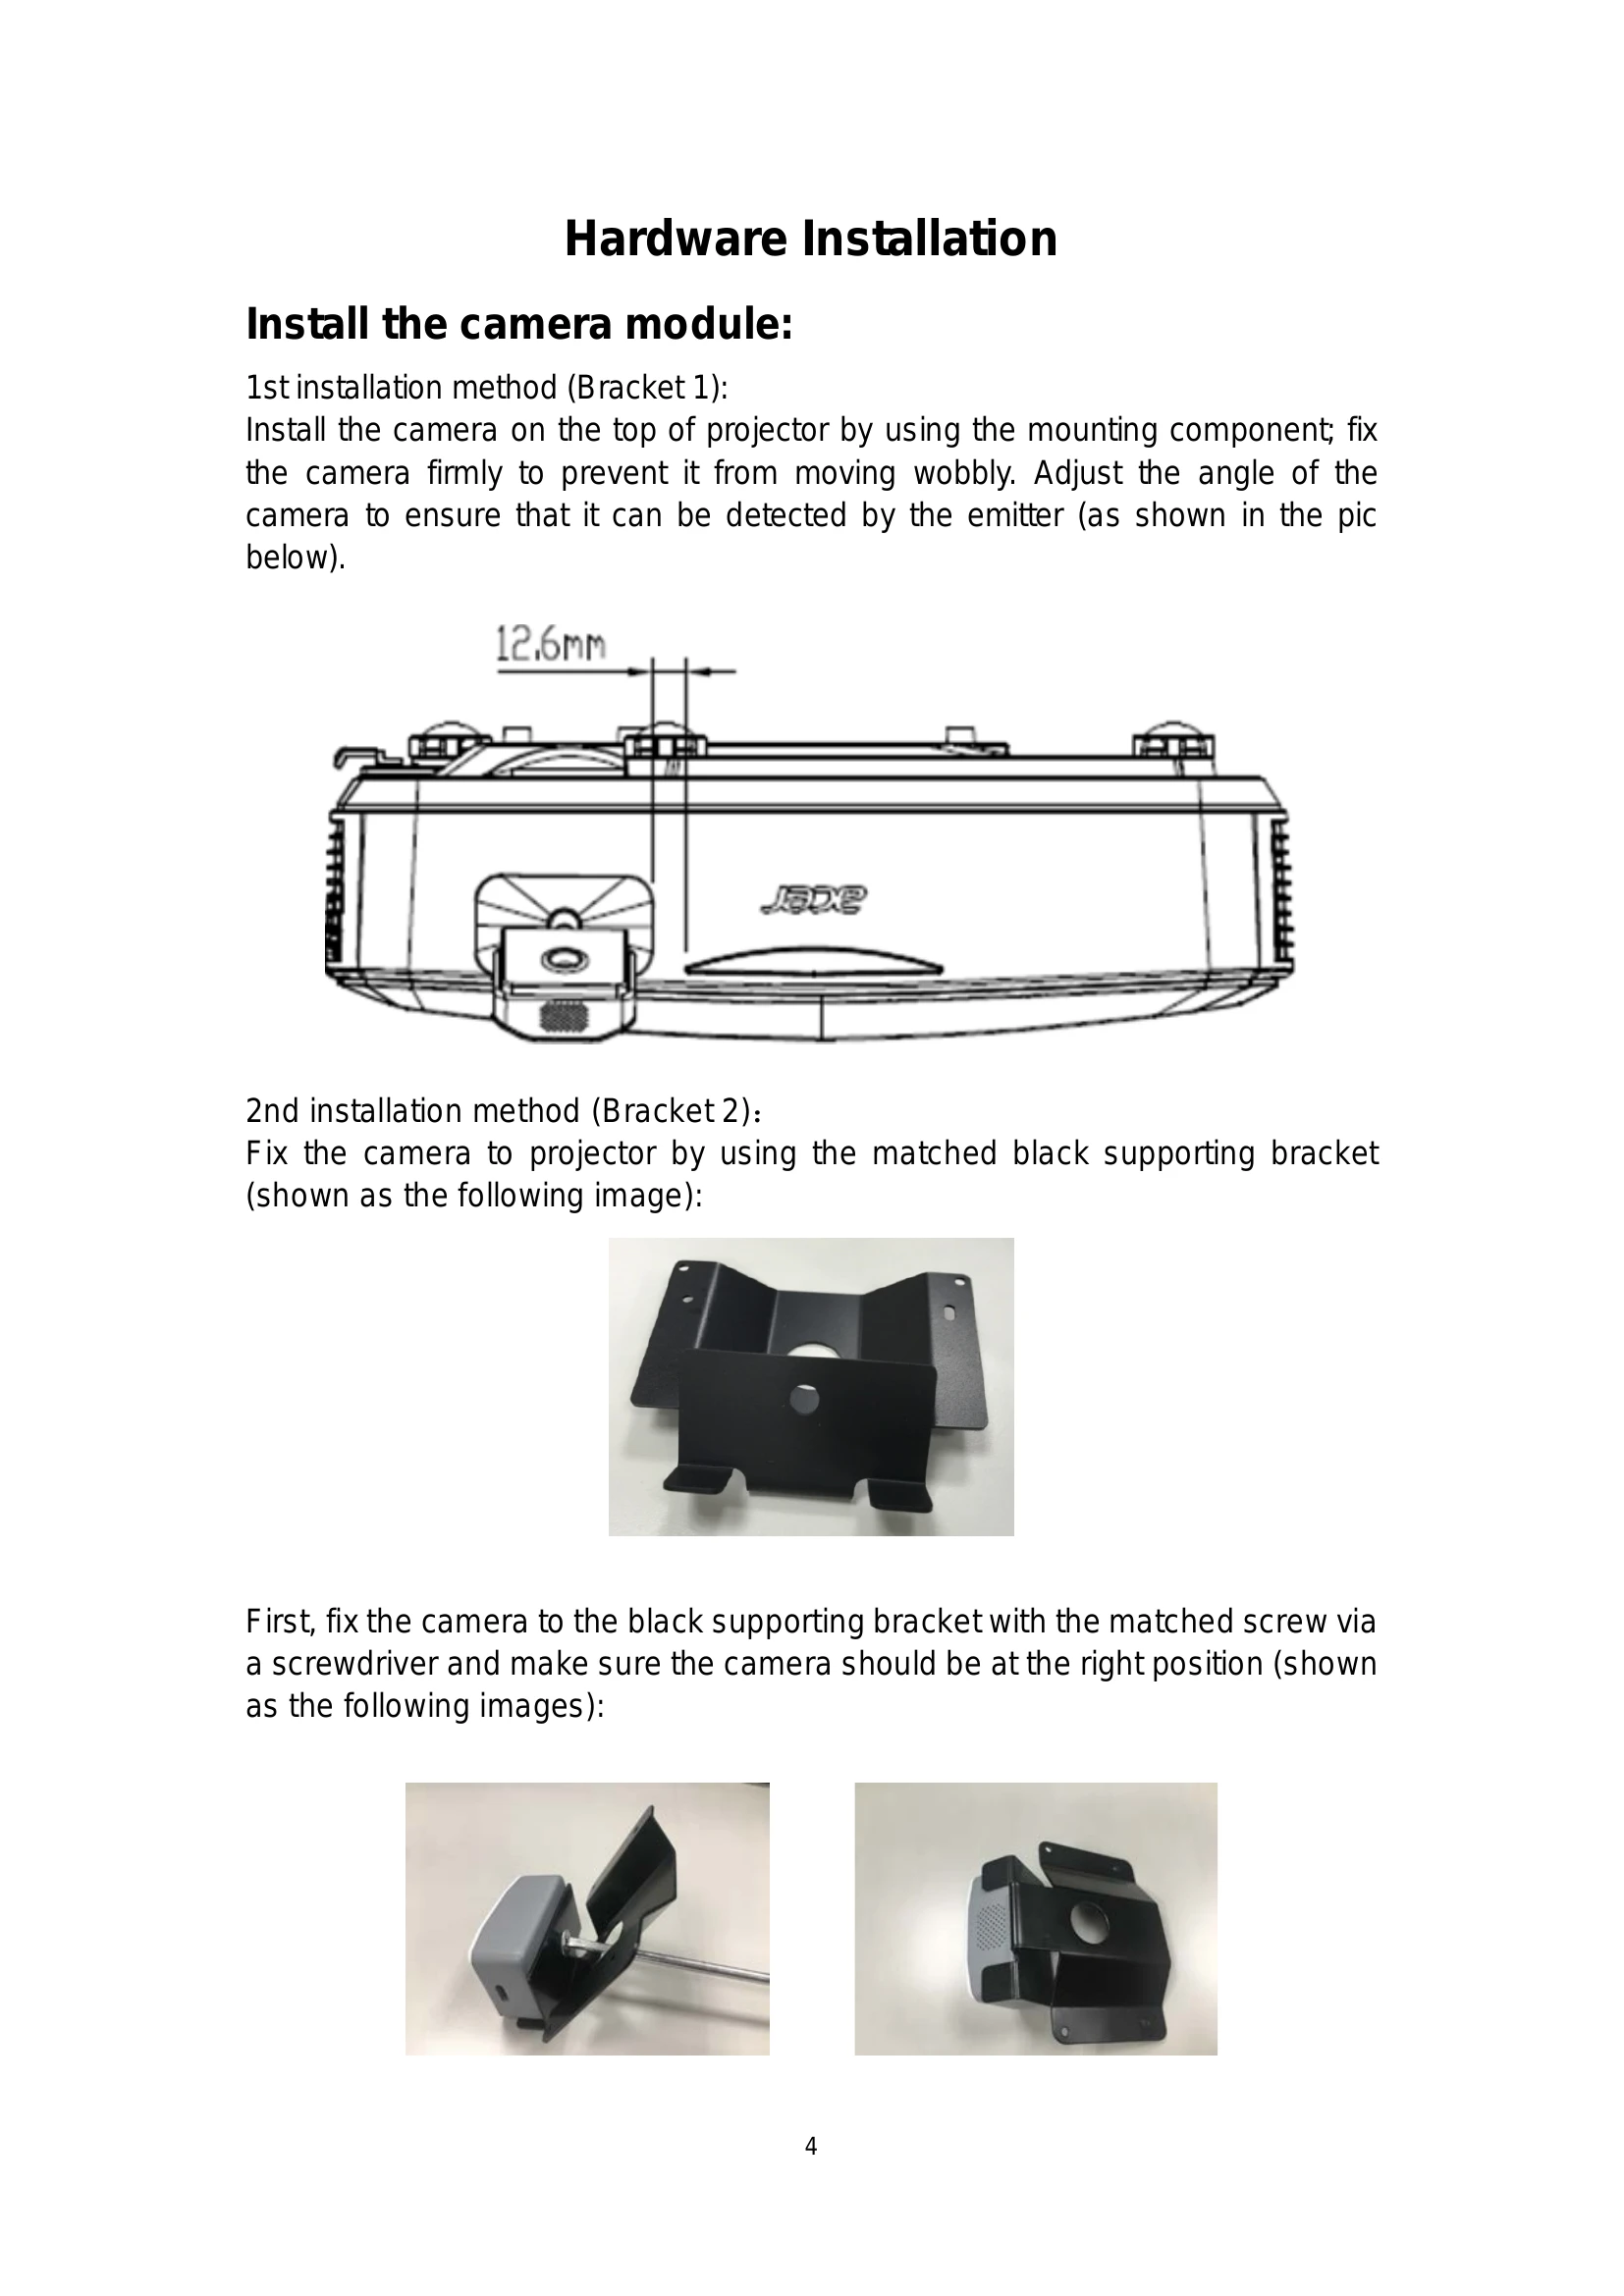
The Smart Touch Kit II allows you to transform any projection screen or LCD screen into a touchable surface. It supports finger touch for writing and control, and multi-touch for up to ten users simultaneously. Installation is designed to be simple, often involving mounting an emitter above the screen and a camera on the projector or ceiling. The device can turn flat surfaces like boards, walls, and LCDs into interactive touch screens and can be operated using any non-transparent object as a pen.

Troubleshooting and error codes

Problem Solution
Hand touch operation is not working properly (Error: "Not a valid USB Key for hand touch whiteboard")
  • Open "Device Management" > "Image Device", check for "USB2.0 PC Camera".
  • If found, the camera may need repair.
  • If not found, check camera/computer connections.
  • Reconnect using another USB port.
  • Reconnect using another USB cable.
  • Reconnect using another camera.
  • Contact the factory if the problem persists.
Auto-calibration is successful, but there is inaccuracy with mouse pointer and finger or IR pen
  • Open "Tuning Webcam Image Mode" (Installation and Debugging menu) and check webcam image proportion.
  • Open "Tuning Laser Transmitter Image Mode" (Installation and Debugging menu) and check if the laser beam is within 4mm above the projection screen.
  • Contact the factory if the problem persists.
Auto-Calibration process failure
  • Select "Adjusting Webcam Image Mode" and check for display issues (dazzling, white/black screen, flickering).
  • Shift to "Tuning Laser Transmitter Image Mode" twice and check for brightness changes. Use another camera if the screen is dark.
  • Analyze "black and white checkerboard" brightness. Adjust "average image brightness" and "Light Gray" settings as needed (e.g., high brightness: avg brightness down to 40, Light Gray up to 250; low brightness: Avg Brightness up to 140, Light Gray up to 250).
  • Contact the factory or perform manual calibration if the problem persists.
Inaccurate performance on top corners or non-smooth writing
  • Check for lightspot in non-smooth areas. Replace emitter if none.
  • If lightspot is small, adjust brightness coefficient to around 170.
  • Perform lightspot sampling.
  • Adjust "Minimum Width" and "Light Spot Minimum Height" to 1 in the "config" file.
Privacy Policy