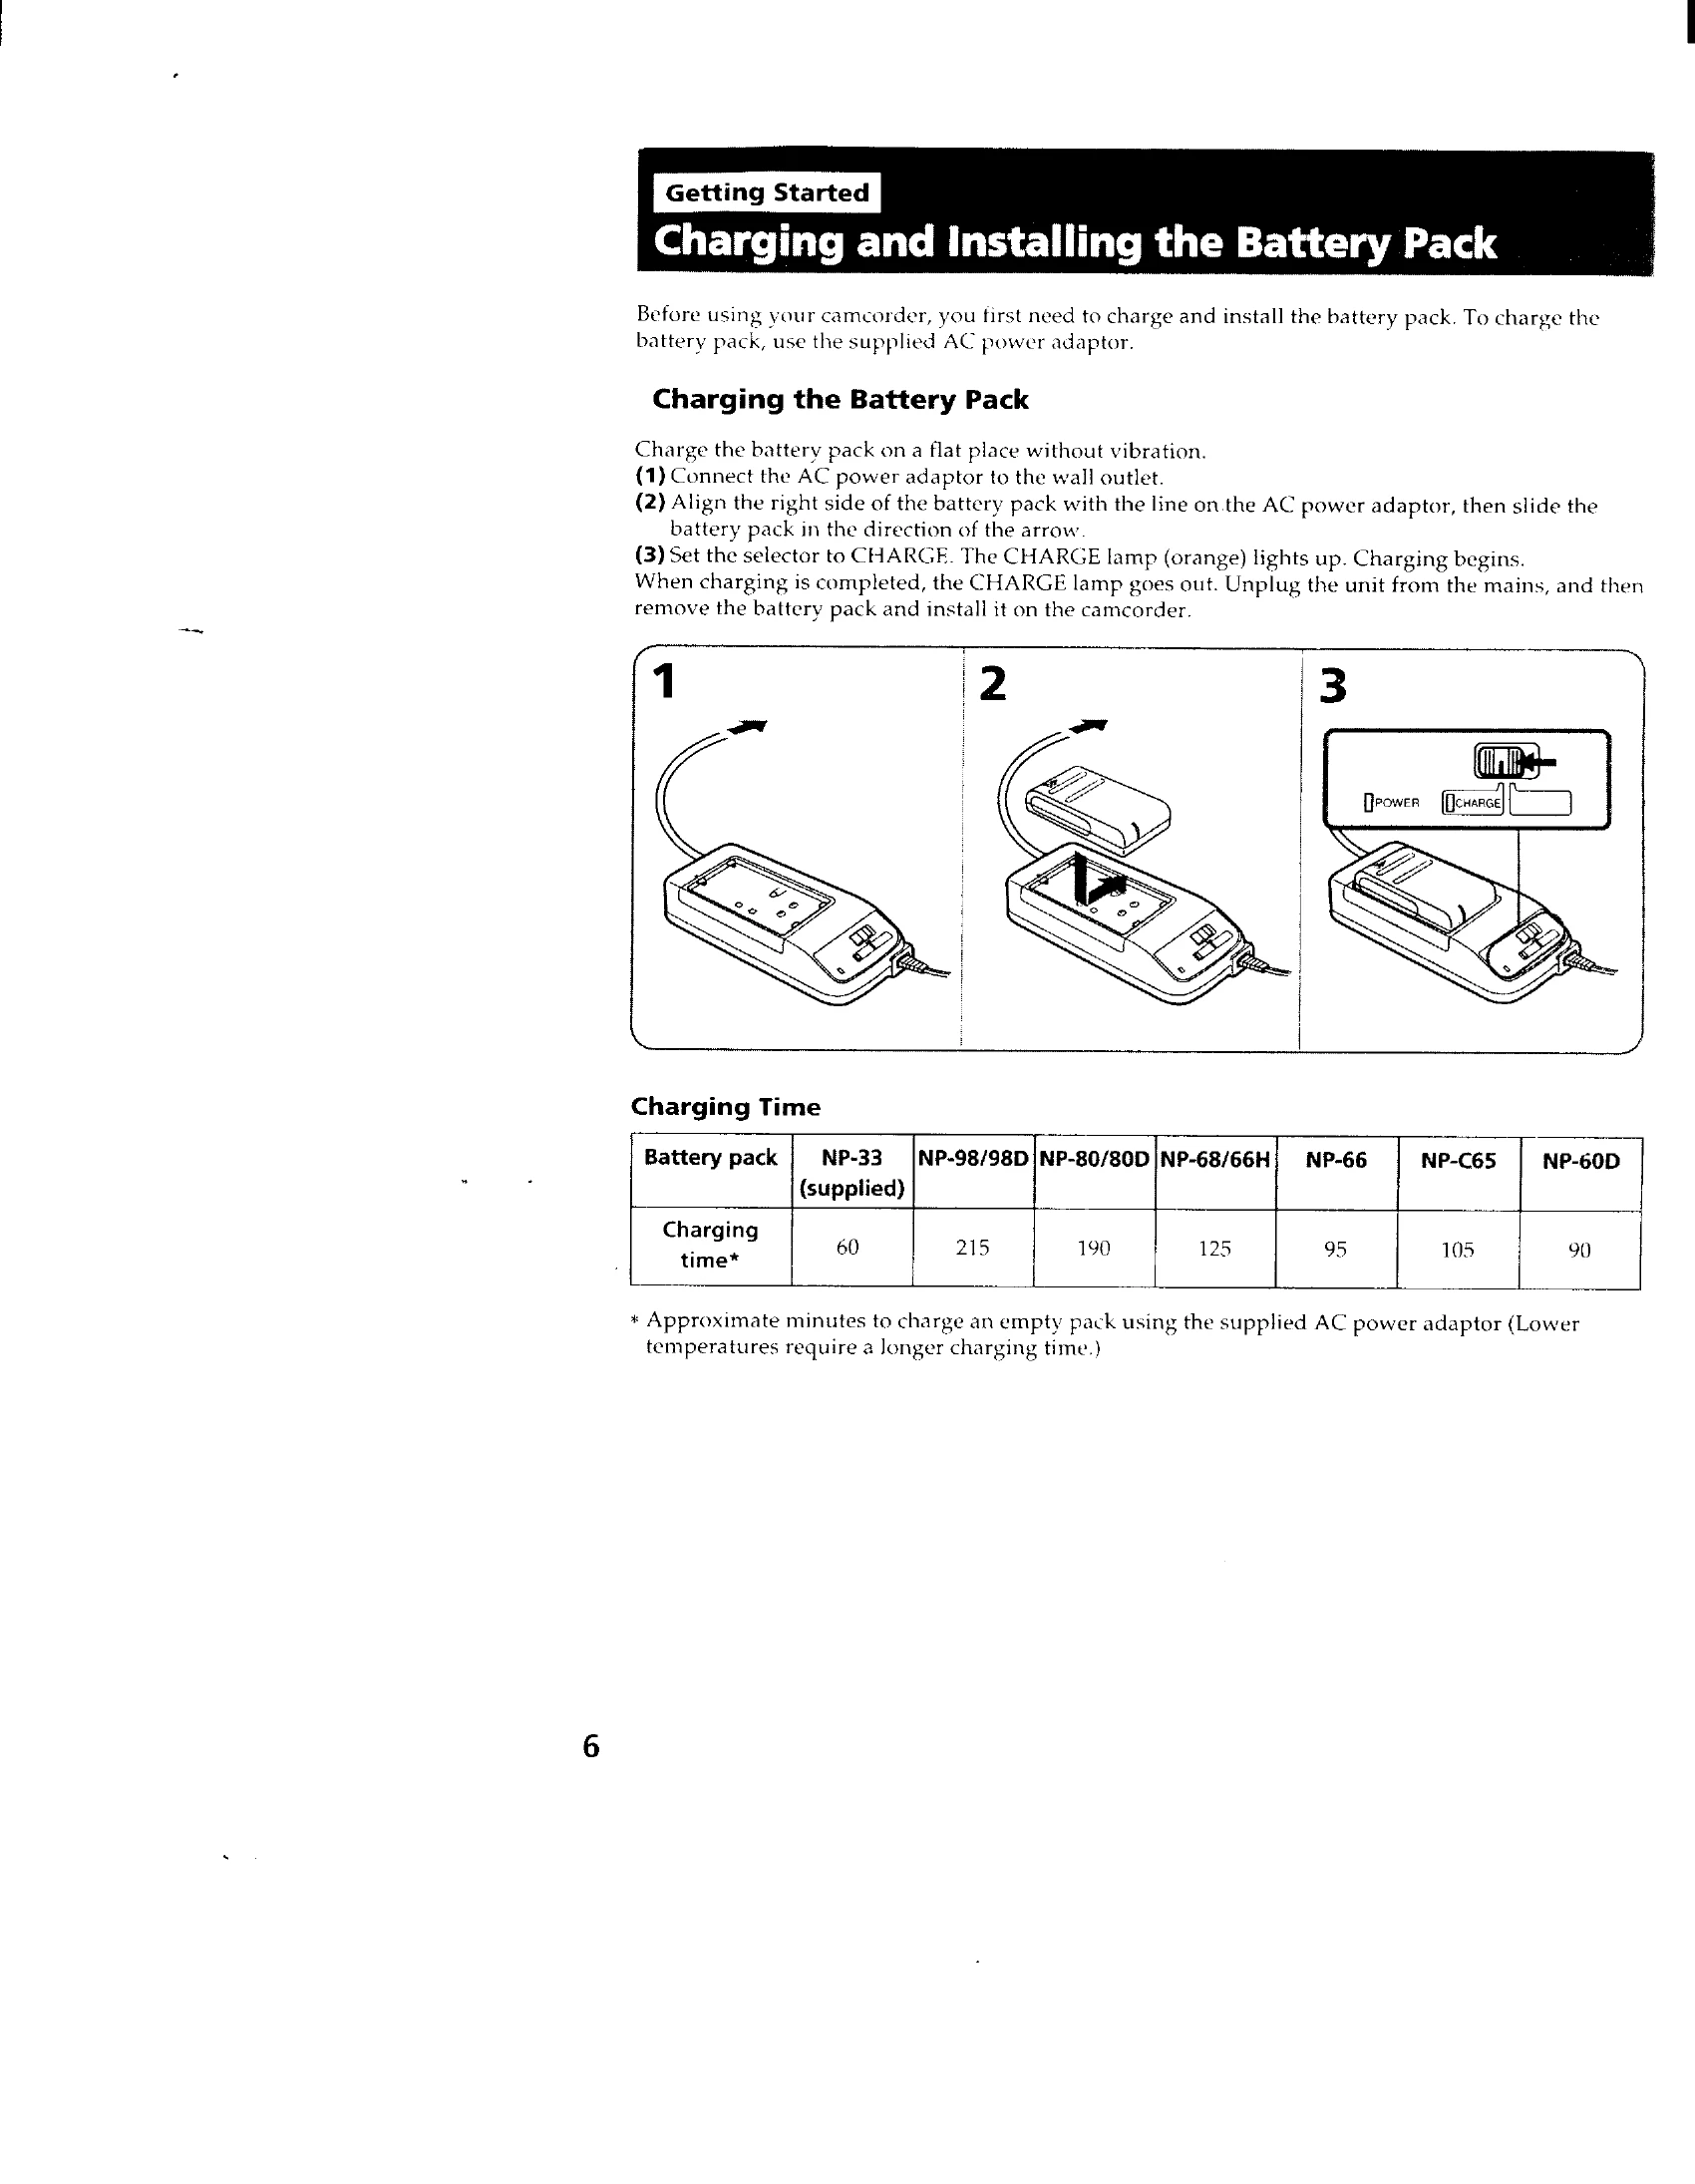
Charging the Battery Pack: Connect the AC power adaptor to the wall outlet and then to the battery pack. Set the selector to CHARGE. The CHARGE lamp will light up. Charging is complete when the lamp goes out.
Inserting a Cassette: Ensure a power source is installed. Slide EJECT to open the cassette compartment, insert the cassette with the window facing out, and close the compartment by pressing the PUSH mark.
Camera Recording: Set the POWER switch to CAMERA. Set START/STOP MODE to the desired setting. Turn STANDBY up and press START/STOP to begin recording. Press START/STOP again to pause and START/STOP again to finish. Turn STANDBY down and set POWER to OFF.
Using the Zoom Feature: Use the power zoom lever to change the size of the subject. Turn it fully for high-speed zoom, or lightly for a slow zoom.
Checking Recorded Picture: Use EDITSEARCH to review the last recorded scene. Press EDITSEARCH momentarily for a brief playback (Rec Review), or hold it down to go back to a desired scene.
Playback: Set the POWER switch to PLAYER. Insert the recorded tape and press PLAY. Use STOP, REW, FF, or PAUSE buttons for control.
Using Alternative Power Sources: The camcorder can be powered by the battery pack, house current (AC adaptor), alkaline batteries (in a battery case), or a car battery (DC pack).
Built-in Light: Slide the LIGHT switch to ON for manual operation or AUTO for automatic brightness adjustment.
Date/Time Recording: Press DATE(+) or TIME(NEXT) to record the date or time with the picture.