Brand: SONY
Category: Camcorder
Document Type: Manual
Language: EN
Brand: SONY
Category: Camcorder
Document Type: Manual
Language: EN
Uploaded: Aug. 10, 2025, 12:19 a.m.
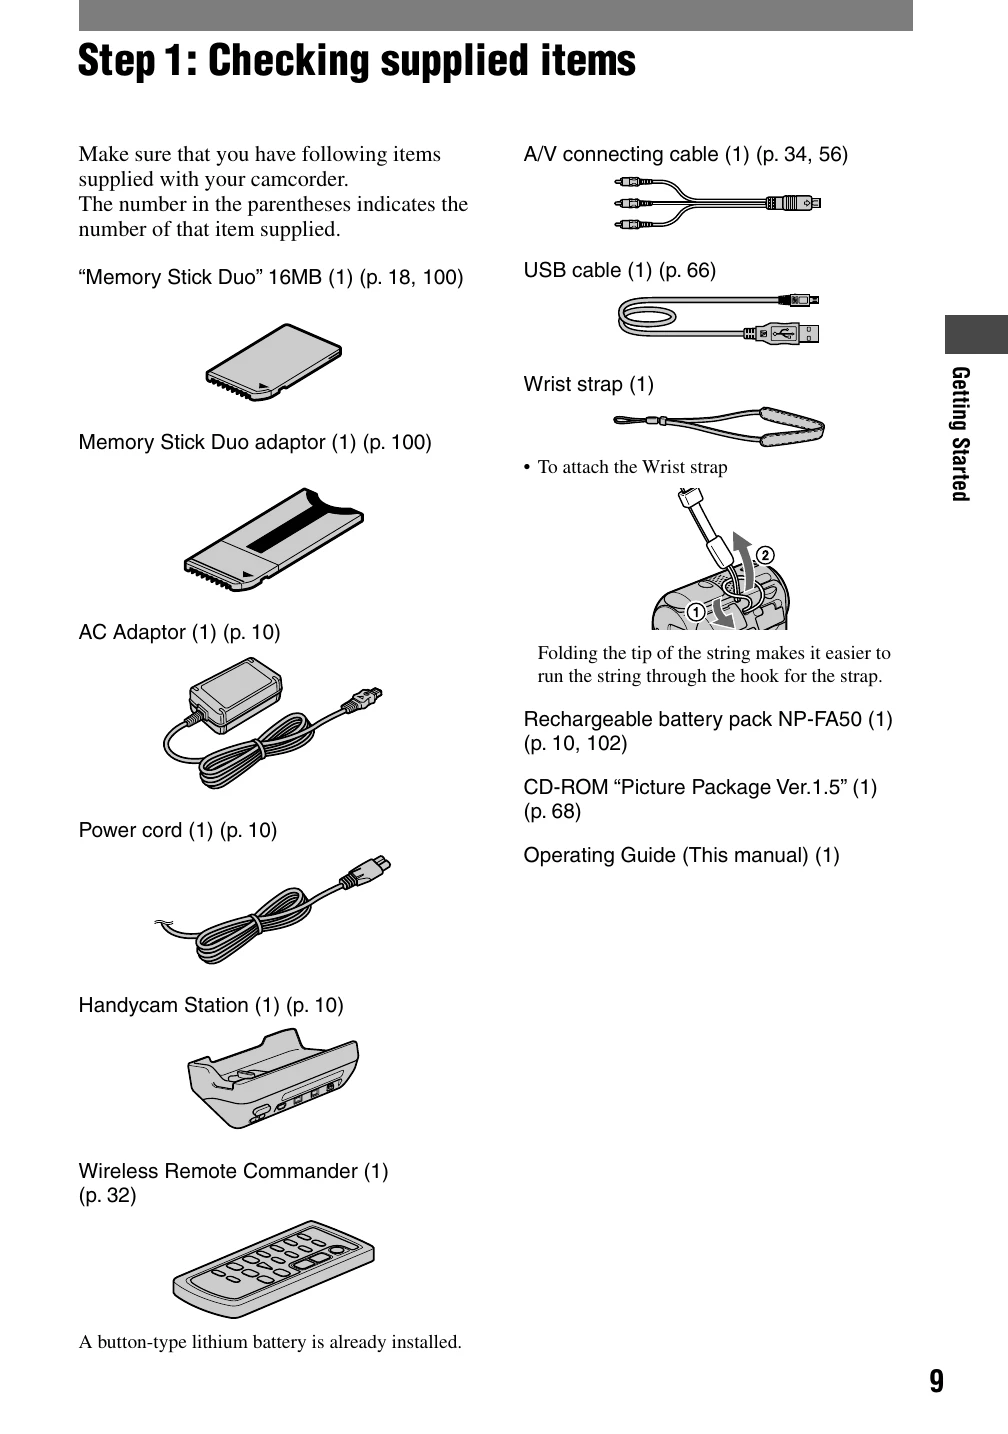
Step 1: Checking supplied items: Verify all included accessories are present.
Step 2: Charging the battery pack: Connect the AC Adaptor or Handycam Station to charge the battery.
Step 3: Turning the power on: Slide the POWER switch to the desired mode (CAMERA-TAPE, CAMERA-MEM, PLAY/EDIT).
Step 4: Adjusting the LCD panel: Open and rotate the LCD panel for optimal viewing.
Step 5: Using the touch panel: Interact with on-screen buttons for playback and settings adjustment.
Step 6: Setting the date and time: Configure the clock for accurate recording information.
Step 7: Inserting a tape or “Memory Stick Duo”: Load the recording media into the camcorder.
Recording: Slide POWER switch to CAMERA-TAPE/CAMERA-MEM, press EASY button, then press REC START/STOP or PHOTO.
Playback: Slide POWER switch to PLAY/EDIT, press EASY button, then use touch controls for playback.