Brand: SONY
Category: Camcorder
Document Type: Manual
Language: EN
Brand: SONY
Category: Camcorder
Document Type: Manual
Language: EN
Uploaded: Nov. 21, 2025, 6:15 p.m.
No warranty information found in the provided manual pages.
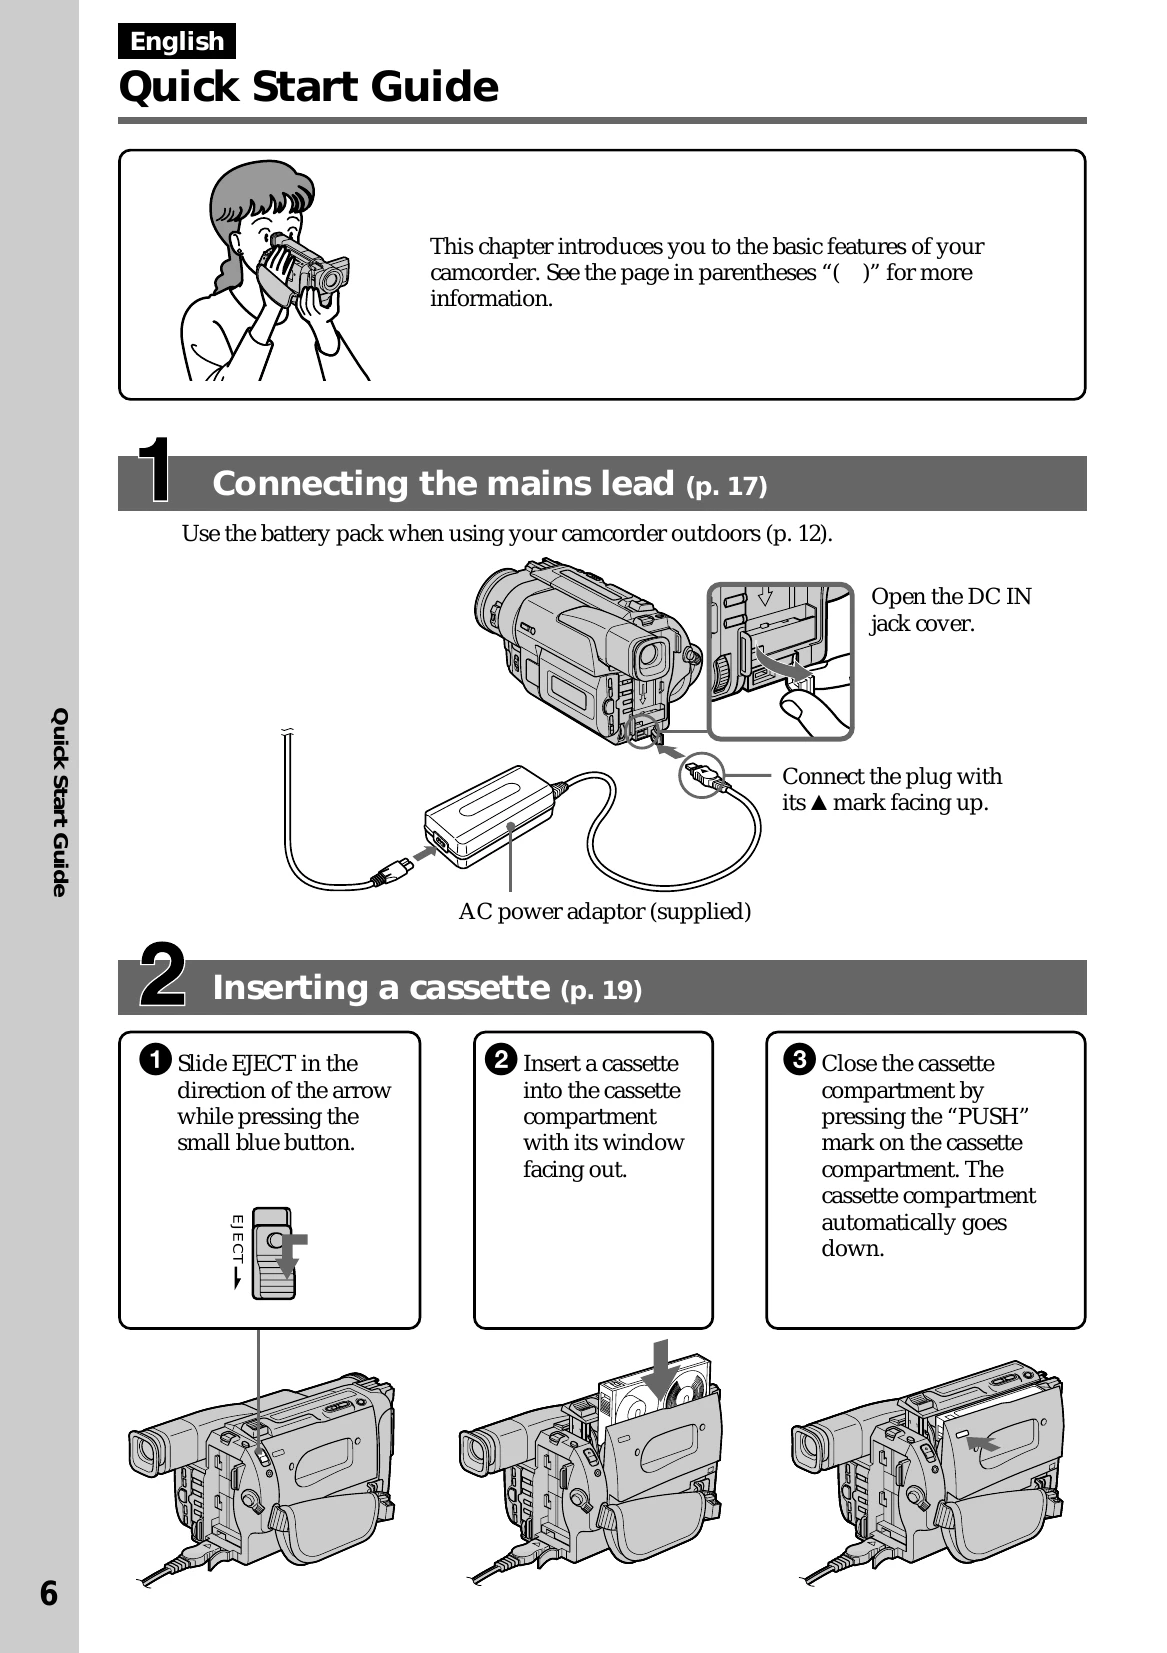
This chapter introduces you to the basic features of your camcorder.
Use the battery pack when using your camcorder outdoors. Connect the AC power adaptor to the camcorder's DC IN jack and then to the mains.
Slide EJECT to open the cassette compartment. Insert a cassette with its window facing out. Close the compartment by pressing the "PUSH" mark.
Remove the lens cap. Set the POWER switch to CAMERA. Open the LCD panel. Turn STANDBY to STANDBY. Press START/STOP to begin recording.
Set the POWER switch to VTR. Rewind the tape using REW. Press PLAY to start playback.
| Condition | Possible Cause | Solution |
|---|---|---|
| No picture appears on the LCD screen or in the viewfinder. | • The camcorder is not turned on. | • Set the POWER switch to CAMERA or VTR. |
| • The lens cap is on. | • Remove the lens cap. | |
| • The battery is exhausted. | • Replace or recharge the battery pack. | |
| • The cassette is not inserted correctly. | • Insert the cassette properly. | |
| • The LCD panel is closed and the viewfinder is not used. | • Open the LCD panel or use the viewfinder. | |
| Recording does not start. | • The POWER switch is not set to CAMERA. | • Set the POWER switch to CAMERA. |
| • The cassette is full or not inserted correctly. | • Replace with a new cassette or insert it properly. | |
| • The write-protect tab on the cassette is slid to the "safe" position. | • Slide the write-protect tab to expose the red mark. | |
| Picture is distorted or noisy. | • The recording tape is dirty or damaged. | • Use a new tape. |
| • The camcorder is exposed to strong light or reflected light. | • Avoid direct sunlight or strong light sources. | |
| • Interference from other electronic devices. | • Move the camcorder away from other devices. |