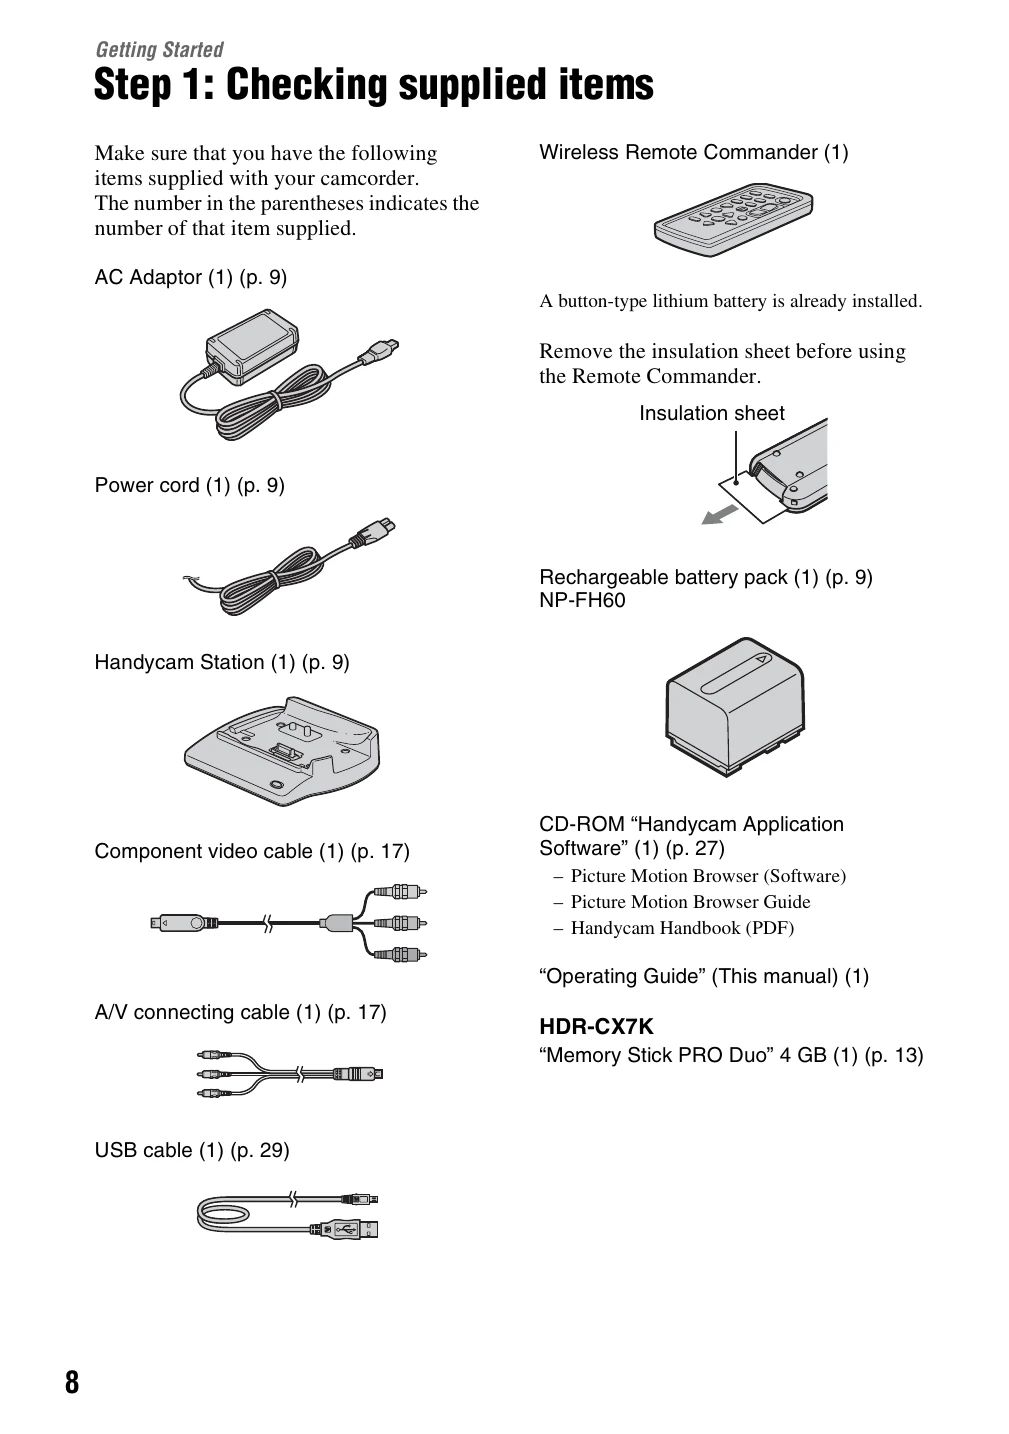
Checking supplied items: Verify all components are present (AC Adaptor, power cord, Handycam Station, battery pack, remote commander, cables, software CD-ROM).
Charging the battery pack: Attach the battery pack to the camcorder, then connect the AC Adaptor to the Handycam Station and a power outlet. The /CHG lamp indicates charging status.
Turning the power on and setting date/time: Slide the POWER switch. For first-time use, the CLOCK SET screen appears. Set the geographical area, date, and time.
Inserting a "Memory Stick PRO Duo": Open the LCD panel, slide the POWER switch to turn on movie mode, open the Memory Stick Duo cover, insert the Memory Stick Duo, and close the cover. Confirm the creation of the Image Database File.
Recording/Playback:
Recording: Slide the POWER switch to activate the movie or still image mode. Press START/STOP to begin and end recording movies. Lightly press PHOTO to focus and fully press to capture still images.
Playback: Slide the POWER switch to turn on the camcorder. Press the VIEW IMAGES button to see thumbnails. Select movies or still images to play back.
Adjusting sound volume: During movie playback, use the OPTION menu to adjust volume.
Playing on TV: Connect the camcorder to a TV using HDMI or A/V cables. Ensure the TV input is set correctly and adjust camcorder output settings.