Brand: SONY
Category: Camcorder
Document Type: Manual
Language: EN
Brand: SONY
Category: Camcorder
Document Type: Manual
Language: EN
Uploaded: Aug. 10, 2025, 12:21 a.m.
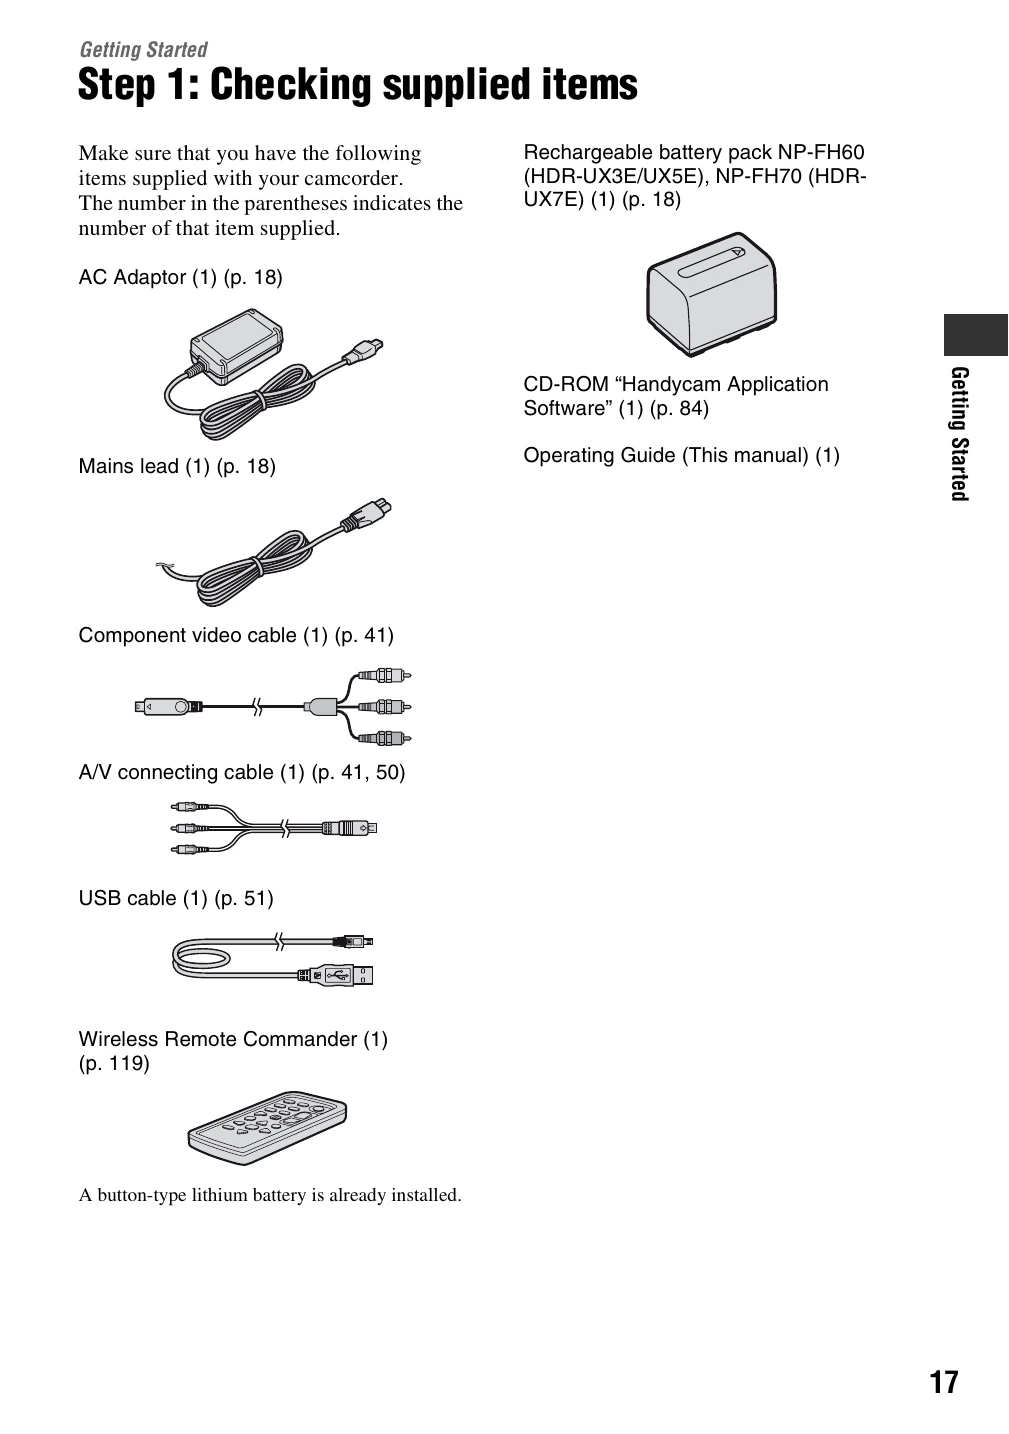
Step 1: Checking Supplied Items
Ensure all accessories are present: AC Adaptor, mains lead, battery pack, CD-ROM, operating guide, component video cable, A/V connecting cable, USB cable, and wireless remote commander.
Step 2: Charging the Battery Pack
1. Set the POWER switch to OFF (CHG).
2. Attach the battery pack to the camcorder.
3. Connect the DC plug of the AC Adaptor to the camcorder's DC IN jack.
4. Connect the mains lead to the AC Adaptor and the wall socket. The CHG lamp indicates charging status.
5. Disconnect the AC Adaptor when charging is complete.
Step 3: Turning the Power On and Setting the Date and Time
1. Slide the POWER switch to turn on the camcorder. The CLOCK SET screen appears.
2. Select the geographical area, then [NEXT].
3. Set [SUMMERTIME], then [NEXT].
4. Set the Year [Y] with the A/V buttons, then [NEXT].
5. Set the Month [M] with the A/V buttons.
6. Set the Day [D], hour, and minute, then [NEXT].
7. Confirm the clock setting and touch [OK].