Brand: SONY
Category: Video Camera
Document Type: Manual
Language: EN
Brand: SONY
Category: Video Camera
Document Type: Manual
Language: EN
Uploaded: Aug. 10, 2025, 12:22 a.m.
Manual Publish Date: 2011
SONY is not liable for damages resulting from unit failure during or after the warranty period.
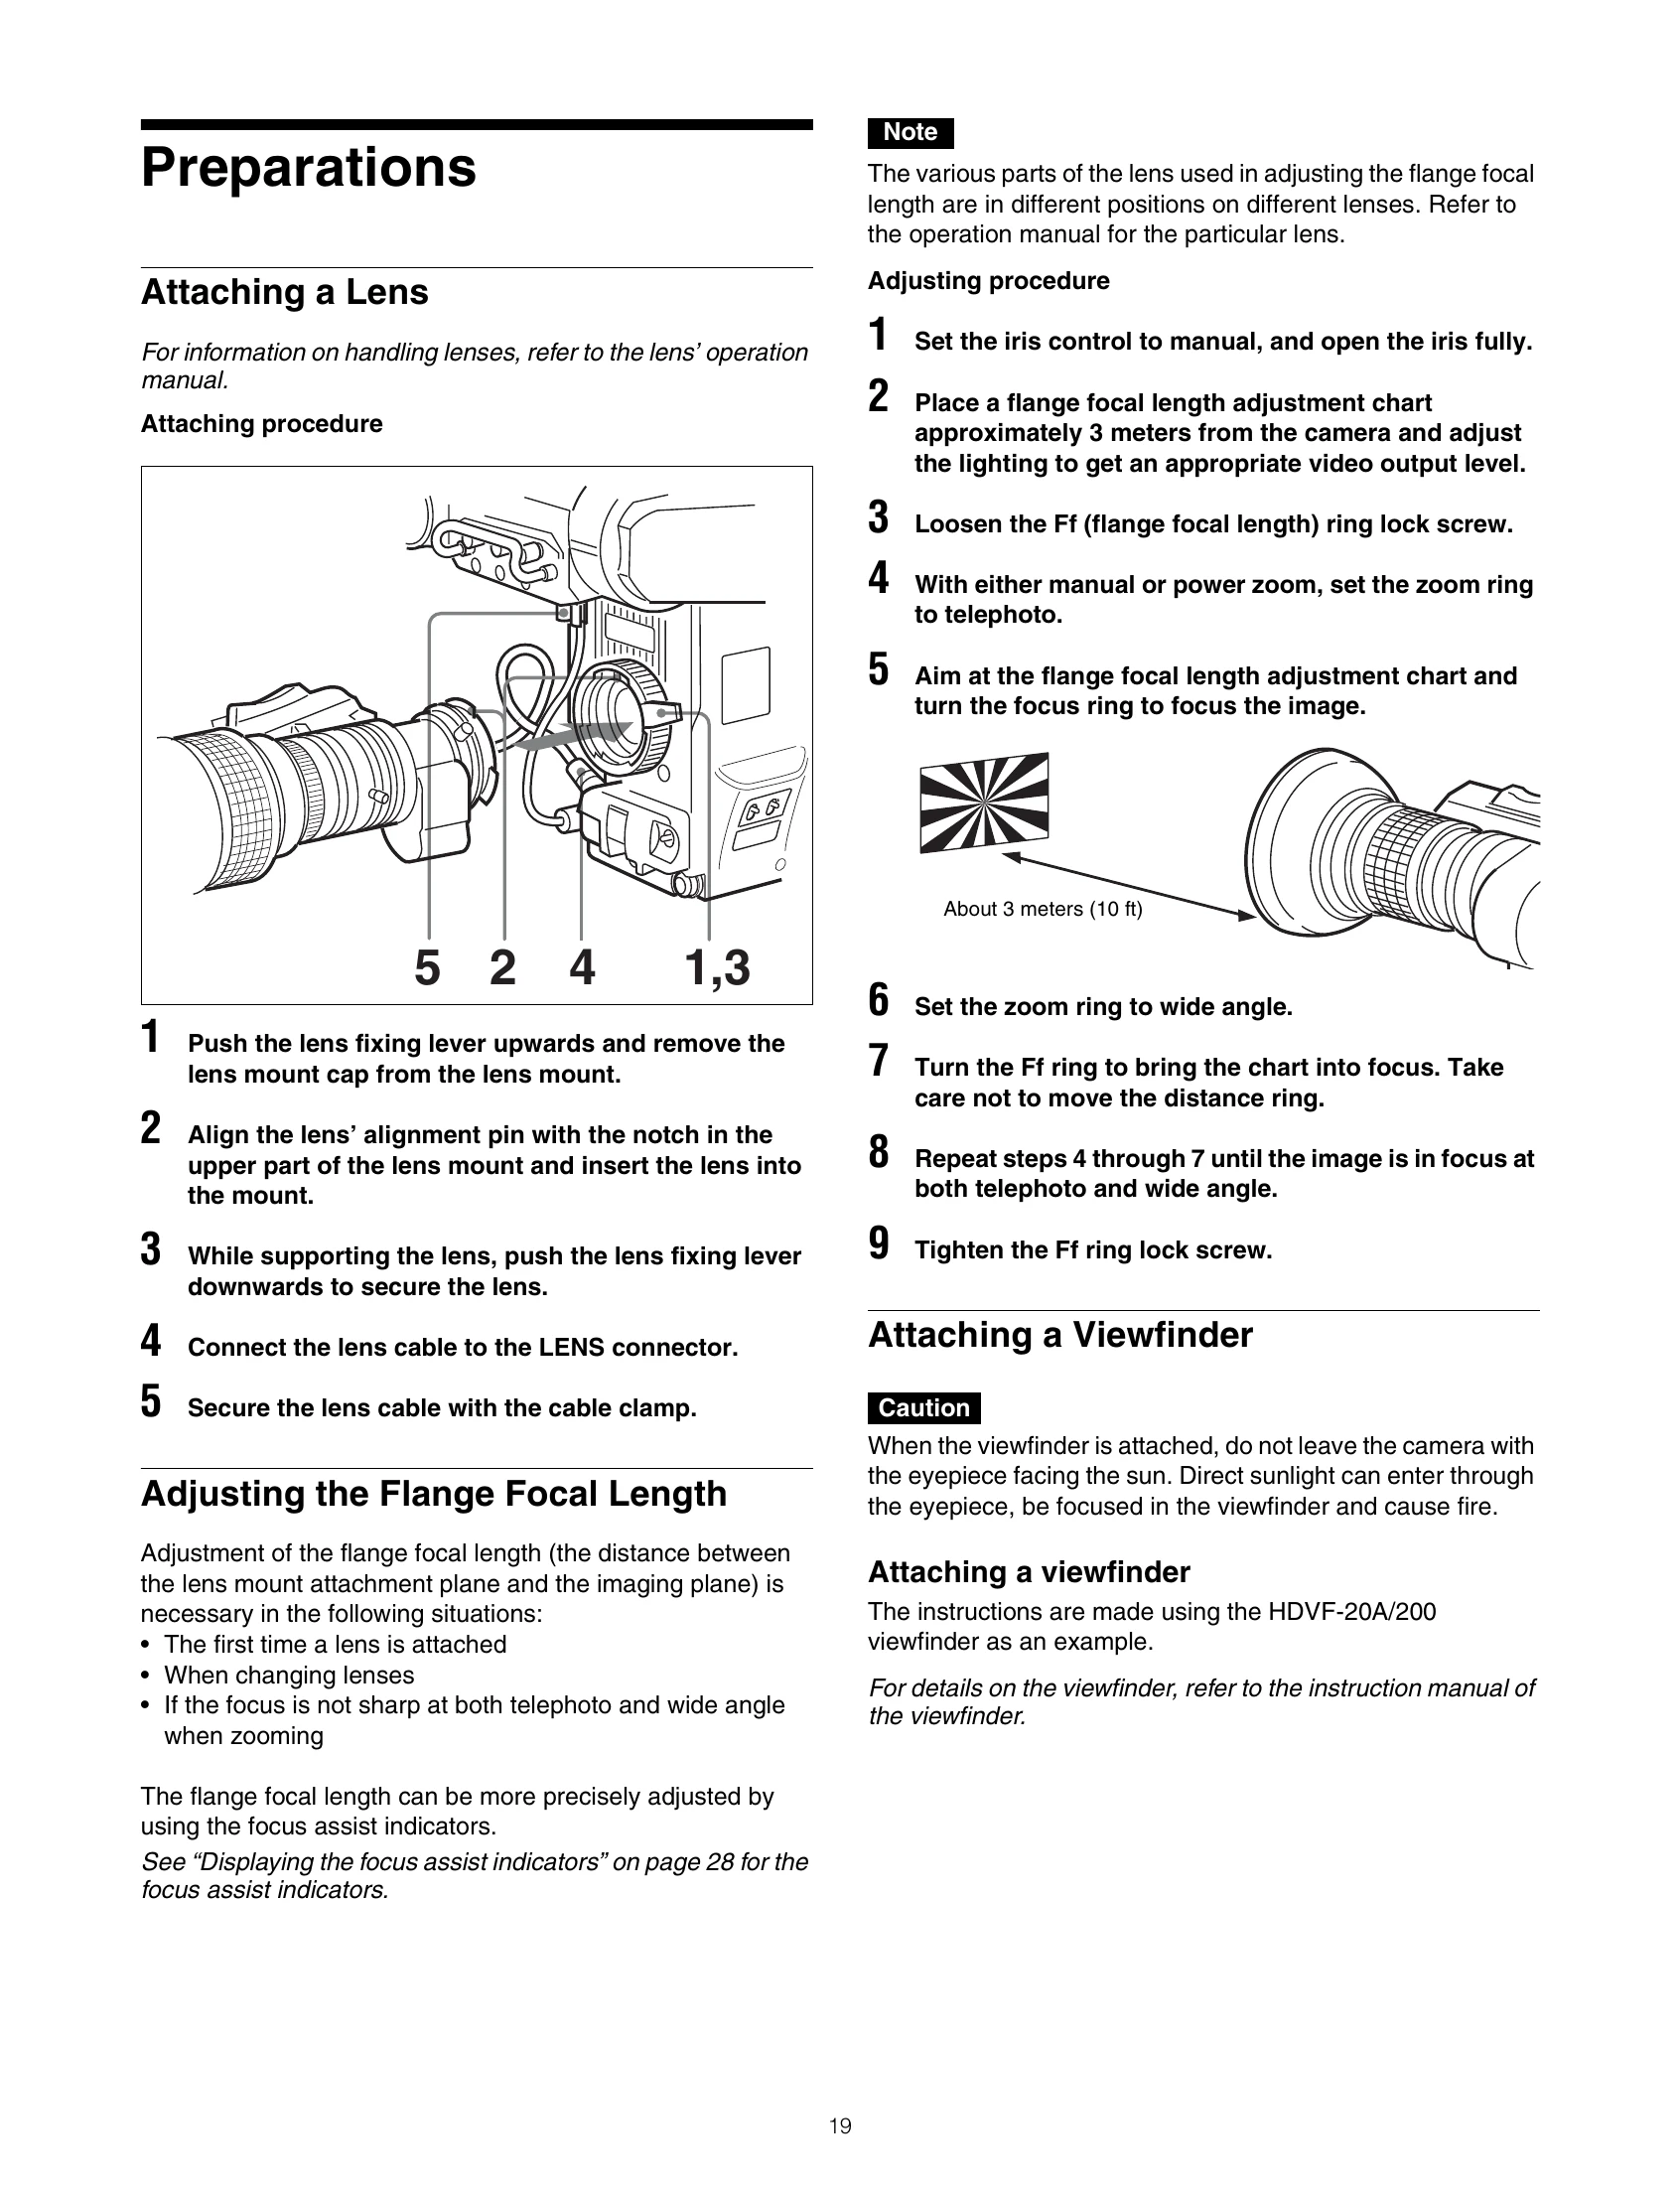
Attaching a Lens: Push the lens fixing lever upwards, align the lens's alignment pin with the notch, insert the lens into the mount, and push the fixing lever downwards to secure it. Connect the lens cable to the LENS connector and secure it with the cable clamp.
Adjusting the Flange Focal Length: Set the iris to manual and open it fully. Place a flange focal length adjustment chart about 3 meters away. Adjust lighting. Loosen the Ff ring lock screw. Set the zoom to telephoto, focus the image on the chart, then set the zoom to wide angle and adjust the Ff ring to bring the chart into focus. Repeat until focus is sharp at both telephoto and wide angle. Tighten the Ff ring lock screw.
Attaching a Viewfinder: Slide the viewfinder in the direction of the arrow. Loosen the viewfinder left-right positioning ring, slide the viewfinder to a comfortable position, and tighten the ring. Connect the viewfinder cable to the VF connector and the microphone cable to the MIC 1 IN connector.
Adjusting the Shoulder Pad Position: Raise the shoulder pad lock lever. Slide the shoulder pad backward or forward for best balance. Move the lever down to lock the shoulder pad.
Mounting the Camera to a Tripod: Use a VCT-14 Tripod Attachment. Select an appropriate hole for balance and ensure the screw size matches the tripod.