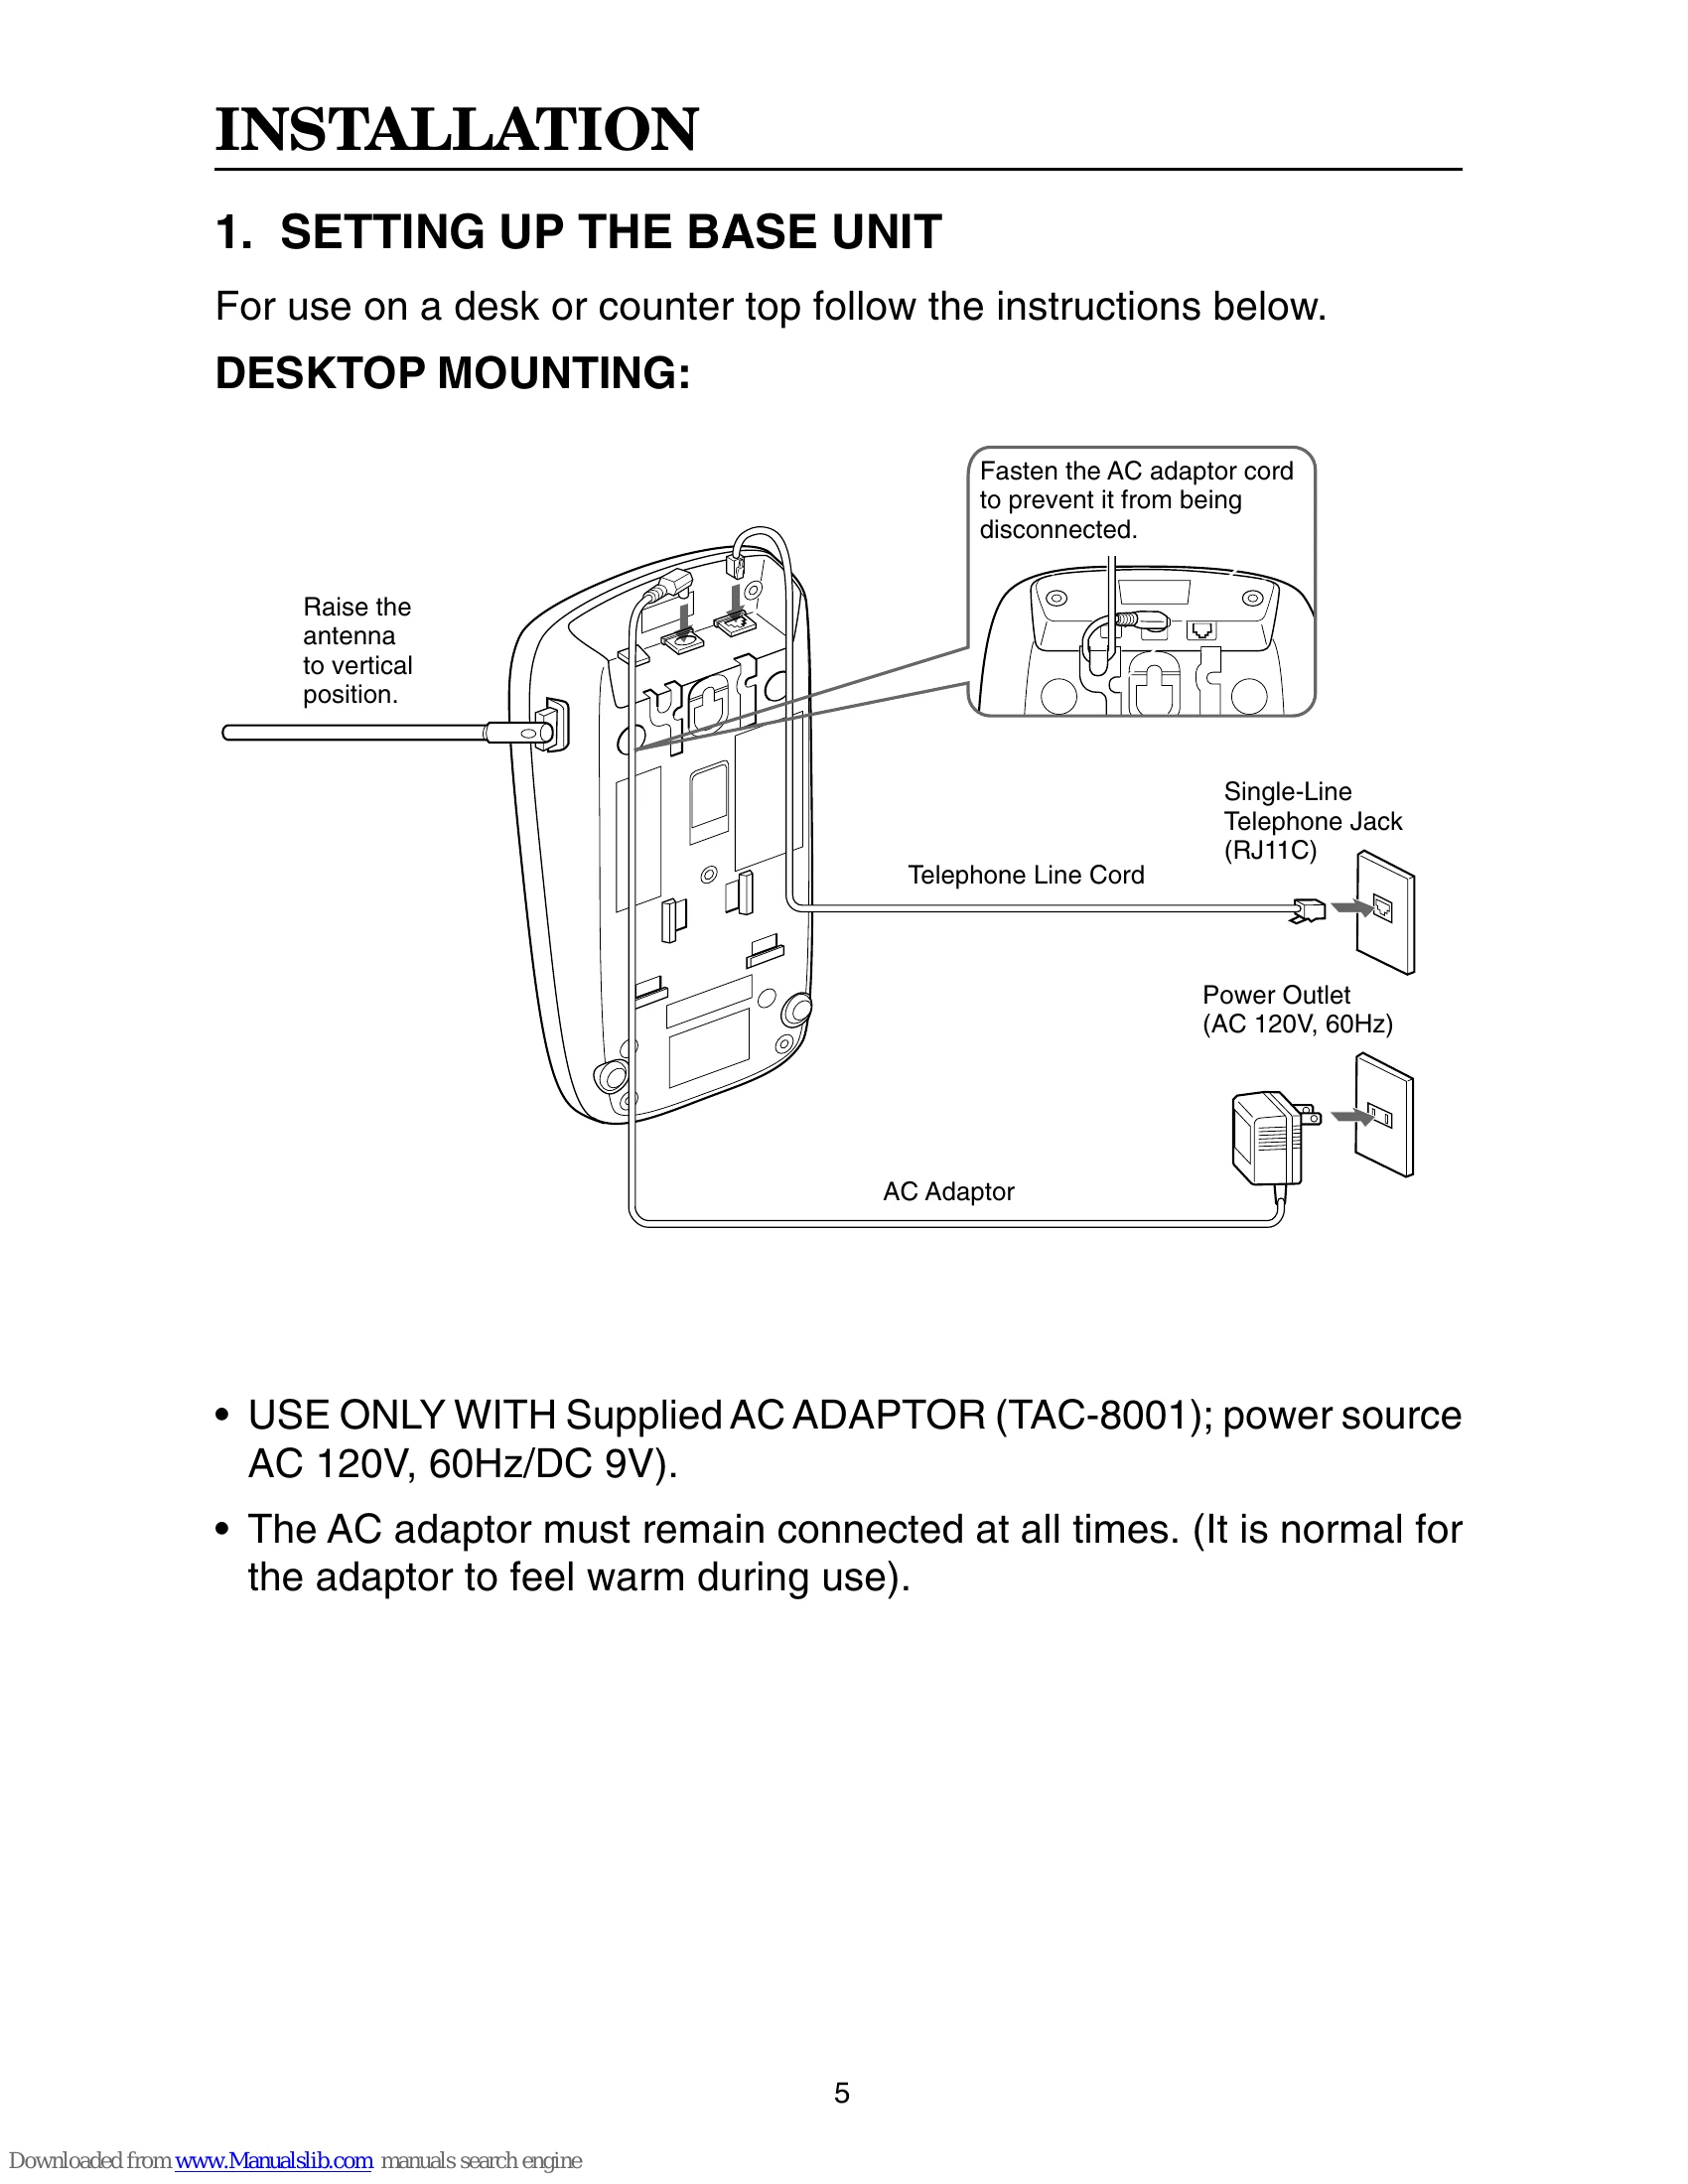
Brand: TOSHIBA
Category: Telephone
Document Type: Manual
Language: EN
Brand: TOSHIBA
Category: Telephone
Document Type: Manual
Language: EN
Uploaded: Nov. 21, 2025, 6:17 p.m.
One year limited warranty on parts and labor from date of original retail purchase.
| PROBLEM | SOLUTION |
|---|---|
| The handset battery does not charge. | • The charging contacts of the handset and base are not clean. →Clean them with a dry cloth. • The battery connector is not connected with correct polarity. →Install the battery correctly. • The battery is several years old. →Replace with a new battery. |
| Battery becomes low quickly. | • The battery was not fully charged at the initial charging. →Charge the battery for 12 to 16 hours without any interruption. • The battery is several years old. →Replace with a new battery. |
| Can not make or receive calls. Can not hear the dial tone. | • The AC adaptor of the base unit is disconnected. →Plug the AC adaptor into the base unit and the AC 120V outlet. • The battery is low. →Place the handset on the base unit to recharge. • Telephone line cord is disconnected. →Check both ends of the telephone jack. • The previous call was not disconnected. →Press TALK to disconnect the line. • Trouble with the telephone line. →Check an extension line. • Outlet used is controlled by a wall switch in its OFF position. →Relocate to another outlet. • The handset is too far from the base unit. →Bring the handset near the base unit. • Dial setting needs to be changed. →Press and hold FLASH then choose the appropriate setting. |
| TALK/BATT LOW LED blinks in the standby mode. | • The battery is low. →Recharge the battery. |
| The handset does not ring or receive a page. | • The handset is located too far away from the base or the battery has been discharged. →Return the handset to charge when your call is finished. • The digital security code is changed. →Remove the handset from the base unit and press and hold PAGE. While the handset is emitting, return the handset to the base unit. • The battery is low. →Place the handset on the base unit to recharge. |
| CHARGE LED does not light when the handset is placed on the base. | • The charging contacts of the handset and the base are not clean. →Clean them with a dry cloth. • The AC adaptor of the base unit is disconnected. →Plug the AC adaptor firmly into the base unit and AC 120V outlet. • The handset is not on the base. →Place the handset on the base properly |
| Noise or interference. | • The handset is too far from the base unit. →Bring the handset near the base unit. • The battery is low. →Place the handset on the base unit to recharge. • The base unit is located in a place with high interference. →Relocate to another outlet. • Interference from TV, Microwave oven, Computer and electrical appliances. →Press CH to select a clearer channel, or relocate the base unit. • Excessive line noise. →Check with another telephone. • The volume control is set too high. →Reduce volume to lower setting. • The base antenna is not in a vertical position. →Lift the antenna to a vertical position. |
| The unit does not operate properly. | • The phone needs to be reset. →Disconnect the AC adaptor and reconnect it after a few seconds. |
| When the handset is returned to the base unit with the volume level set at High, a momentary squeal or howling sound may sometimes be heard. | • This is normal. →It may be prevented by changing the volume setting to Medium or Low before returning the handset to the base unit. |