Brand:
Whirlpool
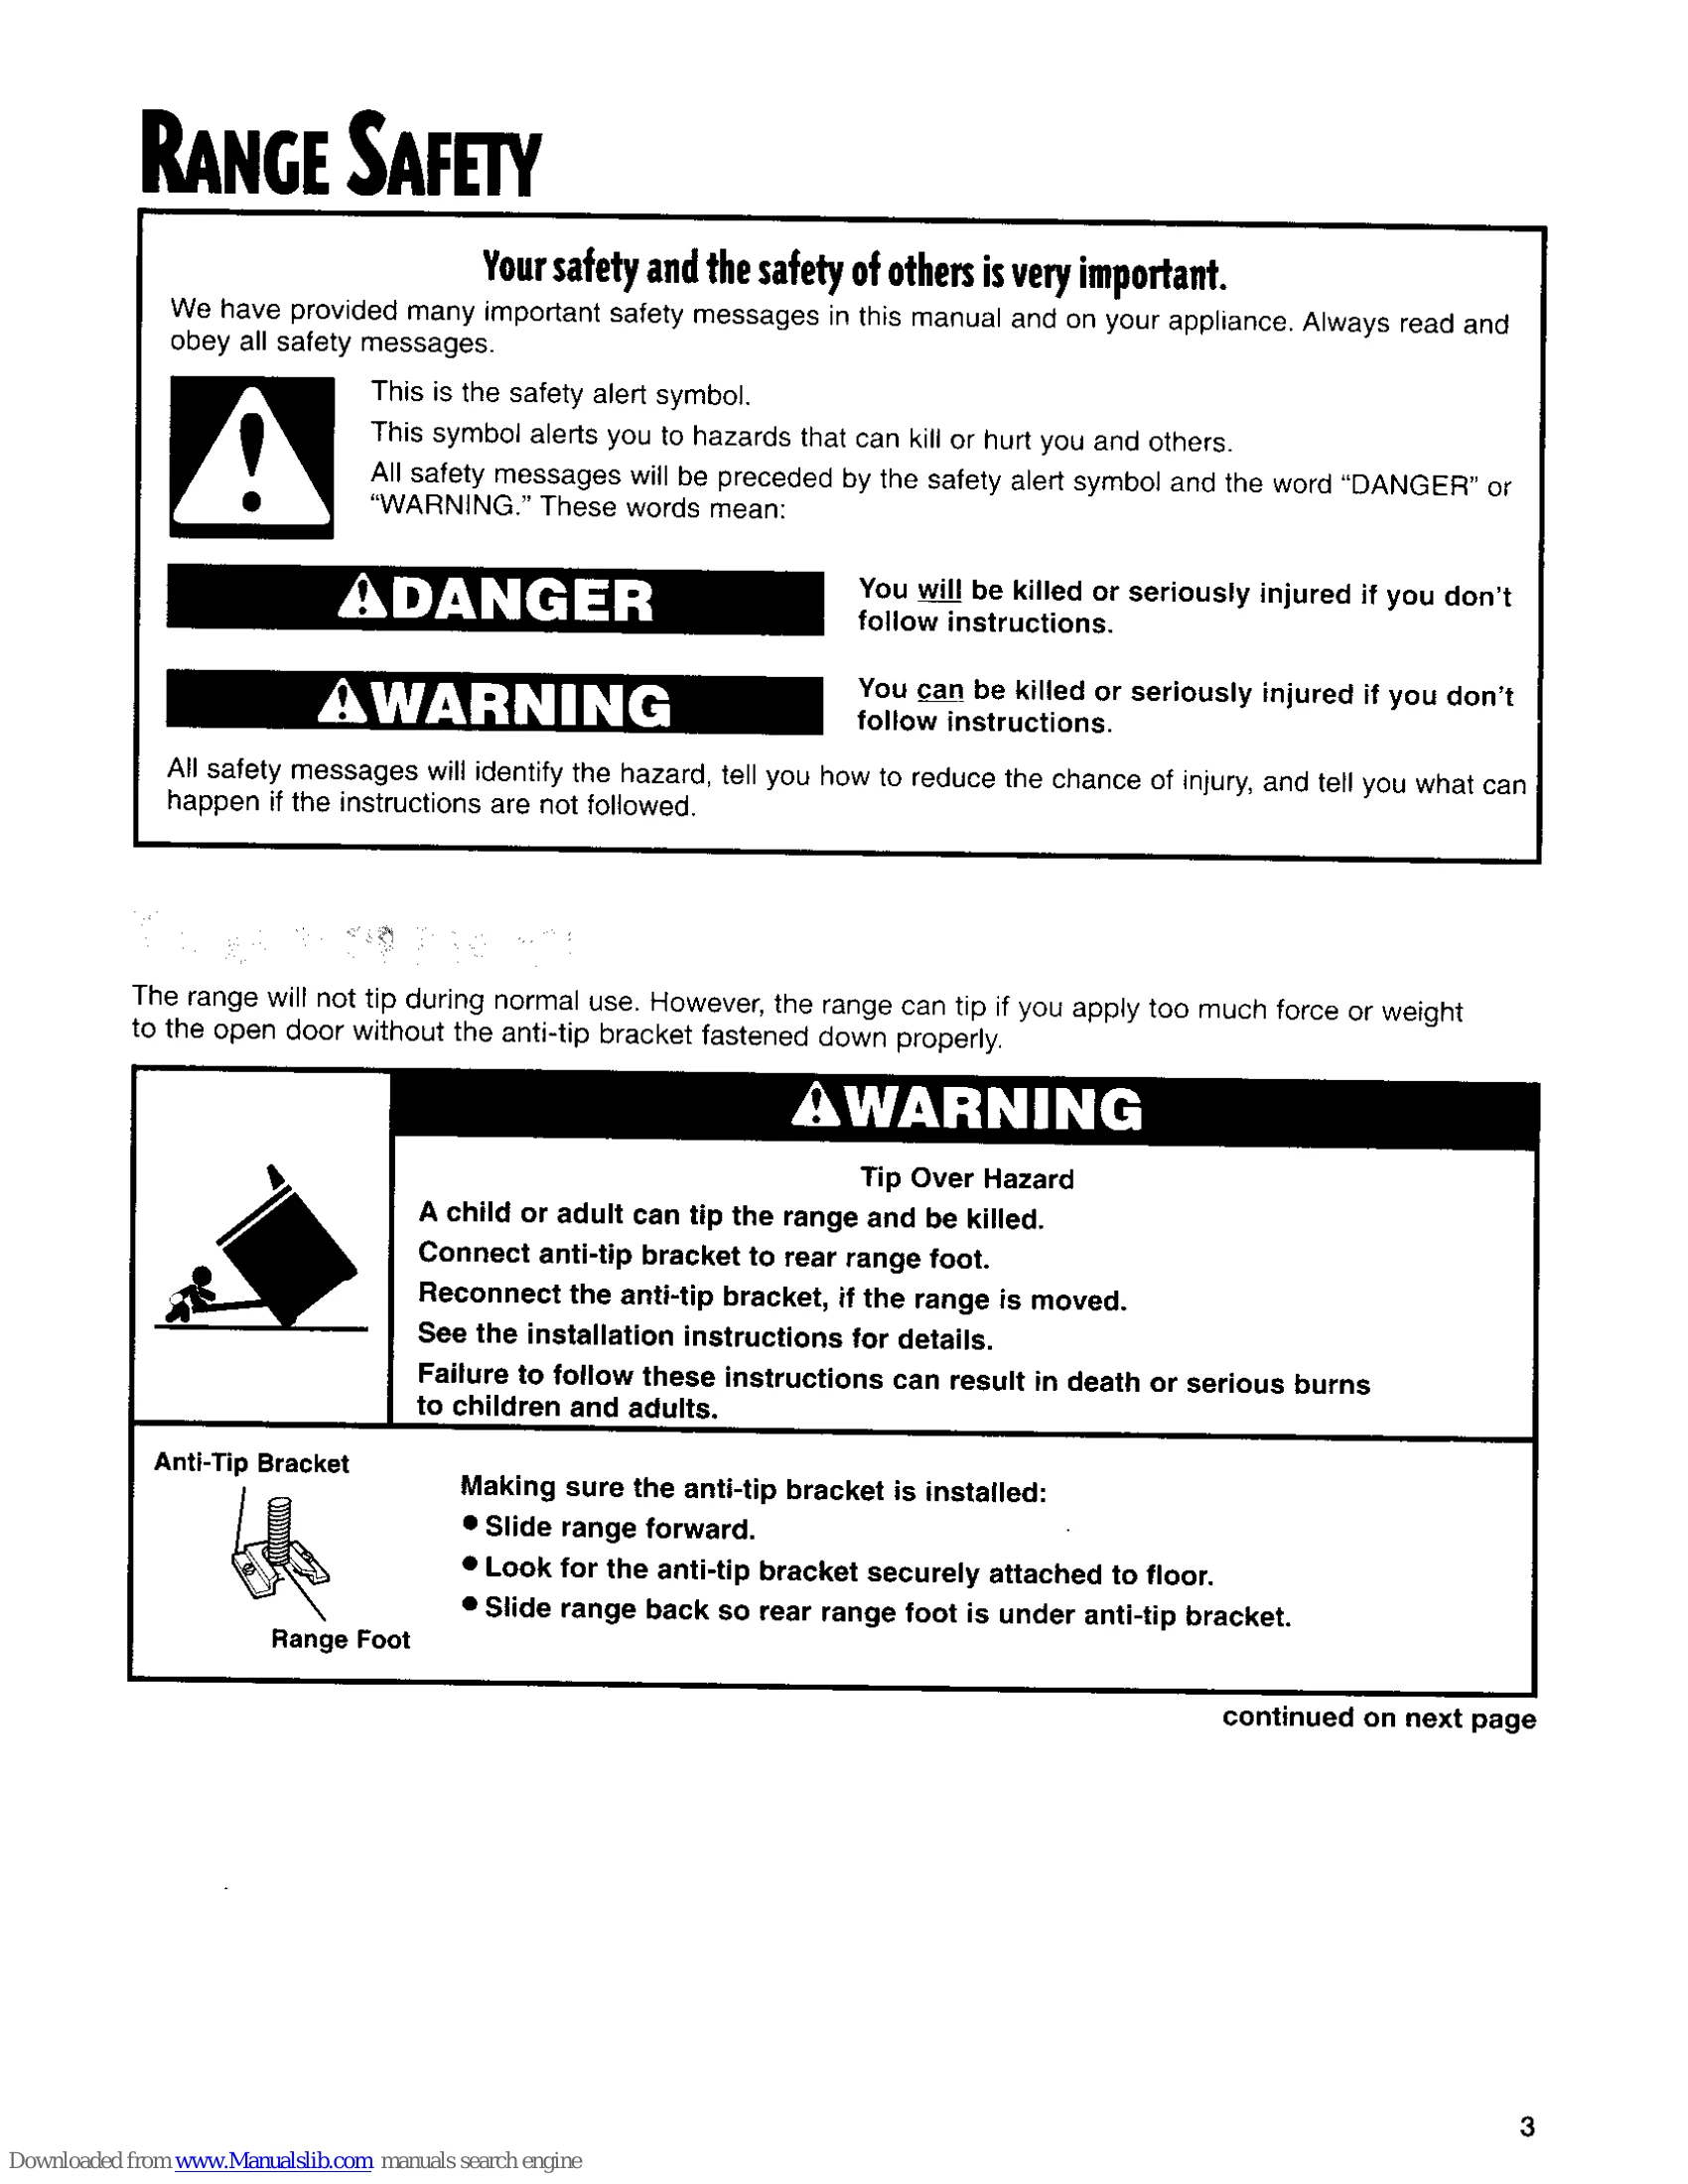
Category: Ranges
Document Type: Manual
Language: EN
Brand:
Whirlpool
Category: Ranges
Document Type: Manual
Language: EN
Uploaded: Nov. 21, 2025, 6:42 p.m.
One-year limited warranty covering parts and labor for defects in materials or workmanship.
| PROBLEM | CAUSE |
|---|---|
| Nothing works | |
| • The range is not plugged into a properly grounded outlet (120V polarized). • The range is not properly connected to the gas supply. Contact a designated service technician to reconnect the range to the gas supply. (See the Installation Instructions.) • You have blown a household fuse or tripped a circuit breaker. |
|
| The oven does not work | |
| • When using the oven for the first time, it is necessary to light the surface burners first to purge the gas lines. • You have not set the control knob correctly. Refer to "Using Your Range" section. • The main or regulator gas shutoff valve is in the off position. (See the Installation Instructions.) |
|
| Burner makes muffled ticking noise when in use | • This is normal. This sound occurs when the oven burner cycles on and off to insure proper oven temperature. |
| The burner fails to light | • The ignition system is broken. Contact a designated service technician to replace it. • You have blown a household fuse or tripped a circuit breaker. |
| The burner flames lift away from the ports, are yellow, or are noisy | • The air/gas mixture is incorrect. Contact a designated service technician to check the air/gas mixture or see the Installation Instructions. |
| SURFACE BURNERS | |
| The burner fails to light | • The control knob is not set correctly. Push in the control knobs before turning them. Make sure the control knob is turned to the LIGHT position. (See page 6.) • You have blown a household fuse or tripped a circuit breaker. • The burner ports may be clogged. Clean them with a straight pin. (See page 31.) |
| The burner flames are uneven | • The burner ports may be clogged. Clean them with a straight pin. (See page 31.) |
| The burner flames lift off the ports, are yellow, or are noisy when turned off | • The burner caps may not be positioned properly. (See page 31.) • The burner needs cleaning. (See page 30 and 31.) • The air/gas mixture is incorrect. Contact a designated service technician to check the air/gas mixture or see the Installation Instructions. |
| The burner makes a popping noise when on | • The burner is wet from washing. Let it dry. |
| WHEN SELF-CLEANING YOUR OVEN | |
| The Self-Cleaning cycle will not work | • You did not press START/ENTER. • You have set a delayed start time. Wait for the start time to be reached or cancel and reset the control. |
| COOKING RESULTS | |
| Cookware not level on cooktop (Check to see if liquids are level in cookware) | • Level the range. (See the Installation Instructions.) • Use cookware with a flat bottom. |
| Excessive heat on cooktop in areas around cookware | • Choose cookware the same size or slightly larger than the burner flame. |
| The oven temperature seems too low or too high | • Adjust the oven temperature control. (See "Adjusting the oven temperature control" section.) |
| Slow baking or roasting | • Increase baking or roasting time. • Increase temperature 25°F (14°C). • Preheat oven to selected temperature before placing food in when preheating is recommended. • Choose bakeware that will allow 2 inches (5 cm) of air space around all sides. • Open oven door to check food when timer signals shortest time suggested in recipe. • Oven peeking can make cooking times longer. |
| Baked items too brown on bottom | • Preheat oven to selected temperature before placing food in oven. • Choose bakeware that will allow 2 inches (5 cm) of air space around all sides. • Position rack higher in oven. • Decrease oven temperature 15° to 25°F (8° to 14°C). |
| Unevenly baked items | • Level the range. • Bake in center of oven with 2 inches (5 cm) of space around each pan. • Check to make sure batter is level in pan. |
| Crust edge browns before pie is done | • Shield edge with foil. |
| DISPLAY MESSAGES | |
| The display is showing "PF" | • There has been a power failure. Press OFF/CANCEL to clear the display, then reset the clock. (See page 11.) |
| "F" followed by a number shows on the display | • Press OFF/CANCEL to clear the display. If an "F" code appears again, call for service. (See "Requesting Assistance or Service" on page 36.) |