Brand: YAMAHA
Category: Audio/Video
Document Type: Manual
Language: EN
Brand: YAMAHA
Category: Audio/Video
Document Type: Manual
Language: EN
Uploaded: Nov. 21, 2025, 7:25 p.m.
Service manual provides technical information for authorized personnel; no warranty information is explicitly stated.
TO SERVICE PERSONNEL
FRONT/REAR PANELS
SPECIFICATIONS
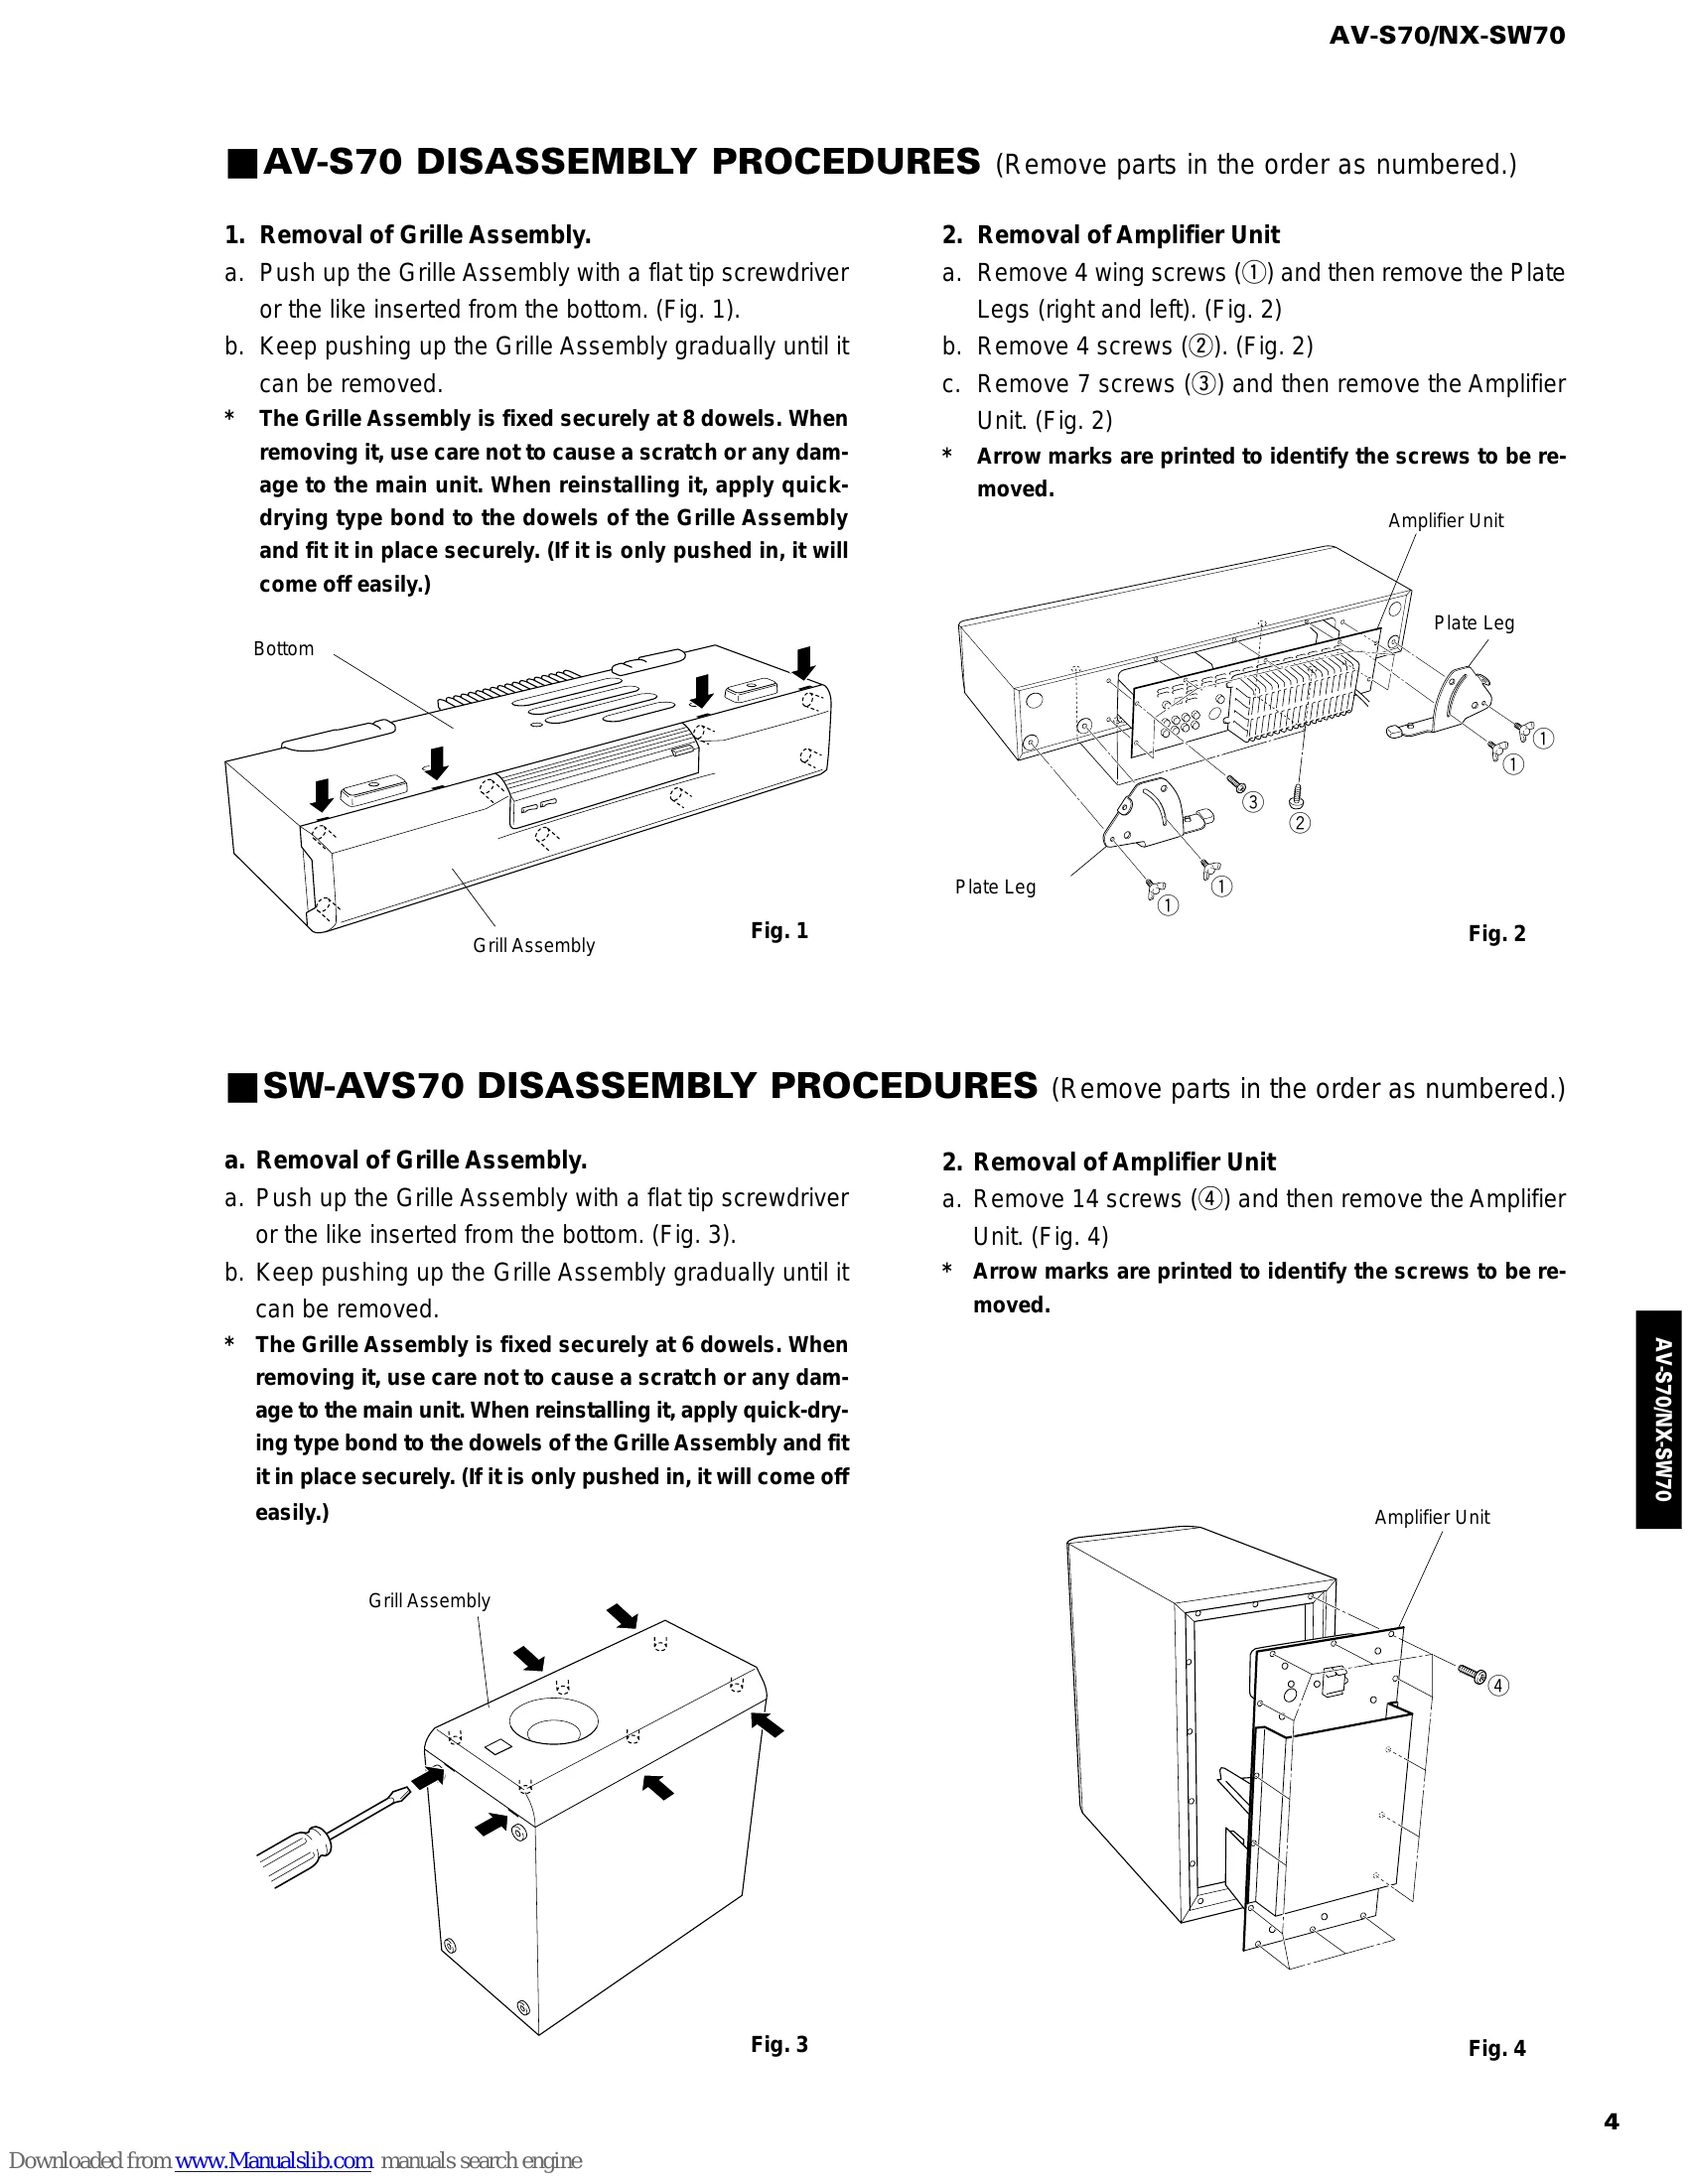
DISASSEMBLY PROCEDURES
TEST PROGRAM MODE (AV-S70)
DSP DIAG MODE (Self-diagnosis)
Details of DIAG menu
IC DATA
BLOCK DIAGRAM
PARTS LIST
REMOTE CONTROL TRANSMITTER
| Display | Function |
|---|---|
| 04 DSP Diag | The DSP DIAG (self-diagnosis) mode is initiated. (Refer to page 7 for the details.) |
| 05 Ver-A1.08 | Microprocessor version / date display Example of microprocessor display 05 Ver-A1.08 Example of microprocessor date display 05 '99.10.15 What is displayed varies depending on the microprocessor software. |
| 06 SUM[4730] | Check sum calculation display / re-calculation |
| 07 PrCan-OFF | All protection cancellation function ON/OFF |
| 08 Pr!C_P_S_ | Protection operation history display / clear : Center unit amplifier voltage F: Power circuit voltage : Switch side : Normal X: Abnormal |
| 09 Cors- St. | ROM collection (EEPROM) check sum calculation/calculation start When there is a data in the ROM collection area of EEPROM: * Example of display 09 Cors-288b When there is no data, "NON" appears on the display. The ROM collection (EEPROM) is utilized to cope with the data area for backup and microprocessor bugs partially. The backup memory for the sound field or the like will be retained semi-permanently even when the plug is disconnected. No data is written in the parts mounted on the product as single units. |
| 10 COR-Clear | ROM collection (EEPROM) data clear / clear start * Display is provided only when there is data in the ROM collection area of EEPROM 1st time: Data clear confirmation (Clear-ON displayed) 2nd time: Data clear execution (Clear: OK! displayed) After "Clear-ON?" is displayed, do not use INPUT key for execution (because the program contents will be erased). Using VOLUME + (UP) key and VOLUME - (DOWN) key, select another test program. * The IC for ROM collection has a role to help the microprocessor be upgraded. If the written data is cleared, the old version will be restored. |